This Teddy Bear Steals Your Ubuntu Secrets

Ubuntu just came out with the new long-term support version of their desktop Linux operating system. It’s got a few newish features, including incorporating the “snap” package management format. One of the claims about “snaps” is that they’re more secure — being installed read-only and essentially self-contained makes them harder to hack across applications. In principle.

[mjg59] took issue with their claims of increased cross-application security. And rather than just moan, he patched together an exploit that’s disguised as a lovable teddy bear. The central flaw is something like twenty years old now; X11 has no sense of permissions and any X11 application can listen in on the keyboard and mouse at any time, regardless of which application the user thinks they’re providing input to. This makes writing keylogging and command-insertion trojans effortless, which is just what [mjg59] did. You can download a harmless version of the demo at [mjg59]’s GitHub.

This flaw in X11 is well-known. In some sense, there’s nothing new here. It’s only in light of Ubuntu’s claim of cross-application security that it’s interesting to bring this up again.

xeyes

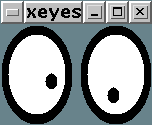
And the teddy bear in question? Xteddy dates back from when it was cool to display a static image in a window on a workstation computer. It’s like a warmer, cuddlier version of Xeyes. Except it just sits there. Or, in [mjg59]’s version, it records your keystrokes and uploads your passwords to shady underground characters or TLAs.

We discussed Snappy Core for IoT devices previously, and we think it’s a step in the right direction towards building a system where all the moving parts are only loosely connected to each other, which makes upgrading part of your system possible without upgrading (or downgrading) the whole thing. It probably does enhance security when coupled with a newer display manager like Mir or Wayland. But as [mjg59] pointed out, “snaps” alone don’t patch up X11’s security holes.

Nixie Timer Is Easy To Read Across The Kitchen

Nixie clocks. Nixie power meters. Nixie thermometers, speedometers, and even Nixies for personal adornment. Is there anything that hasn’t been Nixie-fied? How about a Nixie kitchen timer? Beyond the Nixie tube, this is a great build. Check out the video below the break.

As so often happens with Nixie aficionados, [Kouichi Kuroi] started with tubes and searched for a project to use them on. A wonky kitchen timer provided the thinly veiled excuse for the build – after all, anyone can drop a couple of yen on a commercial replacement, right? The timer features four IN-12 tubes and a large numeric keypad up front on a laser-cut acrylic case. For those who quibble with the keypad’s aesthetics and the wisdom of a Nixie project in the kitchen environment, [Ko] points out that an IP65 keypad would have more than doubled the price of the build, and a little common sense goes a long way to keeping the high-voltage side from meeting anything wet. In addition to countdown capability, the timer can also act as a stopwatch and display the time of day, and the Nixie tubes provide great visibility compared to seven-segment LCD timers.

As for the aforementioned Nixie projects, here’s a clock, power meter, thermometer, speedometer and necklace that we’ve featured before. What’s next for Nixies? We don’t know, but we’re keen to see what you come up with.

Continue reading “Nixie Timer Is Easy To Read Across The Kitchen”

The Long And Bumpy Road To Internet In Serbia

Internet is taken for granted. These days you assume there is Internet and only wonder if there is free WiFi to get onto it. But in the early days, connecting to a network could be tough and this was particularly true in Serbia. The country’s Internet revolution was complicated by both technology and politics, but the vibrance of the tech community always found a way.

The story is a fascinating one shared by Dejan Ristanovic at the Hackaday | Belgrade conference. He is now the Editor-in-Chief of PC Press computer magazine and played an integral part in providing global email access to Serbia. Enjoy the video of his talk below and join me after the break for a few highlights.

Continue reading “The Long And Bumpy Road To Internet In Serbia”

Hackaday Dictionary: USB Type C

USB cables? What a pain. You can never find the right type of connector when you need one, or you can’t figure out which way is up when you plug the cable in. These problems could be a thing of the past, though, with the latest version of the venerable USB connection: USB Type C. This new standard uses a single style of plug for both ends, so you can use cables either way around. The plugs also work both ways up, so you can plug it in with your eyes closed. Let’s take a look at what the USB type C connector means.

Continue reading “Hackaday Dictionary: USB Type C”

OneSolver Does What Wolfram Can’t

Wolfram Alpha has been “helping” students get through higher math and science classes for years. It can do almost everything from solving Laplace transforms to various differential equations. It’s a little lacking when it comes to solving circuits, though, which is where [Grant] steps in. He’s come up with a tool called OneSolver which can help anyone work out a number of electrical circuits (and a few common physics problems, too).

[Grant] has been slowly building an online database of circuit designs that has gotten up to around a hundred unique solvers. The interesting thing is that the site implements a unique algorithm where all input fields of a circuits design can also become output fields. This is unique to most other online calculators because it lets you do things that circuit simulators and commercial math packages can’t. The framework defines one system of equations, and will solve all possible combinations, and lets one quickly home in on a desired design solution.

If you’re a student or someone who constantly builds regulators or other tiny circuits (probably most of us) then give this tool a shot. [Grant] is still adding to it, so it will only get better over time. This may be the first time we’ve seen something like this here, too, but there have been other more specific pieces of software to help out with your circuit design.

Embed With Elliot: Keeping It Integral

If there’s one thing that a lot of small microcontrollers hate (and that includes the AVR-based Arduini), it’s floating-point numbers. And if there’s another thing they hate it’s division. For instance, dividing 72.3 by 12.9 on an Arduino UNO takes around 32 microseconds and 500 bytes, while dividing 72 by 13 takes 14 microseconds and 86 bytes. Multiplying 72 by 12 takes a bit under 2.2 microseconds. So roughly speaking, dividing floats is twice as slow as dividing (16-bit) integers, and dividing at all is five to seven times slower than multiplying.

There’s a whole lot of the time that you just don’t care about speed. For instance, if you’re doing a calculation that only runs infrequently, it doesn’t matter if you’re using floats or slow division routines. But if you ever find yourself in a tight loop that’s using floating-point math and/or doing division, and you need to get a bit more speed, I’ve got some tips for you.

Some of these tips (in particular the integer division tricks at the end) are arcane wizardry — only to be used when the situation really calls for it. But if you’re doing the same calculations repeatedly, you can often gain a lot just by giving the microcontroller numbers in the format it natively understands. Have a little sympathy for the poor little silicon beasties trapped inside!

Continue reading “Embed With Elliot: Keeping It Integral”

Modifying A Raspberry Pi 2 To Fit In Small Places

Still can’t get your hands on a Pi Zero? We know. Why not de-solder a few headers from a Raspberry Pi 2 to fit in your next project instead? Using a pair of 2.5″ HDD enclosures, [nodenet] made a mini linux laptop using the Raspberry Pi 2 — It even has a touch screen, and features a 1000mAh battery!

All in all it cost him about $120 for all the components, but before you JrECiM0rush out to make your own, you will need pretty good skills with a soldering iron to successfully downsize your Raspberry Pi 2. The modifications require removing both USB ports, the Ethernet plug, the GPIO pins, the HDMI port, the A/V jack and the camera connectors.

He used a combination of a mini hacksaw, and a soldering iron to remove all the components — what you’re left with his a business card sized computer — but the real fun part is re-attaching all the components with leads.

Continue reading “Modifying A Raspberry Pi 2 To Fit In Small Places”