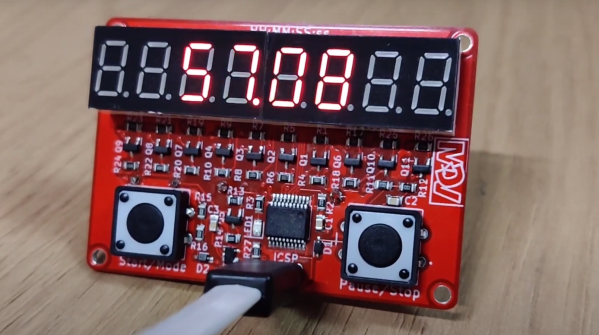
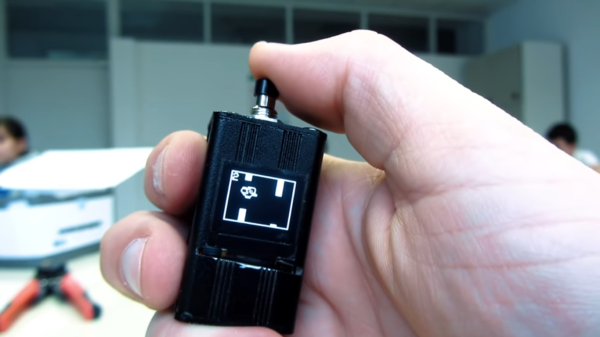
Simple Stopwatch with two buttons, an eight digit 7-segment display and ICSP programming cable going into the board

Add An OSHW Certified Stopwatch To Your Toolkit

[MakingDevices] has created a simple stopwatch that makes for a nice introduction to surface mount electronic design and assembly. The project is open source hardware (OSHW) certified, with Gerbers, KiCAD files, and software all available.

Conceptually the stopwatch is straight forward, with a row of two four digit seven-segment displays being driven by a PIC18LF14k50 microcontroller through multiple NPN transistors. The PIC doesn’t quite have enough data lines to drive the two displays at once so an inverter is used to toggle between the two seven-segment blocks.

The circuit is continuously powered from a CR2032 coin cell battery. For normal usage with display, [MakingDevices] estimates 30+ hours of operation and 140+ hours without display, but still counting time. When idle, the “Extreme Low-Power (XLP)” capabilities of the PIC put the operating window estimates well beyond the self discharge of the coin cell battery. There’s an in circuit serial programming (ICSP) footprint that accepts a pogo pin TC2030-MCP-NL adapter for flashing the PIC.

Don’t let the simplicity fool you, this is a well documented project with detailed posts about the design, simulation and battery consumption. Various videos and glamour shots give a whole picture of the process, from design, assembly, testing to final validation.

It’d be wonderful to see the project extended or hacked on further, perhaps with a cute enclosure or case.

Continue reading “Add An OSHW Certified Stopwatch To Your Toolkit”

Rŏ̽ta: Counting, With Style

Rǒta counts things. That’s it, really — what a cheap little mechanical counter does with a thumb press, or what you can do by counting on your fingers and toes, that’s pretty much all that Rǒta does. But it does it with style.

OK, that’s being a bit unfair to [Kevin Santo Cappuccio] — Rǒta has a few more tricks up its sleeve than simple counting. But really, those functions are just icing on the cake of how this little gadget looks. Rǒta was built around the unbeatable combination of a rotary telephone dial mechanism and a trio of Nixie tubes. The dial looks like it might have come from an old pay phone, all shiny and chrome and super robust looking. The Nixies sit atop the dial on a custom PCB, and everything, including the high-voltage supply for the tubes, is enclosed in a 3D printed case with a little bit of a Fallout vibe.

But what does this thing do? Actually, quite a lot. It’ll count up and down, using whatever number you dial into it. You can either increment from zero, or enter any three-digit number as the starting count. It keeps track of the score of your golf game, if that’s your thing, and it’s also got a stopwatch function. You can even dial up a display of the current battery voltage. It takes some ingenuity to use just the dial for all these functions, but that’s as easy as dialing the operator used to be — dialing 0 puts it in menu mode, allowing you to access any of the functions printed on the card in the center of the dial. It’s pretty clever — check out the video below.

Is it particularly useful? Perhaps not. But when has that ever been a measure of the worth of a project? Something like this rotary cellphone might be more useful, but sometimes looking great is good enough.

Continue reading “Rŏ̽ta: Counting, With Style”

Pocket Computer Reminds Us Of PDAs

Before smartphones exploded on the scene in the late 00s, there was still a reasonable demand for pocket-sized computers that could do relatively simple computing tasks. Palm Pilots and other PDAs (Personal Digital Assistants) were all the rage in the ’90s and early ’00s, although for cutting-edge tech from that era plenty of these devices had astronomical price tags. This Arduino-based PDA hearkens back to that era, albeit with a much more accessible parts list.

The build is based around an Arudino Nano with an OLED screen and has the five necessary functions for a PDA: calculator, stopwatch, games, phonebook, and a calendar. With all of these components on such a small microcontroller, memory quickly became an issue when using the default libraries. [Danko] uses his own custom libraries in order to make the best use of memory which are all available on the project’s GitHub page. The build also includes a custom PCB to keep the entire pocket computer pocket-sized.

There are some other features packed into this tiny build as well, like the breakout game that can be played with a potentiometer. It’s an impressive build that makes as much use of the microcontroller’s capabilities as is possible, and if you enjoy projects where a microcontroller is used as if it is a PC take a look at this Arduino build with its own command-line interface.

Continue reading “Pocket Computer Reminds Us Of PDAs”

Many Uses For A Single Button

When building projects with a simple goal in mind, it’s not unheard of for us to add more and more switches, buttons, and complexity as the project goes through its initial prototyping stages. Feature creep like this tends to result in a tangled mess rather than a usable project. With enough focus, though, it’s possible to recognize when it’s happening and keep to the original plans. On the other hand, this single-button project with more than one use seems to be the opposite of feature creep. (YouTube, embedded below.)

[Danko]’s project has one goal: be as useful as possible while only using a single button and a tiny screen. Right now the small handheld device can be used as a stopwatch, a counter, and can even play a rudimentary version of flappy bird. It uses an Arduino Pro Mini, a 64×48 OLED screen running on I2C, and has a miniscule 100 mAh 3.7V battery to power everything. The video is worth watching if you’ve never worked with this small of a screen before, too.

Getting three functions out of a device with only one button is a pretty impressive feat, and if you can think of any other ways of getting more usefulness out of something like this be sure to leave it in the comments below. [Danko] is no stranger to simple projects with tiny screens, either. We recently featured his homebrew Arduino calculator that uses an even smaller screen.

Continue reading “Many Uses For A Single Button”

Nixie Timer Is Easy To Read Across The Kitchen

Nixie clocks. Nixie power meters. Nixie thermometers, speedometers, and even Nixies for personal adornment. Is there anything that hasn’t been Nixie-fied? How about a Nixie kitchen timer? Beyond the Nixie tube, this is a great build. Check out the video below the break.

As so often happens with Nixie aficionados, [Kouichi Kuroi] started with tubes and searched for a project to use them on. A wonky kitchen timer provided the thinly veiled excuse for the build – after all, anyone can drop a couple of yen on a commercial replacement, right? The timer features four IN-12 tubes and a large numeric keypad up front on a laser-cut acrylic case. For those who quibble with the keypad’s aesthetics and the wisdom of a Nixie project in the kitchen environment, [Ko] points out that an IP65 keypad would have more than doubled the price of the build, and a little common sense goes a long way to keeping the high-voltage side from meeting anything wet. In addition to countdown capability, the timer can also act as a stopwatch and display the time of day, and the Nixie tubes provide great visibility compared to seven-segment LCD timers.

As for the aforementioned Nixie projects, here’s a clock, power meter, thermometer, speedometer and necklace that we’ve featured before. What’s next for Nixies? We don’t know, but we’re keen to see what you come up with.

Continue reading “Nixie Timer Is Easy To Read Across The Kitchen”