MRRF 17: E3D Introduces Combination Extruder And Hotend

Since the beginning of time, or 2006, the ‘hot glue gun’ part of our CNC hot glue guns have had well-defined parts. The extruder is the bit that pushes plastic through a tube, and the hot end is where all the melty bits are. These are separate devices, even though a shorter path from the extruder to hotend is always better. From Wade’s gear extruder to a nozzle made from an acorn nut, having the hotend and extruder as separate devices has become the standard.

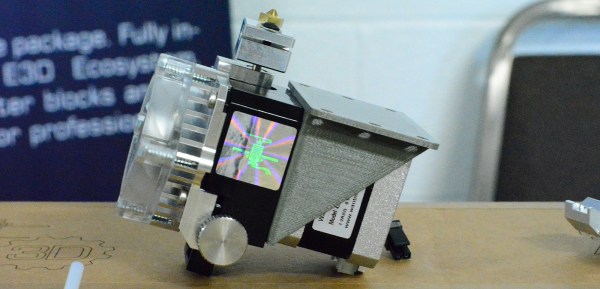
This week at the Midwest RepRap Festival, E3D unveiled the Titan Aero. It’s an extruder and hotend rolled into one that provides better control over the filament, gives every printer more build height, and reduces the mass of a 3D printer toolhead.


The aluminum thermal block of the Titan Aero

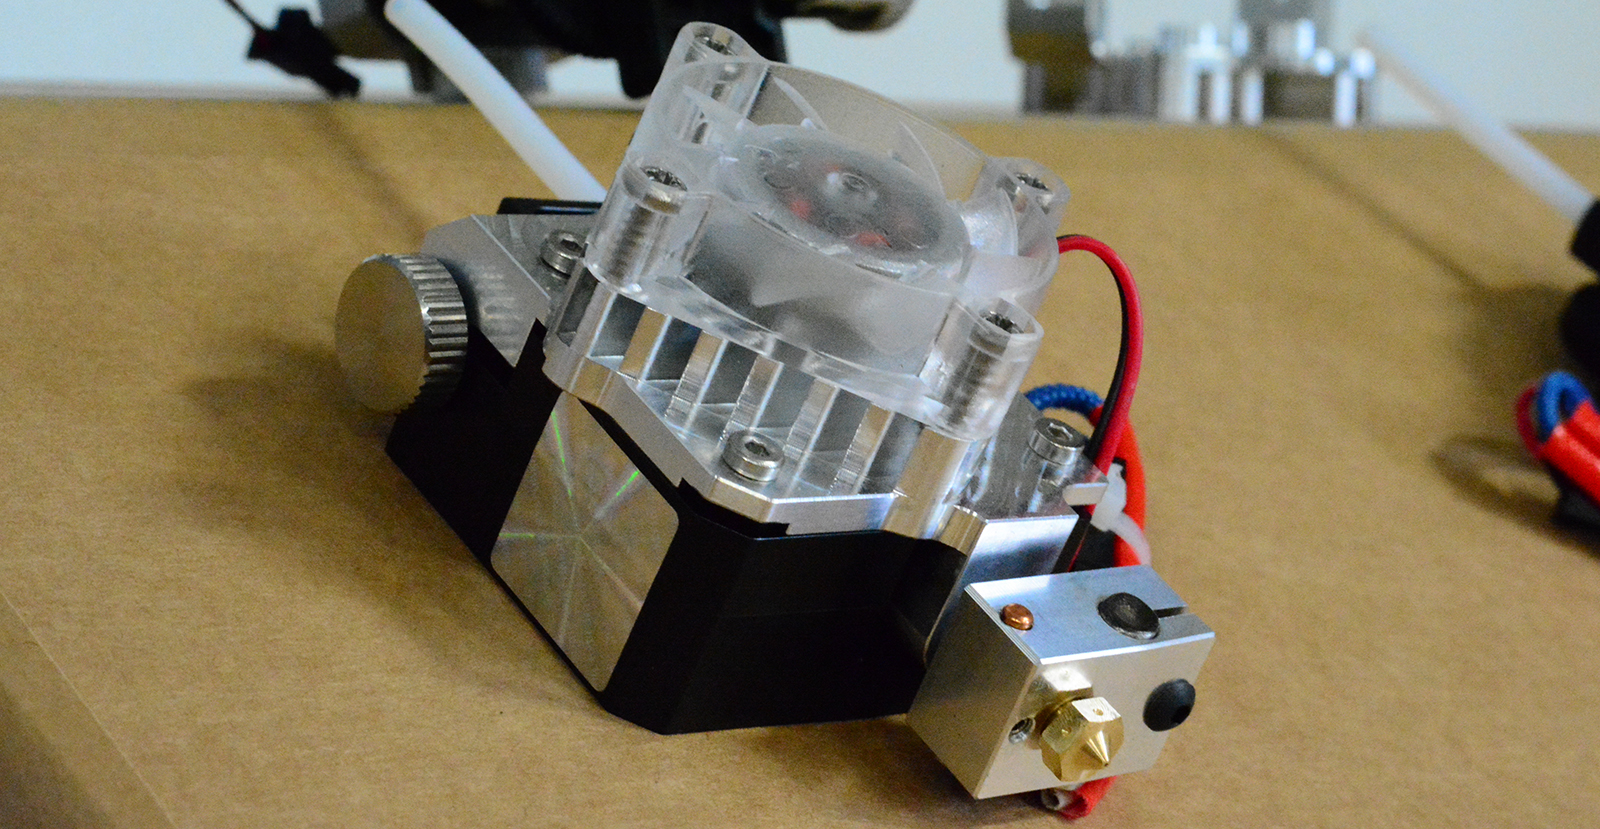
The Titan Aero, revealed on the E3D blog yesterday, is the next iteration of E3D’s entry into the extruder market. It’s a strange mashup of their very popular V6 hotend, with the heat break coupled tightly to the extruder body. A large fan provides the cooling, and E3D’s thermal simulations show this setup will work well.

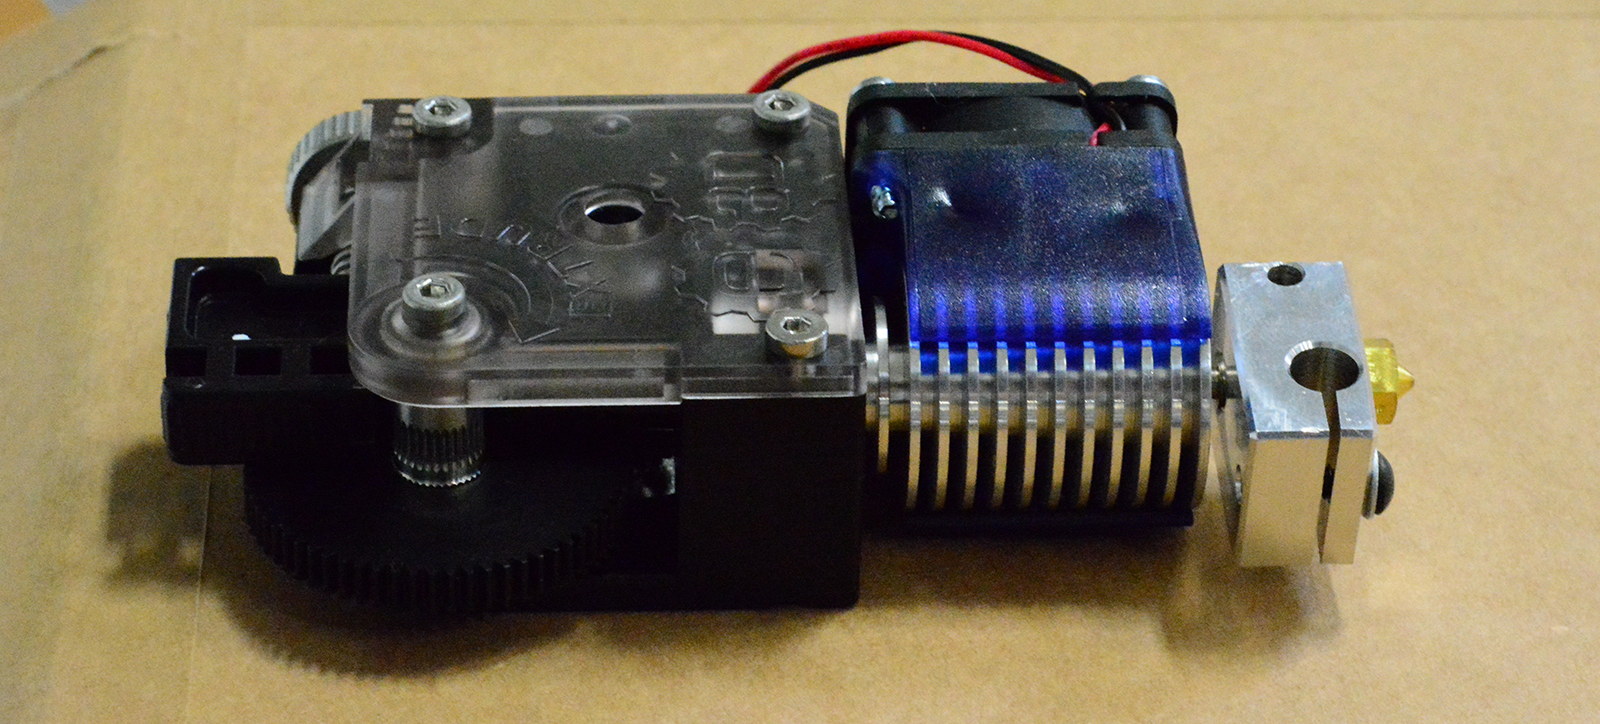
The core component of the Aero extruder is a fancy and complex piece of milled aluminum. This is the heatsink for the extruder and provides the shortest path possible between the hobbed gear and the nozzle. This gives the Aero better control over the extrusion of molten plastic and makes this the perfect extruder and hotend setup for hard to print materials.

Combine the Aero with a smaller ‘pancake’ stepper motor, and you have a very small, very light hotend and extruder. This makes it perfect for the small printers we’re so fond of and for printers built for fast acceleration. I can easily see a few end effectors for Delta-style printers built around this extruder in the near future.

E3D’s Volcano nozzle sock

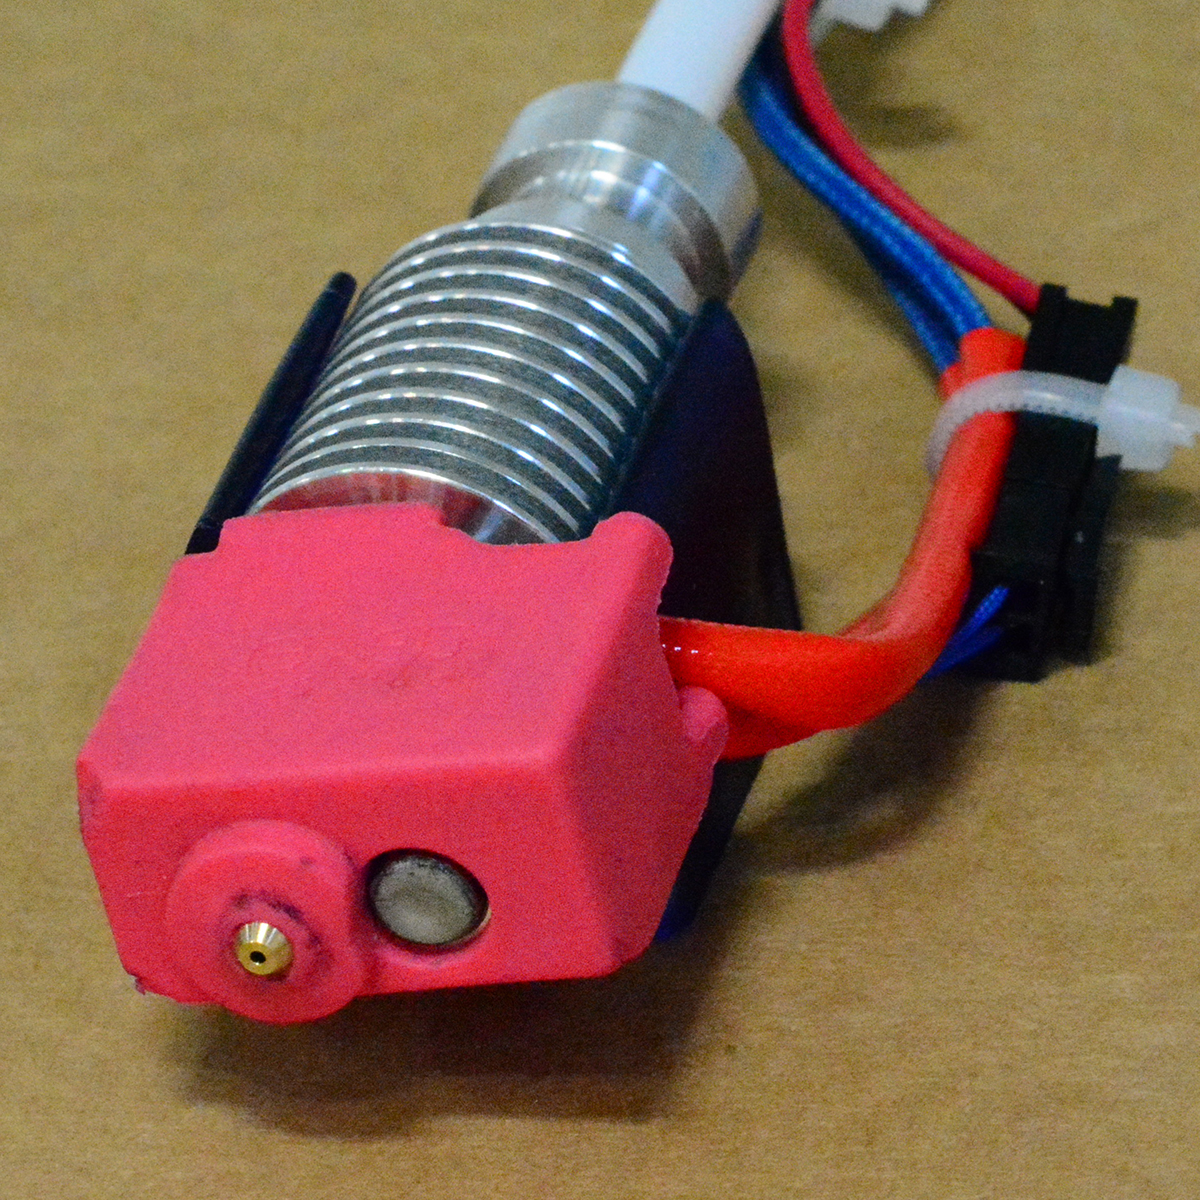
Also at the E3D booth were a few prototypes of nozzle socks. Late last year, E3D released silicone nozzle covers – we’re calling them nozzle socks – for their V6 hotend. These are small silicone covers designed to keep that carbonized crap off of your fancy, shiny hotend. It’s not something that’s necessary for a good print, but it does keep filament from sticking to your hotend, and you get the beautiful semantic satiation of saying the words nozzle socks.

E3D’s other hotend, the Volcano, a massive and powerful hotend designed to push a lot of plastic out fast, did not get its own nozzle sock at the time. Now, the prototypes are out, and the E3D guys expect them to be released, ‘in about a month’.

A Red Teamer’s Guide To Pivoting

What is hacking and what is network engineering? We’re not sure where exactly to draw the lines, but [Artem]’s writeup of pivoting is distinctly written from the (paid) hacker’s perspective.

Once you’re inside a network, the question is what to do next. “Pivoting” is how you get from where you are currently to where you want to be, or even just find out what’s available. And that means using all of the networking tricks available. These aren’t just useful for breaking into other people’s networks, though. We’ve used half of these tools at one time or another just running things at home. The other half? Getting to know them would make a rainy-day project.

Is there anything that ssh and socat can’t do? Maybe not, but there are other tools (3proxy and Rpivot) that will let you do it easier. You know how clients behind a NAT firewall can reach out, but can’t be reached from outside? ssh -D will forward a port to the inside of the network. Need to get data out? There’s the old standby iodine to route arbitrary data over DNS queries, but [Artem] says dnscat2 works without root permissions. (And this code does the same on an ESP8266.)

Once you’ve set up proxies inside, the tremendously useful proxychains will let you tunnel whatever you’d like across them. Python’s pty shell makes things easier to use, and tsh will get you a small shell on the inside, complete with file-transfer capabilities.

Again, this writeup is geared toward the pen-testing professional, but you might find any one of these tools useful in your own home network. We used to stream MP3s from home to work with some (ab)use of netcat and ssh. We keep our home IoT devices inside our own network, and launching reverse-proxies lets us check up on things from far away without permanently leaving the doors open. One hacker’s encrypted tunnel is another man’s VPN. Once you know the tools, you’ll find plenty of uses for them. What’s your favorite?

Thanks [nootrope] for the indirect tip!

MRRF 17: Lulzbot And IC3D Release Line Of Open Source Filament

Today at the Midwest RepRap Festival, Lulzbot and IC3D announced the creation of an Open Source filament.

While the RepRap project is the best example we have for what can be done with Open Source hardware, the stuff that makes 3D printers work – filament, motors, and to some extent the electronics – are tied up in trade secrets and proprietary processes. As you would expect from most industrial processes, there is an art and a science to making filament and now these secrets will be revealed.

IC3D Printers is a manufacturer of filament based in Ohio. This weekend at MRRF, [Michael Cao], founder and CEO of IC3D Printers announced they would be releasing all the information, data, suppliers, and techniques that go into producing their rolls of filament.

According to [Michael Cao], there won’t be much change for anyone who is already using IC3D filament – the materials and techniques used to produce this filament will remain the same. In the coming months, all of this data will be published and IC3D is working on an Open Source Hardware Certification for their filament.

This partnership between IC3D and Lulzbot is due in no small part to Lulzbot’s dedication to Open Source Hardware. This dedication is almost excessive, but until now there has been no option for Open Source filament. Now it exists, and the value of Open Source hardware is again apparent.

MRRF 17: The Infinite Build Volume Printer

Before we dig into this one, a bit of a history lesson is in order. In 2010, MakerBot released the Automated Build Platform for the MakerBot Cupcake. This build platform was like nothing seen before or since. It’s a combination build platform and a conveyor belt for a 3D printer, allowing the Cupcake to become a completely automated production machine. Start a print, let the machine run, and when the print is finished it’s rolled off the bed into a bin, allowing a second print to start. If you’re using 3D printers for production in a manufacturing context – like Makerbot was – this is a phenomenal invention.

The Automated Build Platform was released under an Open Source license, then quickly patented by Makerbot. Since 2010, the idea of an automated build platform has been dead. No one is working on a similar device, lest they draw the ire of a few MakerBot lawyers.

This year’s Midwest RepRap Festival saw a device that’s an even better idea than MakerBot’s Automated Build platform. Yes, it’s a continuous factory of 3D printed parts, but there’s an even better reason for you to build one of these things: this printer has an infinite build volume.

This printer – it doesn’t have a name; this is just a one-off project – is the work of [Bill Steele] of Polar3D. The core of the build is just a hacked up MakerBot Replicator, but with one important difference. This printer has an Automated Build Platform tilted away from the nozzle at a 45-degree angle. What’s the benefit of this setup? Continuous printing and an infinite build volume.

Despite being downright bizarre, the mechanics for this printer are actually pretty simple. The bed is a standard MakerBot heated bed, rotated 90 degrees in the axis you would expect, then rotated 45 degrees in the axis you wouldn’t. A conveyor belt made of Kapton-coated paper is strung between two rollers and connected to a motor.

To produce a print, this printer starts at the very back and the very top of this conveyor belt. The first layer is added, the conveyor belt rolls forward a bit, and the second layer is added on top. The effect for each print is that the layer lines are 45 degrees from what you would expect.

When the print is finished, the belt just rolls forward until the part falls into a bin. Of course, since there’s nothing stopping this printer from producing a meter-long part on this build platform. [Bill] has already produced a 3D printed chain using this printer that was four feet long. Each segment of the chain just fell off the end of the printer when it was done.

There’s still some work to do with this idea. There isn’t a way to tension the belt on this printer, and [Bill] is looking for a material that’s better than Kapton coated paper. Still, this is the most innovative printer you can find at the Midwest RepRap Festival, and it’s not encumbered by the MakerBot patent on the automated build platform. You can check out a video of this printer below.

Continue reading “MRRF 17: The Infinite Build Volume Printer”

CP/M 8266

Hands up if you’ve ever used a machine running CP/M. That’s likely these days to only produce an answer from owners of retrocomputers. What was once one of the premier microcomputer operating systems is now an esoteric OS, a piece of abandonware released as open source by the successor company of its developer.

In the 1970s you’d have seen CP/M on a high-end office wordprocessor, and in the 1980s some of the better-specified home computers could run it. And now? Aside from those retrocomputers, how about running CP/M on an ESP8266? From multi-thousand-dollar business system to two-dollar module in four decades, that’s technological progress.

[Matseng] has CP/M 2.2 running in a Z80 emulator on an ESP8266. It gives CP/M 64K of RAM, a generous collection of fifteen 250K floppy drives, and a serial port for communication. Unfortunately it doesn’t have space for the ESP’s party piece: wireless networking, but he’s working on that one too. If you don’t mind only 36K of RAM and one less floppy, that is. All the code can be found on a GitHub repository, so if you fancy a 1970s business desktop computer the size of a postage stamp, you can have a go too.

There’s something gloriously barmy about running a 1970s OS on a two-dollar microcontroller, but if you have to ask why then maybe you just don’t understand. You don’t have to have an ESP8266 though, if you want you can run a bare-metal CP/M on a Raspberry Pi.

Bad Thermal Design And Burning Down The House

Control boards for 3D printers are a dime a dozen on the usual online marketplaces, and you usually get what you pay for. These boards can burn down your house thanks to a few terrible design choices. [Scott Rider] aka [Crow] took a look at the popular Melzi board, and what he found was horrifying. These boards overheat right at the connector for the heated bed, but the good news is these problems are easily fixed.

The Melzi board has a few problems with its PCB design. The first and most glaring issue is the use of thermals on the pads for the heated bed connector. In low-power applications, thermals — the method of not connecting the entire top or bottom layer to a hole or pad — are a great idea. It makes it easier to solder, because heat isn’t transmitted as easily to the entire copper layer. Unfortunately, this means heat isn’t transmitted as easily to the entire copper layer. In high-power applications, like a connection to a heated bed, these thermals can heat up enough to melt a plastic connector. Once that happens, it’s game over.

Other problems were found in the Melzi board, although you wouldn’t know it just by looking at the Eagle file of the PCB. [Scott]’s Chinesium Melzi board used 1-ounce copper, where 2-ounce copper would be more appropriate. The connector, too, should be rated above the design power loading.

[Scott] made a few tweaks to the board and also added a tiny DS1822Z temperature sensor to the high-current area of his version of a Melzi. Imagine that, 3D printer electronics with a temperature sensor. Slowly but surely, the state of 3D printer electronics is clawing its way to the present.

MIDI Drawings Paint With Piano Keyboards

Musician [Mari Lesteberg] is making music that paints pictures. Or maybe she’s making pictures that paint music. It’s complicated. Check out the video (embedded below) and you’ll see what we mean. The result is half Chinese scroll painting, and half musical score, and they go great together.

Lots of MIDI recorders/players use the piano roll as a model for input — time scrolls off to the side, and a few illuminated pixels represent a note played. She’s using the pixels to paint pictures as well: waves on a cartoon river make an up-and-down arpeggio. That’s a (musical) hack. And she’s not the only person making MIDI drawings. You’ll find a lot more on reddit.

Of course, one could do the same thing with silent pixels — just set a note to play with a volume of zero — but that’s cheating and no fun at all. As far as we can tell, you can hear every note that’s part of the scrolling image. The same can not be said for music of the black MIDI variety, which aims to pack as many notes into a short period of time as possible. To our ears, it’s not as beautiful, but there’s no accounting for taste.

It’s amazing what variations we’re seeing in the last few years on the ancient piano roll technology. Of course, since piano rolls are essentially punch-cards for musical instruments, we shouldn’t be too surprised that this is all possible. Indeed, we’re a little bit surprised that new artistic possibilities are still around. Has anyone seen punch-card drawings that are executable code? Or physical piano rolls with playable images embedded in them?

Continue reading “MIDI Drawings Paint With Piano Keyboards”