Hacking Touch Screens To Count Pulses

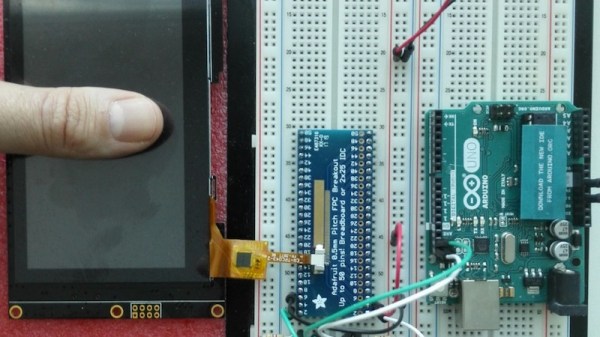
Heart rate sensors available for DIY use employ photoplethysmography which illuminates the skin and measures changes in light absorption. These sensors are cheap, however, the circuitry required to interface them to other devices is not. [Petteri Hyvärinen] is successfully investigating the use of capacitive touchscreens for heart rate sensing among other applications.

The capacitive sensor layer on modern-day devices has a grid of elements to detect touch. Typically there is an interfacing IC that translates the detected touches into filtered digital numbers that can be used by higher level applications. [optisimon] first figured out a way to obtain the raw data from a touch screen. [Petteri Hyvärinen] takes the next step by using a Python script to detect time variations in the data obtained. The refresh rate of the FT5x06 interface is adequate and the data is sent via an Arduino in 35-second chunks to the PC over a UART. The variations in the signal are very small, however, by averaging and then using the autocorrelation function, the signal was positively identified as a pulse.

A number of applications could benefit from this technique if the result can be replicated on other devices. Older devices could possibly be recycled to become low-cost medical equipment at a fraction of the cost. There is also the IoT side of things where the heart-rate response to media such as news, social media and videos could be used to classify content.

Check out our take on the original hack for capacitive touch imaging as well as using a piezoelectric sensor for the same application.

Hackaday Prize Entry: Watching Out For Forest Fires

Hackaday Prize entrant [Danie Copnradie] lives in South Africa where wildfires are a major problem. Every year, humans and animals are killed, crops are destroyed, and property is lost. The FireBreakNet project aims to deploy wireless environmental sensors that alert farmers, park rangers, and emergency personnel when fires break out.

According to [Danie], firefighting services are underfunded in South Africa, with farmers and their employees having to do a lot of the work involved in firefighting with their own equipment. Having access to a network of early warning sensors would allow for faster response times, saving money and lives.

The goals of the project include a low price, easy deployment, low power consumption, physical ruggedness, and scalability. Currently, [Danie] is testing Adafruit Feather as well as Texas Instruments LaunchPad for the brains of each node, taking readings from CO2 and temperature sensors, optical air quality sensors as well as optical flame sensors.

Making A Small-Scale Brewery With A Raspberry Pi And Python

No doubt many Hackaday readers will have tried their hand at home brewing. It’s easy enough, you can start with a can of hopped malt extract and a bag of sugar in a large bucket in your kitchen and achieve a decent enough result. Of course, once you get the taste it’s a field of infinite possibilities, so many enthusiasts go further into the realm of beer making with specialty ingredients and carefully controlled mash tuns.

Such an inductee into the brewery arts is [Christopher Aedo], who has documented his automated brewing system driven by a Raspberry Pi running CraftBeerPi. And it’s an impressive setup, with boil kettle, mash tun, and heat exchanger, a 5KW heating element, and all associated valves, pipes, pumps, and sensors. This ensures consistency and fine control over temperature over the long-term at all stages of the brew, something that would be very difficult to achieve manually at this scale.

The whole brewery is mounted on a cart for portability and has been used for a lot of brew cycles of many different styles. We can’t help a touch of envy at the array of beer taps in his kitchen.

Over the years we’ve brought you a few brewing projects. Another Pi-based setup graced these pages in 2012, as did a brewery using a Lego Mindstorms controller. Top marks go though to the brewer who fought his beer belly through brewing machinery powered by an exercise bike.

Via Recantha.

ISM Communications For Arduino

If you want to wirelessly communicate between devices, WiFi and Bluetooth are obvious choices. But there’s also the ISM (industrial, scientific, and medical) band that you use. There are inexpensive modules like the SX1278 that can handle this for you using LoRa modulation, but they haven’t been handy to use with an Arduino. [Jan] noticed the same thing and set out to build a shield that allowed an Arduino to communicate using LoRa. You can find the design data on GitHub. [Jan] calls it the LoRenz shield.

According to [Jan], the boards cost about $20 to $30 each to make, and most of that cost was in having PC boards shipped. LoRa lets you trade data rate for bandwidth, but typical data rates are fairly modest. As for range, that depends on a lot of factors, too, but we’ve seen ranges quoted in terms of miles.

Depending on where you live, there may be legal restrictions on how you use a radio like the SX1278. You should understand your local laws before you buy into using the ISM bands. We aren’t sure it would be wise, but the board can coexist with three other similar shields. So you could get 4 radios going on one Arduino if you had too and could manage the power, RF, and other issues involved. The breakout board the module uses has an antenna connector, so depending on your local laws, you could get a good bit of range out of one of these.

[Jan] promises a post on the library that makes it all work shortly, but you can find the code on GitHub now. If you look at the code in the examples directory, it seems pretty easy. You’d have to sling some software, but the SX1278 can support other modes in addition to LoRA including FSK and other data modulation techniques.

We’ve seen other LoRa shields, but not many. If you are interested in other wireless technologies, we’ve talked about them quite a bit. If you want a basic introduction to LoRa, [Andreas Spiess’] video below is a good place to start.

Continue reading “ISM Communications For Arduino”

A Poor-Man’s Laser CNC Engraver

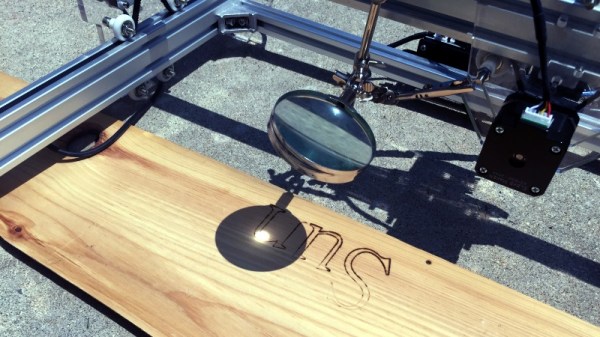
What do you get when you mix the disappointment that sometimes accompanies cheap Chinese electronics with the childhood fascination of torturing insects with a magnifying glass on a sunny day? You get a solar-powered CNC etcher, that’s what.

We all remember the days of focussing the sun on a hapless insect, or perhaps less sadistically on a green plastic army man or just a hunk of dry wood. The wonder that accompanied that intense white spot instantly charring the wood and releasing wisps of smoke stayed with you forever, as seemingly did the green spots in your vision. [drum303] remembered those days and used them to assuage his buyer’s remorse when the laser module on his brand new CNC engraver crapped out after the first 10 minutes. A cheap magnifying glass mounted to the laser holder and a sunny day, and he don’t need no stinkin’ lasers! The speed needs to be set to a super slow — 100mm per minute — and there’s the problem of tracking the sun, but the results are far finer than any of our childhood solar-artistic attempts ever were.

Do we have the makings of a possible performance art piece here? A large outdoor gantry with a big Fresnel lens that could etch a design onto a large piece of plywood would be a pretty boss beachside attraction. Of course, you’d need a simple solar tracker to keep things in focus.

Continue reading “A Poor-Man’s Laser CNC Engraver”

Firework Shows, The Vintage Atari Way

In the summer of 1987, the Atari magazine ST-Log caried a piece entitled “Atari Sets Off Fireworks!”, a profile of the use of Atari computers in professional firework displays by Astro Pyrotechnics, a now-defunct California company. Antic podcast host [Kevin Savetz] tracked down the fireworks expert interviewed in 1987, [Robert Veline], and secured not only an interview, but a priceless trove of photographs and software. These he has put online, allowing us a fascinating glimpse into the formative years of computerized pyrotechnics.

The system uses not one, but two Ataris. An ST has all the display data and scheduling set up in the Zoomracks card file software, this is then exported to an 800XL which does the work of running the display. We’re told the code for the 800XL is loaded on a ROM cartridge for reliability. The 800XL is mounted in an aluminium briefcase with a small CRT monitor and battery, and a custom interface board stuffed with TO220 power transistors to fire the pyrotechnics themselves.

It’s unlikely that you’ll be breaking out a vintage Atari yourselves to fun a firework show three decades later, but the opportunity to examine in detail a real-world contemporary commercial use of a now-vintage computer doesn’t come along too often. You can read the original article on the Internet Archive, and listen to the [Veline] interview on the podcast episode.

This is the first Atari firework controller we’ve brought you, but we’ve shown you plenty of others like this beautifuly-executed Arduino build. And if you wonder how to trigger the fireworks themselves, how about destroying a resistor?

Building A Better Baby Bottle Boiler

[Sebastian Foerster] hasn’t been at his blog in a while. He and his wife just had twins, so he’s been busy standing waiting for formula or milk to warm up. Being a technical kind of guy, he took a look at the tools currently on the market to do this, analyzed them, and decided instead to do it himself.

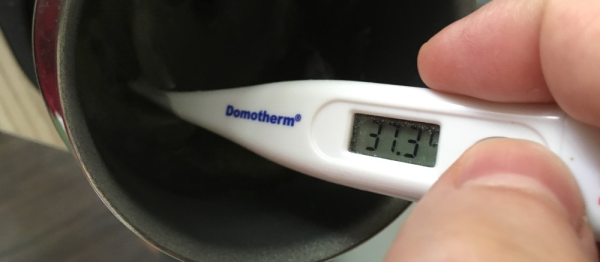
[Sebastian] looked to his Nespresso Aeroccino – a milk frother designed to give you hot or cold frothy milk for the top of whatever beverage you decide to put it on top of. It made the milk a bit too hot, 60°C, but once it got to the temperature, it would shut off, so if [Sebastian] could get it to shut off at a lower temperature, he had found the solution!

After taking the Aeroccino apart and going over the circuit, it seemed like a simple design relying on a resistor and NTC (negative temperature coefficient) thermistor connected to an ATTiny44 microcontroller. [Sebastian] didn’t want to have to reprogram the ATTiny, so he looked at the resistor and NTC. The resistor and thermistor create a voltage divider and that voltage is read in by the microcontroller through an analog pin. After looking up some info on the thermistor and replacing the resistor with a potentiometer, [Sebastian] could adjust the shut-off temperature while measuring with a thermometer. When he got the temperature he liked, he reads the value of the potentiometer and then replaces it with a couple of resistors in series.

Now [Sebastian] gets the babies’ bottles ready from fridge to temperature in about 25 seconds. He doesn’t have to worry about keeping an eye on the bottles as they heat up. We’re sure that getting two bottles ready in under a minute is much better on the nerves of new parents than waiting around for ten minutes. For more fun with thermistors, check out our article on resistors controlled by the environment or check out this bluetooth bbq thermometer!