A Custom Built FPV Monitor To Keep The Fans Happy

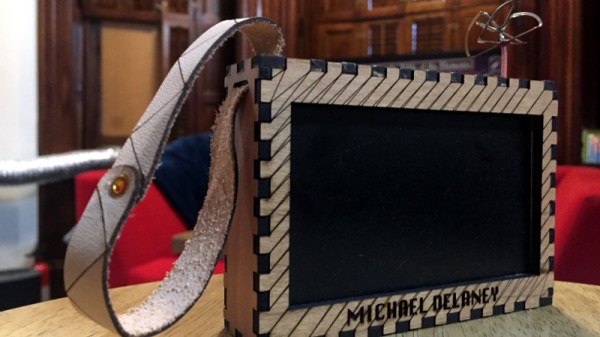
If you’re going to be flying around a FPV-capable aircraft, be it a quadcopter or a fixed-wing plane, you shouldn’t be surprised if bystanders want to take a turn wearing your googles. Of course we hope that you’re good enough flying line of sight that you don’t need to be wearing the googles to stay airborne, but it does make it harder to pull off the sort of tricks and maneuvers that your audience wants to see. So if you want to put on a good show, the audience really needs their own display.

Unfortunately, as avid FPV flier [Michael Delaney] discovered, even the “cheap” ones will run you at least $100 USD. So he did what any self-respecting hacker would do, he set out to build his own. Using a collection of off the shelf components he was able to build a very impressive monitor that lets the viewer see through the eyes of his quadcopter at less than half the cost of commercially available offerings. Though even if he hadn’t manged to beat the cost of a turn-key monitor, we think it would have been more than worth it for this piece of highly customized gear.

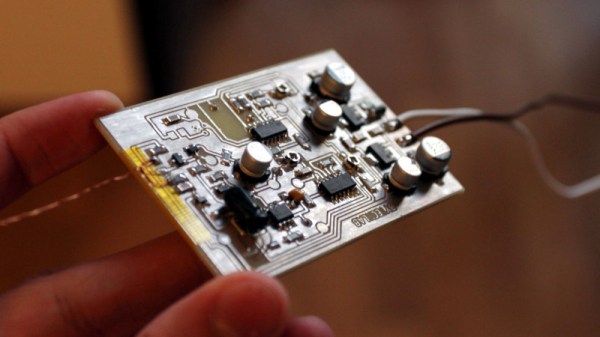
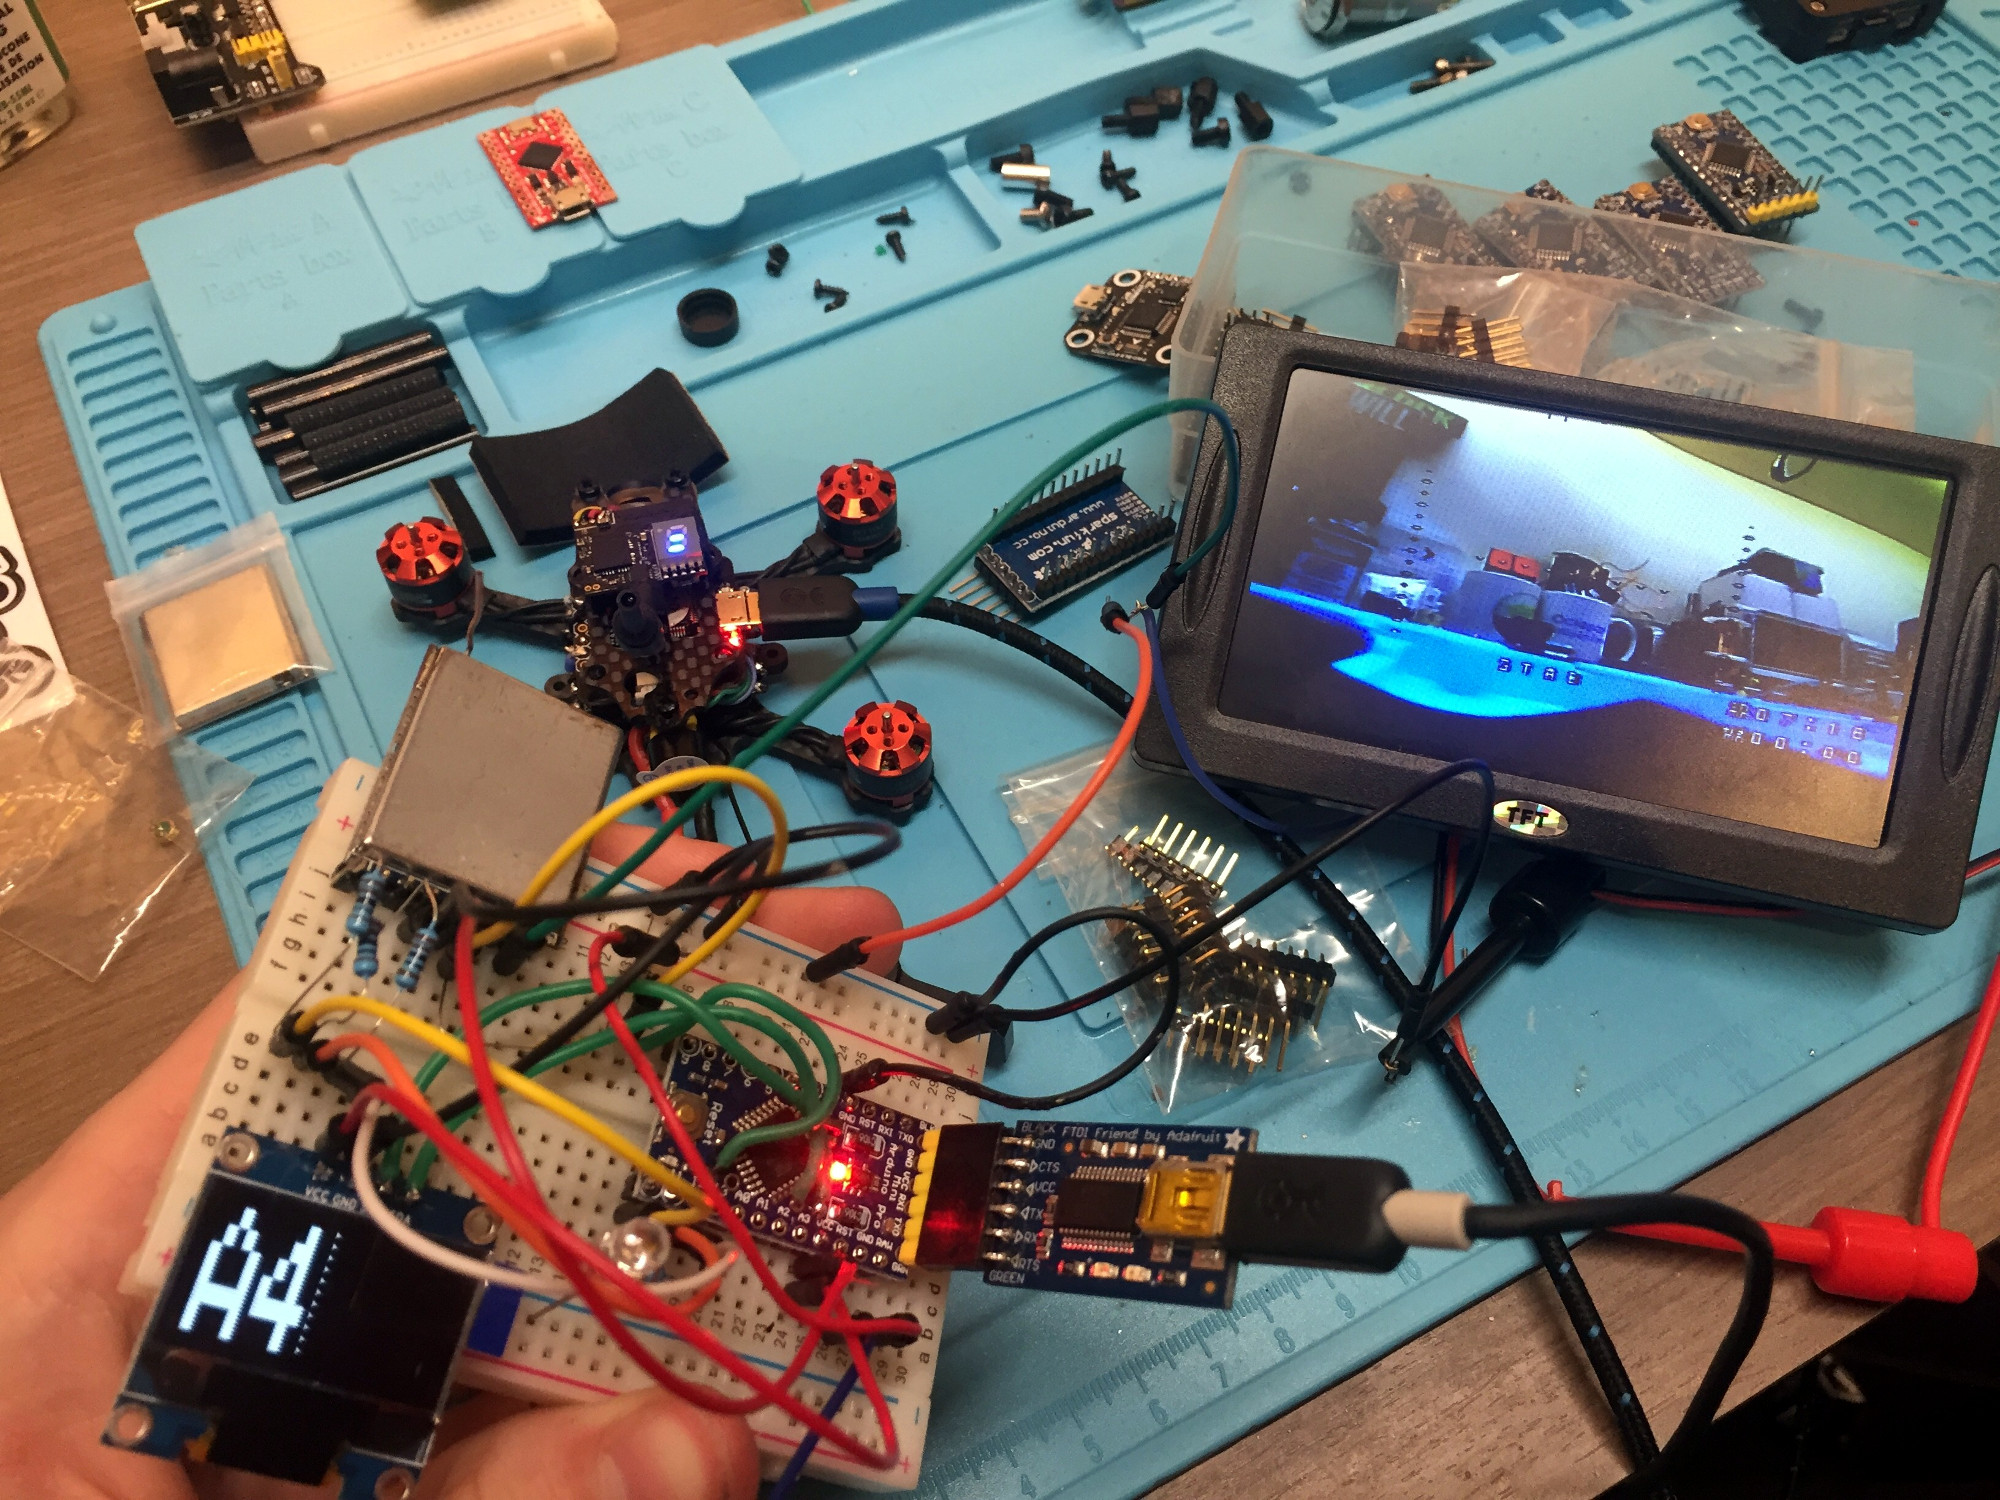
At the heart of the monitor is a Boscam RX5808 5.8 GHz receiver, which is controlled by an Arduino Pro Mini. The video output from the receiver is sent to a 4.2″ TFT screen intended for the Raspberry Pi, and on the backside of the laser-cut wooden enclosure there’s a 128 x 64 I2C OLED to display the currently selected channel and diagnostic information.

An especially nice touch for this project is the custom PCB used to tie all the components together. [Michael] could have taken the easy route and sent the design out for fabrication, but instead went with the traditional method of etching his own board in acid. Though he did modernize the process a bit by using a laser and pre-sensitized copper clad board, a method that seems to be gaining in popularity as laser engravers become a more common component of the hacker’s arsenal.

We’ve previously covered using the RX5808 and Arduino combo to create a spectrum analyzer, in case you want to do more than just watch your friends do powerloops.

Intro To Docker: Why And How To Use Containers On Any System

If you have your ear even slightly to the ground of the software community, you’ll have heard of Docker. Having recently enjoyed a tremendous rise in popularity, it continues to attract users at a rapid pace, including many global firms whose infrastructure depends on it. Part of Docker’s rise to fame can be attributed to its users becoming instant fans with evangelical tendencies.

But what’s behind the popularity, and how does it work? Let’s go through a conceptual introduction and then explore Docker with a bit of hands-on playing around.

Continue reading “Intro To Docker: Why And How To Use Containers On Any System”

LED “Candle” Gets The 555 Treatment

Regular readers may recall we recently covered a neat Arduino trick that allowed you to “blow out” an LED as if it was a candle. The idea was that the LED itself could be used as a rudimentary temperature sensor, and the Arduino code would turn the LED on and off when a change was detected in its forward voltage drop. You need to oversample the Arduino’s ADC to detect the few millivolt change reliably, but overall it’s pretty simple once you understand the principle.

But [Andrzej Laczewski], like many of our beloved readers, feels the Arduino and other microcontrollers can be a crutch if used exclusively. So he set out to replicate this hack with that most cherished of ICs, the 555 timer. In the video after the break, he demonstrates his “old-school” LED candle for anyone who thinks the only way to control an LED is with digitalWrite.

Not to say it’s easy to replicate the original Arduino project with a 555, or that it’s even practical. [Andrzej] simply wanted to show it was possible, which is something we always respect around these parts. He goes into great detail on how he developed and tested the circuit, even including oscilloscope screenshots showing how the different components work together in real-time. But the short version is that a MOSFET is used to turn the LED on and off, a comparator detects change in the LED’s voltage drop, and the 555 is used to control how long the LED stays off for.

Ever the traditionalist, [Andrzej] wrapped up this build by etching his own PCB using a variation of the classic laser toner transfer method. If this all looks a bit too much like Black Magic to you, there’s no shame in sticking with the Arduino version. At 1/20th of the parts count, and with no calibration required, who’s to say which version is “simpler”.

Continue reading “LED “Candle” Gets The 555 Treatment”

Monitoring blinking LED for home power usage

Monitoring Power By Counting Blinks

What do you do when you want to add a new feature to some electronics but you can’t or don’t want to tear into the guts? You look for something external with which you can interface. We like these hacks because they take some thinking outside the box, literally and figuratively, and often involve an Aha! moment.

[Simon Aubury’s] big household load was electric heating and his ancient heaters didn’t provide any way to monitor their usage. His power meters weren’t smart meters and he didn’t want to open them up. But the power meters did have an external LED which blinked each time 1 Wh was consumed. Aha! He could monitor the blinks.

Home power usage graph
Maximum is white, average is orange, and minimum is blue.

Doing so was simple enough. Just point photoresistors at the two meter’s LEDs and connect them and capacitors to a Raspberry Pi’s GPIO pins. Every time a pulse is detected, his Python code increments the LED’s counter and every fifteen minutes he writes the counters to an SQL database. Analysing his data he saw that nothing much happens before 5 AM and that the lowest daytime usage is around noon. The maximum recorded value was due to a heater accidentally being left on and the minimum is due to a mini holiday. Pretty good info given that all he had to go on was a blinking light.

Where else are there LED indicators which you can tap into? Here’s an only slightly more invasive usage where a washing machine’s “end of cycle” LED  was removed and the power going to it was rerouted to an Arduino for remote monitoring.