Ubuntu Update Hack Chat

Join us on Wednesday, July 22 at noon Pacific for the Ubuntu Update Hack Chat with Rhys Davies and Alan Pope!

Everyone has their favorite brands, covering everything from the clothes they wear to the cars they drive. We see brand loyalty informing all sorts of acquisition decisions, not only in regular consumer life but in technology, too. Brand decisions sort people into broad categories like Mac versus PC, or iPhone versus Android, and can result in spirited discussions of the relative merits of one choice over the others. It’s generally well-intentioned, even if it gets a bit personal sometimes.

Perhaps no choice is more personal in hacker circles than which Linux distribution to use. There are tons to choose from, each with their various features and particular pros and cons. Ubuntu has become a very popular choice for Linux aficionados, attracting more than a third of the market. Canonical is the company behind the Debian-based distro, providing editions that run on the desktop, on servers, and on a variety of IoT devices, as well as support and services for large-scale users.

To fill us in on what’s new in the world of Ubuntu, Canonical product manager Rhys Davies and developer advocate Alan Pope will stop by the Hack Chat this week. They’ll be ready to answer all your questions about the interesting stuff that’s going on with Ubuntu, including the recently announced Ubuntu Appliances, easy to install, low maintenance images for Raspberry Pis and PCs that are built for security and simplicity. We’ll also talk about snaps, desktops, and whatever else crops up.

join-hack-chatOur Hack Chats are live community events in the Hackaday.io Hack Chat group messaging. This week we’ll be sitting down on Wednesday, July 22 at 12:00 PM Pacific time. If time zones have you down, we have a handy time zone converter.

Click that speech bubble to the right, and you’ll be taken directly to the Hack Chat group on Hackaday.io. You don’t have to wait until Wednesday; join whenever you want and you can see what the community is talking about. Continue reading “Ubuntu Update Hack Chat”

Raspberry Pi Shuffler Is Computerized Card Shark

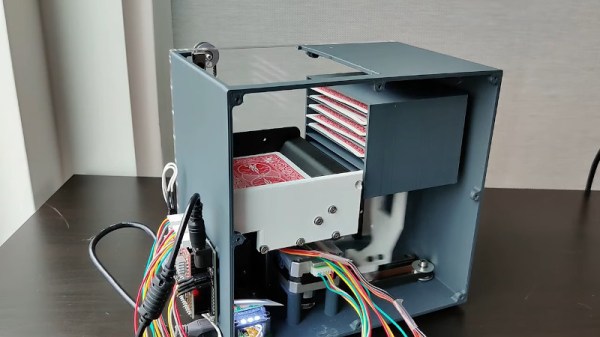
If you’re playing Texas Hold’em or other card games with a small group, you may get tired of shuffling over and over again. [3dprintedLife] was in just such a position, and realized there were no good automatic card shufflers in his budget. Instead, he elected to build one, and put in some extra functionality to corrupt the game to his whims.

The mechanicals of the machine took much development, as accurately handling and dispensing cards is a challenge, particularly with the loose tolerances of 3D printed parts. After developing a reliable transport mechanism, it was more than capable of shuffling a deck well with some basic commands.

However, the real magic comes from installing a camera and Raspberry Pi running OpenCV. This is capable of reading the value and suit of each card, and then stacking the deck in a particular order to suit the dealer’s wishes. It’s all controlled through a web interface and is capable of creating guaranteed wins in Blackjack and Texas Hold’em. Files are on Github for those eager to delve deeper into how the machine works.

The mechanism does such a beautiful job of shuffling, that your friends may not even notice the ruse. It goes to show that you should always have your wits about you when gambling with the aid of machines. Of course, if you wish only to create havoc, this Lego card machine gun may be more your speed. Video after the break.

[via Reddit]

Continue reading “Raspberry Pi Shuffler Is Computerized Card Shark”

Clacker Hacker: Hot Rod Switch Mods

Whether you’re a programmer, gamer, writer, or data entry specialist, the keyboard is an extension of your nervous system. It’s not so much a tool as it is a medium for flow — for being in the zone. So I think it’s only natural that you should care deeply about your keyboard — how it looks, how it sounds, and above all, how it feels to finger-punch those helmeted little switches all the live-long day. That’s my excuse, anyway.

It might surprise you that mechanical keyboard switches can be modified in a number of ways. Depending on what you want from your keyboarding experience, you can make switches feel lighter or less scratchy, quiet them down, or tighten up any wobble in the housing. Why would you want to do this? Because customization is fun. Because electromechanical things are awesome, and because it’s fun to take switches apart and put them back together again. Because it’s literally hacking and this is Hackaday.

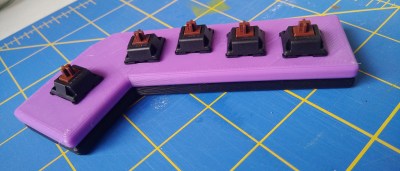
This is a pair of plates from a macro keeb I’m making that will sit directly in front of my trackball.

I got into switch modding because I wanted to put Cherry clears in my dactyl, but worried that they would take too much force to actuate and wear my fingers out. So I bought some really light (39g) springs and was really looking forward to swapping them into the clears, but they just don’t work. Like, physically. Slider goes down, slider gets stuck. It will come back up, but only if I hit it again and smear my finger to the side a bit at the same time. Those springs must be too weak to return clear sliders.

I took this as a sign that I should suck it up and use browns instead. After all, no one else has to know what my sliders look like. While I was opening switches, I tried out one of these super-light springs in a brown, thinking maybe they wouldn’t have to go to waste. Not only did the lighter spring work in the brown, it felt pretty nice. It’s hard to imagine how a whole keeb would feel based on a single switch, but if you can gather a handful and snap them into a plate to riffle your fingers over them, well, it’s probably close enough to a full keyboard to get a good feel for whatever mod you’re doing.

Continue reading “Clacker Hacker: Hot Rod Switch Mods”

Automated Part Removal Gets Serious With The Chain Production Add-on

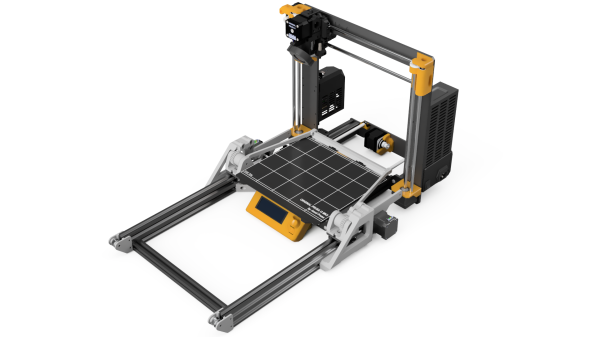
Giving a 3D printer the ability to remove its own prints means that it can crank out part after part automatically, without relying on a human operator between jobs. [Damien Weber] has done exactly that to his Prusa MK3/S printer, with what he calls the Chain Production Add-on.

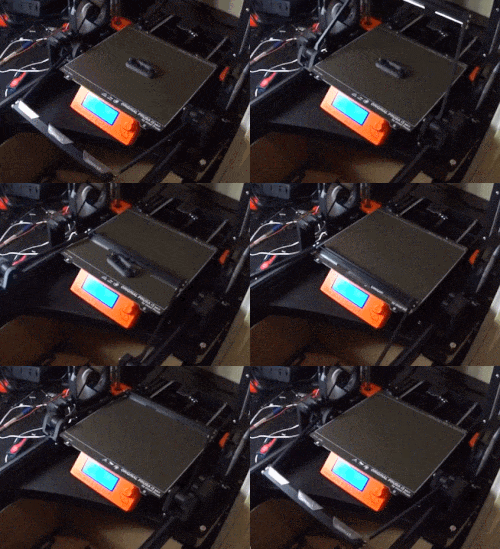
[Damien]’s approach is one we haven’t quite seen before. When printing is complete, a fan cools the part then an arm (with what looks like utility knife blades attached at an angle) swings up and behind the bed. The arm zips forward and scoops the print off the bed, dumping the finished part in the process. It’s all made from 3D printed parts, aluminum extrusion and hardware, two stepper motors, and a driver PCB. The GitHub repository linked above holds all the design files, but there is also a project page on PrusaPrinters.org.

Not quite sure how it all works? Watch it in action in the video embedded below.

Continue reading “Automated Part Removal Gets Serious With The Chain Production Add-on”

Grok The Z80 With This Simulator

Many of us will have at some point encountered a Z80 microprocessor, whether we’ve bare-metal programmed for it, or simply had a go at blasting some invaders on a game system using one. Like all the processors of its era, it’s got a relatively simple and accessible internal block diagram, so there’s a good chance that readers well even know how it works, too. But do any of know how it really works, down to the gate, transistor, and net level? [Goran] does, because he’s written a Z80 netlist simulator that allows the running of code alongside the examination of the chip and its signals. It’s not particularly fast, achieving a modest 2.3kHz clock speed when run of a fairly high-end PC, but we’re guessing readers needing to run Z80 code for anything other than learning would use the real thing anyway.

There’s a video of the software in operation which we’ve placed below the break, and we can see it will be a fascinating tool even to people who aren’t dedicated reverse engineers. To be able to bring up a logic analyzer view of the internals of a processor while it is in operation is truly astounding if you are used to it as a black box, and to have logic diagrams at your fingertips rather than puzzling out individual transistors really gives a window into what is going on.

This isn’t the only such simulator out there, in the past we’ve mentioned Visual6502, when we covered the Monster 6502.

Continue reading “Grok The Z80 With This Simulator”

3D Printer Revives Large Format Camera

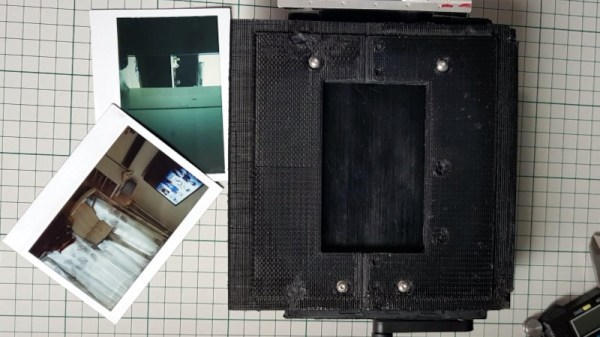
With a quarter-century of more of consumer digital cameras behind us, it’s easy to forget that there was once another way to see your photos without waiting for them to be developed. Polaroid Land cameras and their special film could give the impatient photographer a print in about a minute, but sadly outside a single specialist producer, it is no longer a product that is generally available.  [The Amateur Engineer] sought an alternative for a large format camera, by adapting a back designed for Fuji Instax film instead.

Lomography, the retailer of fun plastic cameras, had produced an Instax back for one of their cameras, and to adapt it for a Tachihara large format camera required a custom 3D-printed frame. Being quite a large item it had to be printed in three pieces and stuck together with epoxy. Then a series of light leaks had to be chased down and closed up. The result is a working Instax back for the camera, which appears to deliver the photographic goods.

We’ve seen a few digital backs for larger cameras produced with scanners, but we rather like this linear CCD one.

Digging Deep Into SD Card Secrets

To some, an SD card is simply an SD card, notable only for the amount of storage it provides as printed on the label. However, just like poets, SD cards contain multitudes. [Jason Gin] was interested as to what made SanDisk’s High Endurance line of microSDXC cards tick, so he set out to investigate.

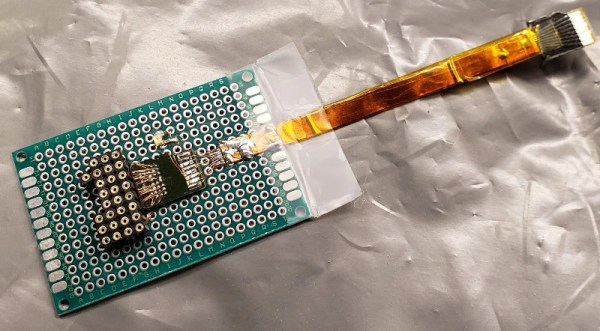
Naturally, customer service was of no help. Instead, [Jason] started by scraping away the epoxy covering which hides the card’s test points. Some delicate soldering was required to hook up the test points to a breakout board, while also connecting the SD interface to a computer to do its thing. A DS Logic Plus signal analyzer was used to pick apart the signals going to the chip to figure out what was going on inside.

After probing around, [Jason] was able to pull out the NAND Flash ID, which, when compared to a Toshiba datasheet, indicates the card uses BiCS3 3D TLC NAND Flash. 3D NAND Flash has several benefits over traditional planar Flash technology, and SanDisk might have saved [Jason] a lot of time investigating if they’d simply placed this in their promotional material.

We’ve seen other similar hacks before, like this data recovery performed via test points. If you’ve been working away on SD cards in your own workshop, be sure to let us know!