Naming Names

We have all heard that good variable names are important for creating readable programs — advice that will serve you well when you come back to your code two years later, or even twenty. Sometimes, when you are so deep in the zone and begin to question a variable name that you made three levels up the calling hierarchy, it can be helpful to take a step back and review your variable naming conventions. The wikipedia article on computer program naming conventions is a good starting point, where you can dig into the nitty gritty of Hungarian notation like bFlag, case separated names like camelCase, and so on. But sometimes you have to go meta, and need names to describe the names themselves.

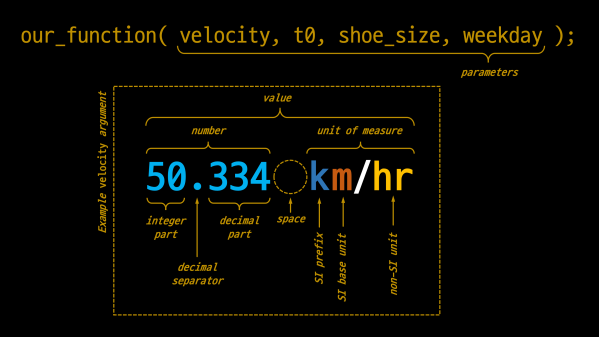
For example, in everyday usage the terms parameter and argument are often used interchangeably. But strictly speaking, a parameter is a placeholder, the variables in a function declaration for example (see image above). An argument is the actual value itself, say the number 50.334 in the example.

We recommend that units of measure should always be clearly specified in your comments, perhaps even in the variable names if you’re mixing different systems in the same program. At Hackaday we prefer to use SI units, check out NIST SP 330 if you’re interested. But invariably, there are going to be exceptions for years to come. We like to deal with those at the edges during I/O if possible, thus keeping a consistent set of units in the core of the program.

What about the terms number and value? We like to think of a number as being a kind of value. For example, a function’s return value could be a number, say a velocity. Or it could return an enumeration or a boolean. Sometimes the perfect meta-name for something will collide with a reserved keyword in your programming language, names like string or data for example. In these cases you have to be creative and find suitable synonyms, perhaps text and payload.

Using consistent and precise language can be tedious, but it can be just as helpful as good commenting and variable naming practices. Do you have any examples where precise terminology such as this has been been helpful or perhaps tripped you up? If so, share in the comments section below.



OpenSCAD Prints Woodworking Aid

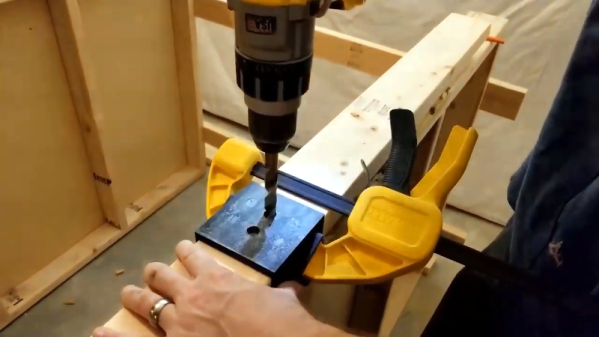
Home-based 3D printing is getting pretty unremarkable. Sure, printers aren’t as ubiquitous as, say, PCs. But you wouldn’t be any more surprised if your neighbor had a 3D printer than if you found out they had a drill press. In fact, sometimes the real value of 3D printing something isn’t to make a working part, but to make up something that helps you create other things using methods other than printing. That’s exactly what [iqless] does when he uses his printer to make some jigs to help him easily build shelves. (Video, embedded below.)

The issue is making dowel joints for the shelve’s feet. Sure, you could just drill a piece of scrap wood as a template, but with a 3D printer you can do better. Using OpenSCAD, it is possible to create a parameterized jig that fits exactly the job at hand.

Continue reading “OpenSCAD Prints Woodworking Aid”

Obstacle Climbing Rover Built With The Power Of Lego

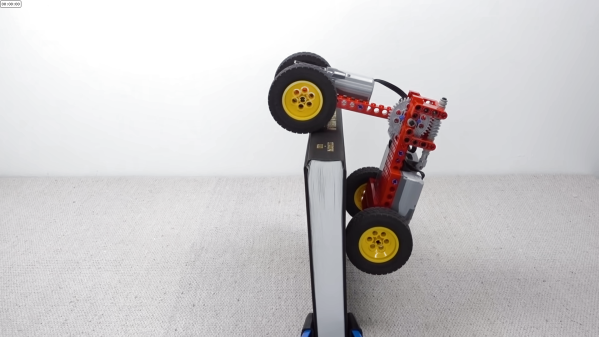
When we want to prototype a rover, we’ve developed a tendency to immediately reach for the 3D printer and Arduino or Raspberry Pi. It’s easy to forget the prototyping tool many of us grew up using: LEGO. The [Brick Experiment Channel] has not forgotten, and in the video after the break demonstrates how he used Lego Technic components to prototype an impressive little obstacle climbing robot.

The little Lego rover starts as a simple four-wheeled rover trying to climb on top of a book. Swap in a four-wheel-drive gearbox and grippy tires, and it clears the first obstacle. Add a few books to the stack causes the break-over angle to become an issue, so the rover gets an inverted-V chassis. As the obstacle height increases, batteries are moved around for better weight distribution, but the real improvement comes when an actuating middle joint is added, turning it into a wheeled inchworm. Clearing overhangs suspended beams, and gaps are all just a matter of finding the right technique.

Thanks to Lego’s modularity, all this is possible in an hour or two where a 3D printer and CAD might have stretched it into days. This robot does have the limitation of not being able to turn. Conventional car steering or Mecanum wheels are two options, but how would you do it?

The [Brick Experiment Channel] knows a thing or two about building Lego robots, even for stealing keys. Continue reading “Obstacle Climbing Rover Built With The Power Of Lego”

A Deep Dive Into The Chemistry Of Retrobright

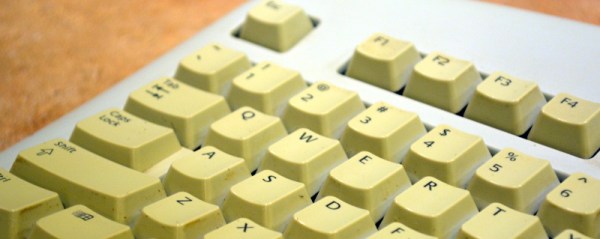
Considerable effort is often required to rejuvenate the yellowed and grungy plastic cases of retrocomputing gear. One generally does well to know their enemy in order to fight it, though, which is where this guide to the chemistry of plastic yellowing and whitening (PDF) comes in handy.

“The Retrobright Mystery” was written and sent in to us by [Caden Xu], a high school student who also goes by the alias [Saltypretzel]. The paper begins with an excellent description of the chemistry of plastic yellowing. We had always heard that the yellowing in ABS, or acrylonitrile-butadiene-styrene, the plastic most commonly used for cases back in the day, was primarily caused by brominated compounds added to the plastic as flame retardants. It turns out that’s only a minor contributor, with the bulk of yellowing occurring thanks to a complex chain of reactions starting with free radicals liberated from the butadiene copolymer through a reaction requiring oxygen and energy.

Reactive radicals from the decomposing synthetic rubber, added to ABS to increase its flexibility, unroll the benzene ring in styrene copolymers to form a conjugated compound called 2-hydroxymuconic acid. The alternating double and single bonds in this compound tend to absorb light towards the blue end of the spectrum strongly, so the accumulation of 2-HMA in the plastic over time thus makes it reflect more and more yellow and red wavelengths, giving aged ABS its unhealthy bronze glow.

Luckily, just as ketchup smears and grass stains, both rich in conjugated compounds like lycopene and chlorophyll, can be bleached out of existence, so too can yellowed plastics. [Caden] notes that Retrobright, which contains a powerful dose of hydrogen peroxide, does its whitening trick by breaking the UV-absorbing double bonds in 2-HMA. There’s little that can be done about the embrittlement of the ABS caused by the breakdown of butadiene copolymers, but at least it’ll look good.

We found this guide quite comprehensive and instructive, and it should only help retrocomputing fans in their restoration efforts. For those less interested in the chemistry, [Bob Baddeley] published an overview of the yellowing of plastic and manufacturing steps to avoid it, and we covered the more practical considerations of Retrobright treatment too.

New Parts, New Hacks

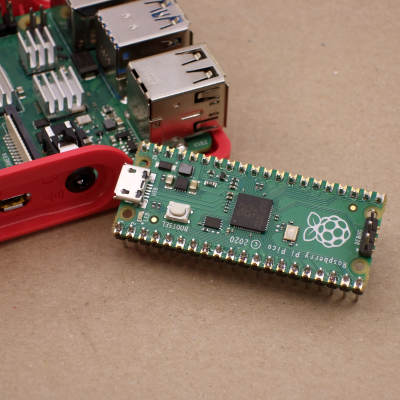
The biggest news this week is that Raspberry Pi is no longer synonymous with single-board Linux computers: they’re dipping their toes into the microcontroller business with their first chip: the RP2040, and the supporting breakout board, the Pico. It’s an affordable, capable microcontroller being made by a firm that’s never made microcontrollers before, so that’s newsy.

The Hackaday comments lit on fire about this chip, with some fraction of the commenters lamenting the lack of wireless radios onboard. It’s a glass-half-full thing, I guess, but the RP2040 isn’t an ESP32, folks. It’s something else. And it’s got a hardware trick up its sleeve that really tickles my fancy — the programmable input/output (PIO) units.

The other half of the commenters were, like me, salivating about getting to try out some of the new features. The PIO, of course, was high on that list, but this chip also caters to folks who are doing high-speed DSP, with fast multiplication routines burnt into ROM and a nice accumulator. (You know you’re a microcontroller nerd when you’re reading through a 663-page datasheet and thinking about all the funny ways you can use and/or abuse the hardware peripherals.)

All chip designs are compromises. Nothing can do everything. The new peripherals, novel combinations of old elements, and just pleasant design decisions, open up new opportunities if you’re willing to seek them out. When the ESP32 was new, I was looking at their oddball parallel-I2S hardware and thinking what kind of crazy hacks that would enable, and clever hackers have proven me right. I’d put my money on the PIO being similar.

New chips open up new possibilities for hacks. What are you going to do with them?

Low Cost Metal 3D Printing By Electrochemistry

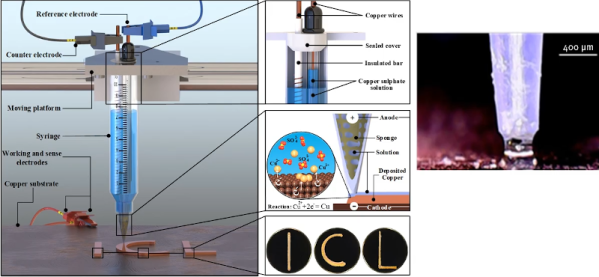
[Billy Wu] has been writing for a few years about electrochemical 3D printing systems that can handle metal. He’s recently produced a video that you can see below about the process. Usually, printing in metal means having a high-powered laser and great expense. [Wu’s] technique is an extension of electroplating.

Boiling down the gist of the process, the print head is a syringe full of electroplating solution. Instead of plating a large object, you essentially electroplate on tiny areas. The process is relatively slow and if you speed it up too much, the result will have undesirable properties. But there are some mind-bending options here. By using print heads with different electrolytes, you can print using different metals. For example, the video shows structures made of both copper and nickel. You can also reverse the current and remove metal instead of depositing it.

This looks like something you could pretty readily replicate in a garage. Electroplating is well-understood and the 3D motion parts could be a hacked 3D printer. Sure, the result is slow but, after all, slow is a relative term. You might not mind taking a few days to print a metal object compared to the cost and trouble of creating it in other ways. Of course, since this is copper, we also have visions of printing circuit board traces on a substrate. We imagine you’d have to coat the board with something to make it conductive and then remove that after all the copper was in place. When you build this, be sure to tell us about it.

We’ve seen electroplating pens before and that’s really similar to this idea. Of course, you can also make your 3D prints conductive and plate them which is probably faster but isn’t really fully metal.

Continue reading “Low Cost Metal 3D Printing By Electrochemistry”

Two-Key Keyboard Build Log Starts Small, But Thinks Big

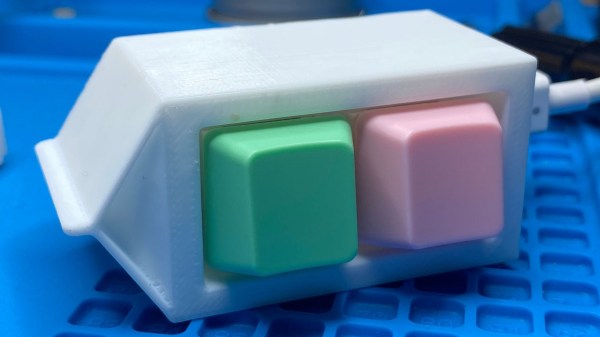
Interested in making a custom keyboard, but unsure where to start? Good news, because [Jared]’s build log for an adorable “2% Milk” two-key mini-keyboard covers everything you need to know about making a custom keyboard, including how to add optional RGB lighting. The only difference is that it gets done in a smaller and cheaper package than jumping directly in with a full-size DIY keyboard.

[Jared] is definitely no stranger to custom keyboard work, but when he saw parts for a two-key “2% Milk” keyboard for sale online, he simply couldn’t resist. Luckily for us, he took plenty of photos and his build log makes an excellent tutorial for anyone who wants to get into custom keyboards by starting small.

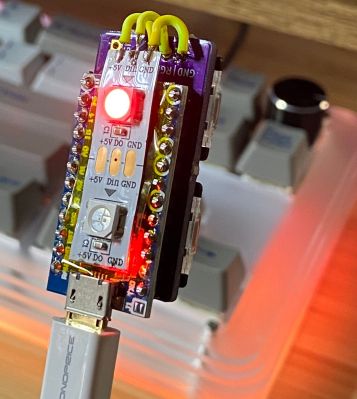
The hardware elements are clear by looking at photos, but what about the software? For that, [Jared] uses a Teensy  Pro Micro clone running QMK, an open source project for driving and configuring custom input devices. QMK drives tiny devices like the 2% Milk just as easily as it does larger ones, so following [Jared]’s build log therefore conveys exactly the same familiarity that would be needed to work on a bigger keyboard, which is part of what makes it such a great project to document.

Interested in going a little deeper down the custom keyboard rabbit hole? You can go entirely DIY, but there’s also no need to roll everything from scratch. It’s possible to buy most of the parts and treat the project like a kit, and Hackaday’s own [Kristina Panos] is here to tell you all about what that was like.