Why Do Brits Drink Warm Beer?

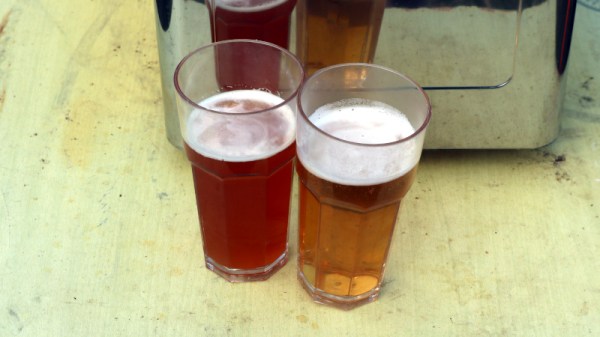
Traveling through mainland Europe on a British passport leads you to several predictable conversations. There’s Marmite of course, then all the fun of the Brexit fair, and finally on a more serious note, beer. You see, I didn’t know this, but after decades of quaffing fine ales, I’m told we do it wrong because we drink our beer warm. “Warm?”, I say, thinking of a cooling glass of my local Old Hooky which is anything but warm when served in an Oxfordshire village pub, to receive the reply that they drink their beers cold. A bit of international deciphering later it emerges that “warm” is what I’d refer to as “cold”, or in fact “room temperature”, while “cold” in their parlance means “refrigerated”, or as I’d say it: “Too cold to taste anything”. Mild humour aside there’s clearly something afoot, so it’s time to get to the bottom of all this. Continue reading “Why Do Brits Drink Warm Beer?”

Discreet CO2 Monitor Hides Elegant Internal Layout

Outwardly, this sleek CO2 monitor designed by [Daniel Gernert] might look like something cooked up in Amazon’s consumer electronics division. But open up that 3D printed case, and you’ll find a surprisingly low parts count that’s been cleverly packed in so as to make the most of the enclosure’s meager internal dimensions.

No wasted space here.

There are, if you can believe it, just three principle components to this device: a Seeed Studio Seeeduino XIAO microcontroller, a Infineon S2GO PAS CO2 sensor board, and a ring of WS2812B LEDs. You could even delete the ring altogether and replace it with a single addressable LED to accomplish the same goal, but we’d say the full ring is money-well-spent if you’re going to spin up your own copy.

Functionality is very straightforward — the LED ring will indicate the detected CO2 concentration by lighting up green and working its way through yellow and onto red. The sensor has no wireless capability, but if you plug it into your computer, you can get a local readout of current conditions.

We love environmental monitoring solutions here almost as much as we love intricately designed 3D printed enclosures. If you’d like to see another project where those two concepts aligned, check out this printable ESP8266 sensor enclosure.

Recreating DOOM On A Homebrew 8-Bit CPU

[James Sharman] has been working away on a 8-bit CPU of his own design. Naturally, with his computing device largely functional, the obvious question was asked: can it run DOOM? [James’] latest video explores this question, showing just how close he was able to get.

[James’] 8-bit pipelined CPU also has its own UART, VGA adapter, and sound adapter all built up on discrete components on various PCBs. There’s also a custom interface for a SNES controller as an input device. However, it’s fundamentally well below the specs that DOOM originally required at launch. His 8-bit CPU runs at just 4 MHz, with 64 KB of RAM. This compares poorly to the 32-bit, 33 MHz Intel 386 chips and 4 MB of RAM originally recommended to run the game.

In lieu of running the real thing, [James] demonstrated the limitations of his machine by coding his own demo, nicknamed Doomed. It’s able to average 19 fps video output at a resolution of 80×60, and consists of over 5,000 lines of hand-written assembly code. Fundamentally, it’s a basic 3D engine not dissimilar to Wolfenstein 3D, though without any actual gaming interactions involved.

[James] could have simply stated the machine won’t run DOOM. However, trying to get something similar up and running was a useful learning experience, and in his own words, highly satisfying. This attitude of pushing on in the face of adversity is what propels many other DOOM porting efforts.

Continue reading “Recreating DOOM On A Homebrew 8-Bit CPU”

(Re)designing The LumenPnP Tape Feeder

Many of the hardware orientated hackers among us will likely have been following along with the story of [Stephen Hawes] and the Lumen pick-and-place project but kind of waiting a bit for the project to mature some more before maybe taking the plunge and ordering a kit. One reason for this might be that whilst the basic machine design is there and working, the tape feeders did need a fair bit of work, and a lack of usable feeders does not make a great PnP machine. [Stephen] has been working on a newer design that addresses some of the identified shortcomings, and has started documenting his progress (video, embedded below) along the way.

Gone is the PCB-based ‘case’, reverting back to a 3D printable affair and a much smaller PCB. After flip-flopping a bit between different geared DC motors, [Stephen] settled back on the original, smaller unit, which after a wee spot of hacking, was convinced to accept an optical encoder stripped from another unit, and this proved that it was indeed more than up to the tape-advancement duty. The reason for this change was physical size — the original motor resulted in an assembly 38mm wide — this limited the number for feeders on the front rail to barely eleven units. This is not really enough, but with the narrower assembly, the width is reduced to 15.5mm allowing 27 feeders to snuggle together on the rail, and that should make the machine much more usable.

Continue reading “(Re)designing The LumenPnP Tape Feeder”

Getting To The TrackPoint Quicker

Love it or hate it, TrackPoint can be a powerful tool. Love it or hate it, the idea of moving the mouse without removing your hands from the keys has an appeal. [Alon Swartz] incorporated one into his custom wired split mechanical keyboard and wrote a helpful guide on how to do it yourself.

The first step was to determine the pinout of the Trackpoint, which he provides a handy repository of various devices with annotations and pictures. The next step is swapping the little rubber nub at the top for something a bit longer. As the PCB sits below the keys, a labret cheek piercing happens to be a perfect candidate. Strong, thin, easily obtainable in different lengths, and threaded on one end. With jewelry in hand, [Alon] created a reset circuit with just a few resistors and a capacitor so the teensy can trigger a reset of the Trackpoint. The keyboard’s TMK firmware also needed a few tweaks to support reading the Trackpoint.

It’s a great guide, and we love the use of the jewelry as a piece of the keyboard. A knitting needle was used in a previous attempt to add a Trackpoint to a mechanical keyboard, and we’re excited to see what other household items end up in keyboards.

Fytó Is Fido For Phytophiles

On the surface, most plants really aren’t all that exciting, save for maybe the Venus flytrap. Sure, you can watch them grow in the long run, but for the most part, they’re just kind of there, quietly bringing peace and cleaner air. Day by day, they hardly move at all, although if you’re one of those people who likes to get the Sim into the pool and take the ladder away, you could always play the drought game just to watch it droop and come back to life a half hour later.

Fytó the smart planter is a much more cool and far less cruel way of spicing up your plant life. The idea is to turn a plant into a pet by giving it an expressive face. Sure, plants have needs, but they communicate them more subtly than the average Earthing. By assigning animated emoji to various conditions, the plant becomes more familiar and in turn, feels more like a pet. Plus, the whole thing is just so darn cute.

Fytó runs on a Raspberry Pi 2W and has six emotions that are based on a capacitive soil moisture sensor, an LM35 temperature sensor, and an LDR module to detect light levels. If everything is copacetic, Fytó puts on a happy face, and will lick its lips after getting a drink of water. If the light is insufficient, Fytó looks sleepy; if the plant needs water, Fytó appears sweaty, red-faced, and parched. Don’t conflate this with the temperature-taking emoji, which indicates that Fytó is too hot. Finally, if the spot is too drafty and cold, Fytó looks like it’s nearly frozen. Be sure to check out the video after the break and watch Fytó work through their range of emotions.

Would you rather hear your plant complain in English? There’s a build for that.

Continue reading “Fytó Is Fido For Phytophiles”

DIY Gaming Mouse Beats The Competition, Costs Less

We’ve seen plenty of custom keyboards here on Hackaday. Seriously, like more than we can count. But custom mice? Those are far more elusive. Though we wouldn’t be surprised to see that change should this excellent example from [Tyler Richard] catch on.

How the mouse sees the date on a US quarter

The goal was to build a customizable mouse that could match the performance of Logitech’s MX Master 3, but without the $100 USD price tag. In the end, [Tyler] says his mouse is around 10x as responsive thanks to a 1,000 Hz refresh rate, and the total cost is just a fraction of the retail price of the Logitech. Though as you might expect, there’s a catch or two.

For one thing, he says getting your hands on the PixArt PMW3389 mouse sensor in single quantities can be difficult. It seems like he was able to secure a sample because he’s a student, but you’ll have to figure out your own way to con secure one from the company. There’s also no friendly GUI to configure the mouse, and indeed, you’ll need to write some code should you want to modify any of its buttons. Oh, and despite the fact that the cheapo donor mouse you need to use for parts is wireless, the replacement guts you’ll be fitting it with currently only support wired operation.

Alright, we’ll admit it’s not perfect. But it’s still a huge step in the right direction if you care about being able to spin up your own input devices. With some refinement, and perhaps somebody willing to do bulk buy of the sensors, we could see this project becoming quite popular. In the meantime, you may have to settle for a macro stool.