In an era where running a website without HTTPS is shunned, and everyone wants you to encrypt your DNS queries, you’d expect that the telecommunications back-ends are secured tightly as well. Especially the wireless bits between terra firma and geosynchronous communication satellites.
But as recently discovered by US researchers, the opposite is actually true. The paper by [Wenyi Morty Zhang] et al. (PDF) goes into great detail on how they discovered these unencrypted IP traffic flows and what they found in these captures.
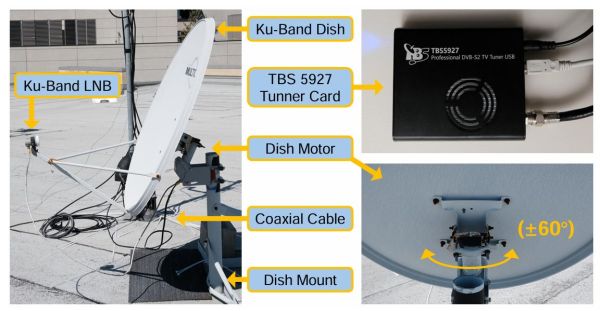
With an off-the-shelf consumer satellite dish mounted to the roof of a university building in San Diego, they performed a scan of IP traffic on 39 geosynchronous satellites. To their surprise, they found unencrypted data that belonged to companies like T-Mobile for their cellular backhaul, Internet traffic targeting airliners, and VoIP communication — all in the clear.
Even more worrying was what looked like military traffic and corporate VPN data containing unencrypted login details, corporate emails and much more. While T-Mobile immediately enabled encryption after this discovery, it remains to be seen whether anyone else will. It’s probably best to assume that any communication can be intercepted and to use e.g. PGP-encrypted emails for anything sensitive.
The researchers have made the IP encapsulation parser (in Python) for DVB-S2(X) captures available for anyone who wants to give this experiment a whirl themselves.