Hacklet 23 – The Groove Tube

The transistor may rule the electronics world today, but before solid state moved in, vacuum state was king. Tubes, or valves if you’re from Europe, were the only way to fly. Every good hacker knew their triodes from their tetrodes and their pentodes. While technology has moved on, some hackers keep the past alive with tube based projects. This week on the Hacklet, we’re featuring some of the best tube projects on Hackaday.io!

SAMSUNGWe start with [256byteram] and Tube Television Tennis. [256byteram] is building an entire Pong style game from tubes, including a CRT to display the game. Displaying anything on a standard television means generating lots of timing signals. [256byteram] is doing this by using multivibrators to create one-shots and flip-flop circuits. Tube Television Tennis is still a work in progress, but [256byteram] already can display a paddle and move it around the screen in both X and Y. This project has already blown our minds!

tamp1From [Marcel] comes this great Low Voltage All-Tube Amplifier, which we featured on the blog earlier this year. [Marcel] does tubes without the danger of high voltage by using the ECL82 tube at 40 volts. The ECL82 incorporates both a triode pentode in one package, making it something of an integrated circuit. Power is provided by transformer while a PY88 tube handles rectifier duties, making this truly an all tube amp. A few passive components complete the design. We can’t wait to fire one up and hear some class A goodness while basking in the warm glow only a tube can create.

obsoleteTimeNo tube article would be complete without some nixies, and [opeRaptor] is here to provide them with Obsolete Time, a nixie tube clock! Obsolete Time uses IN-12 Russian nixie tubes, and goes for a minimalist design. Under the hood it’s all modern tech though, including a Bluetooth radio which allows the clock to be set via an Android app.

hybridHeadphone2[Brandon Foltz] is also getting into a vacuum state of mind as he takes Adventures in Hybrid Headphone Amps. [Brandon] is mixing the best of the old and new worlds by using a 6247 tube as the input stage to an LM386 single chip amplifier. This hybrid is still a work in progress, as [Brandon] is trying to clean up the sound from his LM386.

Hackaday.io update!

private-messageDid you know that we’re constantly upgrading Hackaday.io? We listen to your input on the feedback project, and we’re always adding new features to the site. If you haven’t noticed, you can now send private messages to other users. We’re sure this will help put users in contact with each other, so they can collaborate on even more projects! On the left side of each profile page there is a “Send a private message” button below the hacker’s avatar. You now have better indicators when you have messages or updates too! The private messages and feed icons at the top right of every .io page now have indicators to show how many messages or feed entries you have waiting. These are all based on live data, so they’ll update as you browse the site.

That’s all the time we have for this week’s Hacklet! As always, see you next week. Same hack time, same hack channel, bringing you the best of Hackaday.io!

Push Button, Receive Bacon.

Members of the Rabbit Hole hackerspace spent the last weekend competing in The Deconstruction, a 48 hour hackathon competition. The hackerspace’s theme was “Light it up!”, so members created some awesome projects involving light. The star of the show was their bacon cooking machine. The Rabbit hole made the “Push Button. Receive Bacon” meme real.

A broken laser printer was gutted for its drive train and fuser assembly. Laser printer fusers are essentially hot rollers. The rollers melt toner and fuse it with paper as it passes through the printer. The heat in this case comes from a lamp inside the roller. That lamp also puts out plenty of light, which fit perfectly with the team’s theme.

The Rabbit Hole members wasn’t done though, they also built a pocket-sized infinity mirror from an empty Altoids tin. The bottom of the tin was cut out, and a mirror glued in. A filter from a broken projector made a perfect half silver mirror, and some LEDs completed the project.

The members also built a fandom art piece, consisting of 25 fans connected together in a skull shape. The eye and nose fans were lighted. When the fans were plugged in, they kicked for a few seconds before spinning up. Once they did spin though – there was a mighty wind in the Rabbit Hole.

Click past the break for The Rabbit Hole’s Deconstruction video!

Continue reading “Push Button, Receive Bacon.”

Extreme Repair Of An All-in-One PC

While browsing a local auction site, [Viktor] found himself bidding on a beat up Lenovo A600 all-in-one PC. He bid around $50 and won. Then came the hard part – actually making the thing work. The front glass was cracked, but the LCD was thankfully unharmed. The heat pipes looked like they had been attacked with monkey wrenches. The superIO chip’s pins were mangled, and worst of all, the MXM video card was dead.

The first order of business was to fix the superIO chip’s pins and a few nearby discrete components which had been knocked off their pads. Once that was done, [Viktor] was actually able to get the computer to boot into Linux from a USB flash drive. The next step was bringing up the display. [Viktor] only needed a coding station, so in addition to being dead, the video accelerator on the MXM wasn’t very useful to him. The Lenovo’s motherboard was designed to support video on an MXM card or internal video. Switching over meant changing some driver settings and moving a few components, including a rather large LVDS connector for the display itself. A difficult task, compounded by the fact that [Viktor’s] soldering tools were a pair of soldering guns that would be better suited to fixing the bodywork on a ’57 Chevy. He was able to fashion a hot wire setup of sorts, and moved the connector over. When he was done, only one tiny solder bridge remained!

The end result is a new coding battle station for [Viktor] and a computer which was a basket case is saved from the landfill. If you like this hack, check out [Viktor’s] low power PSU, or his 1 wire network!

Play Music On A High Voltage Keyboard

[Matt] works at a neon sign power supply company. When a vendor error left him with quite a few defective high voltage transformers, he couldn’t bring himself to toss them in the bin. [Matt] was able to fix the transformers well enough to work, and the idea for a high voltage keyboard began to brew. Unfortunately, the original transformers were not up to the task of creating a musical arc. At that point the project had taken on a life of its own. Matt grabbed some higher power transformers and started building.

The keyboard has 25  keys, each connected to an individual high voltage circuit with its own spark gap. The HV circuit is based upon a IR2153D self-oscillating half-bridge driver. (PDF link). The 2153D is modulated by a good old-fashioned 555 timer chip. No micros in this design, folks! The output of the IR2153D switches a pair of N-channel MOSFETS which drive the flyback transformers.

[Matt] created 25 copies of his circuit and built them up on individual PCBs. He assembled everything on a wooden board shaped roughly like a grand piano. The final project looks great – though [Matt] admittedly has no musical ability, so we can’t hear AC/DC flying out of those spark gaps just yet.

If you do want to hear sparks playing music, check out the OneTesla project we saw at MakerFaire NY 2013.

Continue reading “Play Music On A High Voltage Keyboard”

Bricked Raspberry Pi Displays History

[eN0Rm’s] Raspberry Pis are much more than just another brick in the wall. He’s used the popular embedded Linux platform to build several small rear projection screens in a brick wall (Imgur link). Brick shaped metal enclosures were mortared into the wall of the building. Each rear projection screen is illuminated by a DLP projector which sits inside the metal enclosure. The Raspberry Pis sit on a shelf below all this.  The bricks are in a building in the Aker Brygge section of Oslo, Norway, and show historical facts and short videos about the local area.

[eN0Rm] could have used a PC for this task, the price for a low-end PC with a few graphics cards probably wouldn’t have been much more expensive than several Raspberry Pi’s with cases. However, this system has to just work, and a PC would represent a single point of failure. Even if one Raspberry Pi goes down, the others will continue running.

The current installation is rather messy, but it’s just a test setup.  [eN0Rm] has already been taken to task for the lack of cable management in his Reddit thread.  As [eNoRm] says – first get it working, then make it pretty.

[Ben Krasnow] Shows Us How A Crookes Radiometer Works

[Ben Krasnow] is tackling the curious Crookes Radiometer on his Applied Science YouTube channel. The Crookes Radiometer, a staple of museum gift shops everywhere, is a rather simple device. A rotor with black and white vanes rotates on the head of a needle. The entire assembly is inside a glass envelope. The area inside the glass is not at a hard vacuum, nor is it filled with some strange gas. The radiometer only works when there is a partial vacuum inside.

The radiometer’s method of operation was long misunderstood. Sir William Crookes and James Clerk Maxwell both believed that the vanes moved due to the pressure of the photons hitting the vanes. If that were true though, the radiometer would spin in the opposite direction it normally does when held near a light source.  It was eventually discovered that the system is a thermodynamic one. [Ben] proves this by cooling down the radiometer’s glass with a can of freeze spray.  The radiometer immediately begins spinning backwards, with no light source present.

From there [Ben] mounts the rotor of a radiometer inside his vacuum chamber, which many will recognize as the chamber from his DIY electron microscope. As expected, the vanes don’t spin at a hard vacuum. In fact, [Ben] find the vanes spin fastest when the pressure is about 7 mTorr.

Continue reading “[Ben Krasnow] Shows Us How A Crookes Radiometer Works”

Hacklet 22 – Retro Console Projects

Everyone loves arcade games, and it didn’t take long for designers to figure out that people would love to take the fun home. The home gaming console market has been around for decades. Through the early days of battery-powered pong style consoles through Atari and the video game crash of the early 80’s, to the late 8 and 16 bit era spearheaded by The Nintendo Entertainment System and The Sega Master System and beyond, consoles have become a staple of the hacker home. This week’s Hacklet features some of the best retro console projects from Hackaday.io!

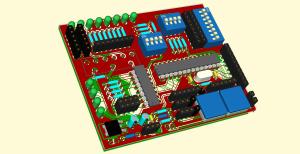
52001We start with [ThunderSqueak] saving the world with her Atari 5200 Custom Controller Build. For those who don’t know, the Atari 5200 “Super System” was an 8 bit system ahead of its time. The 5200 was also saddled with on of the worst controller designs ever. The buttons would stop responding after a few hours of game play. With 17 buttons, (including a full number pad), that was a pretty major design flaw! [ThunderSqueak] hacked a cheap commercial fighting game stick to make it work with the 5200. 12 individual buttons were wired in a matrix to replace the telephone style keys on the original 5200 controller. Atari’s non-centering analog stick was converted over to a standard 4 switch arcade style stick. [ThunderSqueak] did leave the original pots accessible in the bottom of the enclosure for centering adjustments. Many 5200 games work great with the new setup.


snes[DackR] is bringing back the glory days of Nintendo with Super Famicade, a homebrew 4 SNES arcade system inspired by Nintendo’s Super System. Nintendo’s original Super System played several customized versions of games which were available on the Super Nintendo Entertainment System (SNES). [DackR] is building his own with parts from four SNES consoles. He’s also adding a few features, like a touch screen, video overlay, and enhanced RGB.

He’s going to add custom memory monitoring hardware, which will allow him to check how many lives a player has left and handle coin operation, all without the original Super System Hardware. If you’re curious what the original Super Systems looked like, check out Hackaday’s Tokyo Speedrun video.You might just catch a glimpse of one!

rgb[Bentendo64] is improving on the past with RGB For ‘Murica. European systems have enjoyed the higher quality afforded by separate red, green and blue video lines for decades. North American gamers, however were stuck in the composite or S-Video realm until shortly before the HDTV age. [Bentendo64] had an old hotel CRT based monitor, and decided to hack an RGB input. After opening up the back of the set, he removed the yolk board and added direct inputs to the video amplifiers. We’re not sure if this mod will work with every CRT, but it can’t hurt to try! Just be sure to discharge those high voltage capacitors before wrenching on these old video systems. Even if a set has been unplugged for days, the caps can give a seriously painful (and dangerous) shock!

snes2[Ingo S] is also working to improve the SNES with SNES AmbiPak, a mod which brings ambient lighting and “rumble pack” controller feedback to the vintage Super Nintendo. [Ingo S] used the popular SNES9X emulator to figure out where game data is stored while the SNES is running. His proof of concept was the original F-ZERO SNES game. [Ingo S] found that Every time the player’s car hits the wall, the system would perform a write on address 3E:0C23. All he would need to do is monitor that address on the real hardware, and rumble the controller on a write. The real hardware proved to be a bit harder to work with though. Even these “slow” vintage systems clock their ram at around 3MHz, way too fast for an Arduino to catch a bus access.  [Ingo S] is solving that problem with a Xilinx XC9572 Complex Programmable Logic Device (CPLD). CPLDs can be thought of as little brothers to Field Programmable Gate Arras (FPGAs). Even though they generally have less “room” for logic inside, CPLDs run plenty fast for decoding memory addresses.  With this change, [Ingo S] is back on track to building his SNES rumble pack!

It feels like we just got started – but we’re already out of space for this week’s Hacklet! As always, see you next week. Same hack time, same hack channel, bringing you the best of Hackaday.io!