THP Semifinalist: Cheap Satellite Transponder

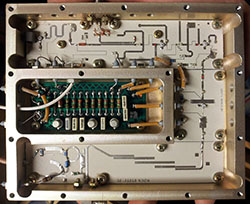
In 2016, a communications satellite will be launched into geostationary orbit somewhere over the middle east. Normally, this is fairly ordinary occurrence. This satellite, however, will be carrying two amateur radio transponders for hams all across europe, africa, the middle east, and India. [2FTG] is building a satellite transponder to talk to this satellite, and he’s doing it with junk sitting around his workbench.

The uplink frequency for this satellite will be in the neighborhood of 2.4 GHz, and [2FTG] needed a way to deal with the out of band interference in this part of the spectrum. The easy and cheap way to do this is with filters made for the WiFi band. Instead, [2FTG] had a few cavity filters in his junk box and decided to go that route. It meant he had to retune the filters, a process that should be annoyingly hard. [2FTG] did it in thirty minutes.

Antennas are another matter, but since [2FTG] has a supply of metal coffee cans, this part of the build was just a matter of soldering a bit of wire to an SMA connector, drilling a hole (using a log as a drill stop, no less), and soldering the connector to the can.


SpaceWrencherThe project featured in this post is a quarterfinalist in The Hackaday Prize.

Continue reading “THP Semifinalist: Cheap Satellite Transponder”

NYC Maker Faire: The Logistics Of Manufacturing Pentagons

Most of the Maker Faire attendees have spent weeks or months putting together their projects. [Matt] is doing things a little differently. He brought two thousand boards, each containing twelve pentagon PCBs with individually addressable LEDs mounted in the center. This weekend, he, his team, and anyone else who can wield a soldering iron will be assembling these pentagon panels into a gigantic glowing crystal.

Last year, [Matt] put together a Kickstarter for Blinkytape, a WS2812 LED strip with an Arduino on one end of the strip to generate patterns of colors. This year, [Matt] is moving into three dimensions with a system of pentagons with a single RGB LED mounted in the center. The pentagons can be soldered together into a regular polyhedra or a convoluted wall of LEDs that form a geometric crystal pattern of blinkyness. The Kickstarter for the BlinkyTile should be up before the faire is over.

[Matt] has a few tips for anyone wanting to run their own Kickstarter: don’t have a lot of SKUs. [Matt] only has to keep track of a single panel of twelve pentagons. Compare this to other failed Kickstarters with dozens of options, several colors, and a few stretch goals, and you quickly see why many, many Kickstarters fail. [Matt] is just selling one thing.

NYC MakerFaire: A Really, Really Big Printer

https://www.youtube.com/watch?v=FtQG733dC1s

Walk in to the science center at Maker Faire this year, and the first thing you’ll see is a gargantuan assemblage of aluminum extrusion spitting out molten plastic for one of the biggest 3D prints you’ve ever seen. It’s SeeMeCNC’s PartDaddy, a 16-foot tall 3D printer with a four foot diameter build plate.

The printer doesn’t extrude filament. Instead, this printer sucks up PLA pellets and extrudes them with a modified injection mold press mounted to a delta printer frame. That’s a 4mm nozzle squirting plastic. The heater for the extruder is 110 V, and the NEMA32 motors are controlled with 72V drivers. Everything about this is huge, and it’s surprisingly fast; a single-wall vase grew by about two feet in as many hours. We have no idea how fast a solid print can be completed, although the SeeMeCNC guys will probably find out later this weekend.

SeeMeCNC also had a neat little resin printer with an impossibly clever name on display. We’ll get a post up on that later this weekend.

[Sprite_TM] Puts Linux In A Clock Radio

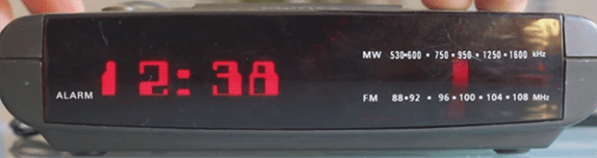
[Sprite] needs an alarm clock to wake up in the morning, and although his phone has an infinitely programmable alarm clock, his ancient Phillips AJ-3040 has never failed him. It’s served him well for 15 years, and there’s no reason to throw it out. Upgrading it was the only way, with OLED displays and Linux systems inside this cheap box of consumer electronics.

After opening up the radio, [Sprite] found two boards. The first was the radio PCB, and the existing board could be slightly modified with a switch to input another audio source. The clock PCB was built around an old chip that used mains frequency as the time base. This was torn out of the enclosure along with the old multiplexed LCD.

A new display and brain for the clock was needed, and [Sprite] reached into his parts drawer and pulled out an old 288×48 pixel OLED display. When shining though a bit of translucent red plastic, it’s can be a reasonable facsimile of the old LEDs. The brains of the clock would be a Carambola Linux module. After writing a kernel module for the OLED, [Sprite] had a fully functional Linux computer that would fit inside a clock radio.

After having a board fabbed with the power supplies, I2C expanders, USB stereo DAC, and SPI port for the OLED, [Sprite] had a clock radio that booted Linux on an OLED screen. In the video below, [Sprite] walks through the functions of the clock, including setting one of the many alarms, streaming audio from the Internet, and changing the font of the display. There’s also a web UI for the clock that allows alarms to be set remotely – from a phone, even, if [Sprite] is so inclined.

Continue reading “[Sprite_TM] Puts Linux In A Clock Radio”

Building A Vector Monitor Controller

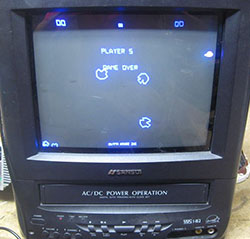
[fredkono] has a few vintage Atari arcade boards sitting around, and without the rest of the arcade machine – especially the XY CRT – these boards would continue to gather dust. The solution to this terrible shortage of vintage video games was to build a vector monitor from scratch. No, that doesn’t mean building a new CRT, but it does mean rewiring the yoke and building a CRT controller board for tubes salvaged from small, old TVs.

Nearly all the CRTs you’ll find at your local goodwill or surplus shop are raster displays. The CRTs used in the old Atari games were vector displays and extremely similar to the tubes found in old oscilloscopes. [fred] turned the CRT found in an old 9″ color TV into a vector monitor by rewinding the yoke.

With the tube rewired, it was only a matter of connecting the custom deflection circuit boards and getting the old arcade boards running. The images drawn with the new yoke deflector board are great and produce fine, crisp lines of some of the most famous video games in history.

A DIY MIDI Wind Controller

MIDI is more than just keyboards and a matrix of buttons that plays samples; there are MIDI controllers for virtually every instrument that has ever existed, from guitars to harps and even woodwinds. [J.M.] didn’t like the features found in existing wind MIDI controllers, so he’s building his own with features that put it far beyond any commercial offering.

Woodwind MIDI controllers are relatively simple; put a pressure sensor in the mouthpiece and turn that data into note on and note off commands. A few buttons, or in [J.M.]’s case, resistive touch sensors, are easily mapped to different fingerings and notes for the instrument. An Arduino Nano takes care of all this hardware, and a 2.4 GHz radio module to communicate wirelessly to a base station.

Once at the base station, the MIDI data can be output to any number of synths and computers, but [J.M.] added a MIDI codec chip right in the device to play with only a set of headphones. It doesn’t sound great – about the same as an old Sound Blaster card – but with the mod and expression control a wind controller offers, it’s more than passable as a real woodwind.

Videos below.

Continue reading “A DIY MIDI Wind Controller”