DIY Heavy Duty Linear Slides

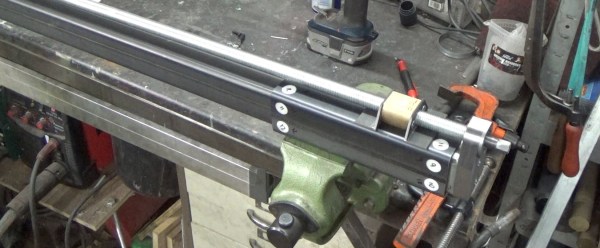
The rise of cost-effective CNC platforms like 3D printers, routers, and laser cutters has gone hand in hand with the availability of affordable and accurate linear rails and extrusions. However, they quickly become expensive when you need something for heavy loads. [Andy Pugh] found himself in need of a large linear slide, so he resorted to making his own with steel square tubing and a bit of PTFE (Teflon).

The PTFE slider/spacers

[Andy] needed a compact motorcycle lift for his small workshop, so he designed one with a single vertical tube that mounts on his floor. The moving part of the lift is a slightly larger tube, onto which the motorcycle mounts. To allow the outer part to slide easily [Andy] machined a set of 16 PTFE spacers to fit between the surfaces of the tubes. The spacers have a small shoulder that lets them mount securely in the outer tube without pushing out. After a bit of fine-tuning with a file, it slides smoothly enough for [Andy]’s purposes. With a large lead screw mounted onto the lift, he can easily lift his 200 kg motorcycle with a cordless drill, without taking up all the floor space required by a traditional motorcycle lift.

Although the Teflon spacers will wear with regular use and, they are more than good enough for the occasional motorcycle service, and are also easy to replace. You may not want to use this on your next CNC machine build, but it is a handy blueprint to keep in your mental toolbox for certain use-cases. These spacers were machined on a lathe, but we found that very similar looking PTFE parts are sold as “wrist pin buttons” for the piston of old air cooled VW engines, and could be modified for the purpose.

For other lifting applications, check out this hydraulic workbench, and this forklift for moving stuff in your crawl space without crawling.

Peter Sripol’s DIY Electric Ultralight MK4

Peter Sripol really likes building gravity defying death traps. He recently flew the fourth ultralight, which he designed and built himself. For a taste of what’s going on here, the wings have aluminum tube spars and are made of hot-wire-cut styrofoam sections.

To keep the plane simple, he got rid of ailerons entirely. For roll stabilization he angled up the wings noticeably, adding dihedral. This gives the aircraft passive stability, because as it rolls to a side, the upper wing’s lift decreases and the lower wing’s lift increases, forcing the plane to correct itself. Interestingly he kept the rudder controls on pedals instead of moving it to the stick, so the stick only controls the elevator.

It is powered by a single large brushless electric motor borrowed from the OpenPPG project. On the first test he used a two-bladed propeller, with a small pitch angle which required full throttle to keep flying. It can be compared to driving a car only in first gear. By moving to a three bladed propeller with a higher pitch angle, and increasing the length of the wings for more lift, [Peter] was able to cruise comfortably at about 30 MPH or 48 km/h.

Although this aircraft definitely performed better than [Peter]’s previous ultralight builds, piloting something like this isn’t for the faint of heart. Although he does extensive weight-loading and thrust testing before taking to the air, adding tail weight to piloted aircraft by simply taping a water bottle to the tail just felt wrong. But we aren’t aviation experts, so we won’t pass final judgement.

Flies Like A Quadcopter, But This Drone Design Has Only One Propeller

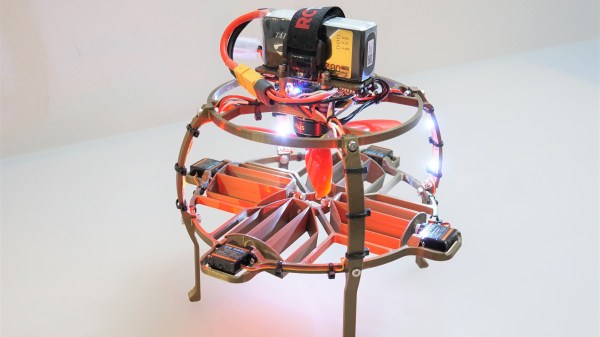
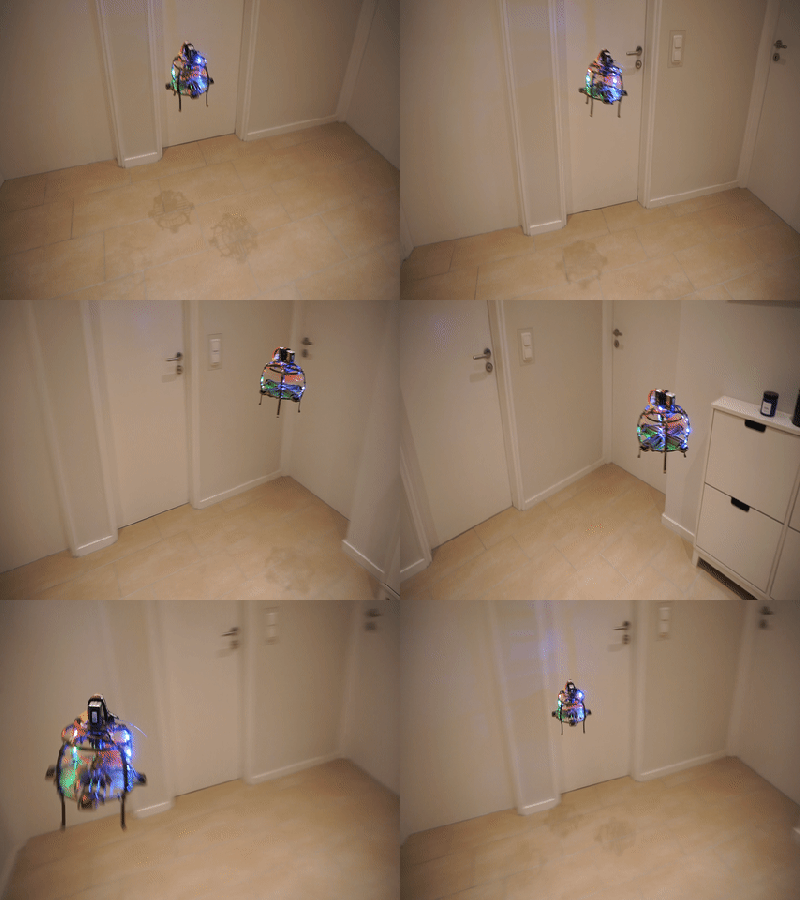
When mentioning drones, most people automatically think of fixed-wing designs like the military Reaper UAV or of small quadcopters. However, thanks in large part to modern electronics, motors, and open-source control systems, it is possible to build them in a variety of shapes and sizes. [Benjamin Prescher] is working on the second version of his single rotor Ball-Drone, which uses four servo-actuated fins for control.

Mk II in action

The first version of the ball drone flew but was barely controllable and had a tendency to tip over. After a bit of research, he found that he had fallen victim to the drone pendulum fallacy by mounting the heavy components below the propeller and control fins. Initially, he also used conventional fin control that caused the servos to jitter due to high torque loading. By changing to grid fins, the actuation torque was reduced, eliminating the servo jitter.

Mk2 corrected the pendulum problem by moving most of the components to the top of the drone. The 3D printed frame (available on Thingiverse) was also dramatically changed and simplified to reduce weight. Although [Benjamin] designed a custom flight controller with custom control software, the latest parts list contains an off-the-shelf flight controller. He mentions that he had started working with Betaflight. The most complex part of a drone is not the mechanics or even the electronics, but the control software. Thanks to open source projects like Betaflight and Ardupilot, you don’t need to write control software from scratch to get something in the air.

The ball drone seems well suited to an indoor environment, but we’re not sure if it has any real advantages over a quadcopter with ducted propellers. Servos are cheaper than motors and ESCs, so there might be a small cost saving. Drop your thoughts on the advantages/disadvantages in the comments below. Continue reading “Flies Like A Quadcopter, But This Drone Design Has Only One Propeller”

Five-Axis Pumpkin Carving

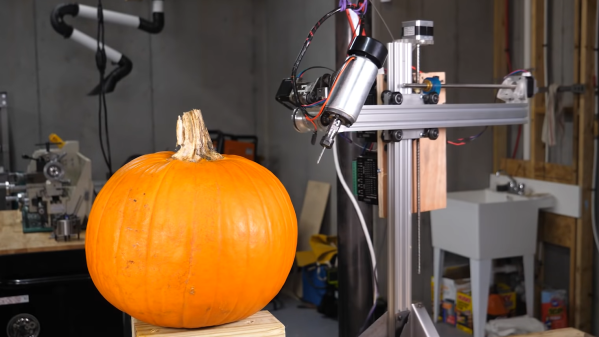
The day of carved pumpkins is near, and instead of doing manually like a mere mortal, [Shane] of [Stuff Made Here] built a five-axis CNC machine to take over carving duties. (Video, embedded below.)

[Shane] initially intended to modify his barber robot, but ended up with a complete redesign, reusing only the electronics and the large ring bearing in the base. The swiveling spindle is a rotating gantry with two sets of aluminum extrusions for vertical and horizontal motion. The gantry isn’t very rigid, but it’s good enough for pumpkin carving. Software is the most challenging part of the endeavor due to the complexity of five-axis motion and mapping 2D images onto a roughly spherical surface. Cartographers have dealt with this for a long time, so [Shane] turned to Mercator projection to solve the problem. We’re also relieved to hear that we aren’t the only ones who sometimes struggle with equation-heavy Wikipedia pages.

Since there are no perfectly spherical pumpkins, [Shane] wrote a script to probe the surface of the pumpkin with a microswitch before cutting, appropriately named “TSA.exe”. The machine is capable of carving both profiles and variable depth lithophanes, mostly of [Shane]’s long-suffering wife. She seriously deserves an award for holding onto her sense of humor.

With projects like explosive baseball bats and CNC basketball hoop, the [Stuff Made Here] YouTube Channel is worth keeping an eye on.

Going For The Home Run Record With Explosive Help

The baseball home run distance challenge for crazy engineers is really heating up, with the two main (only?) competitors joining forces. [Shane] of [Stuff Made Here] and [Destin] of [Smarter Every Day] did a deep dive into [Shane]’s latest powder charged baseball bat, designed to hit a ball 600+ feet.

[Shane] built two new versions of his bat this time, using the lessons he learned from his previous V1 and V2 explosive bats. It still uses blank cartridges, but this time the max capacity was increased from three to four cartridges. For V3 a section of the bat was removed, and replaced with a four-bar linkage, which allowed the entire front of the bat to move. The linkage integrated a chamber for four blank cartridges that could be loaded almost like a double barrel shotgun and closed with a satisfying snap. Unfortunately the mass of the moving section was too much for the welds, and the entire front broke off on the first test, so the design was scrapped.

V4 returned to the piston concept of the initial version, except V4 contains two parallel pistons, in a metal bat, with a larger hitting surface. With two cartridges it worked well, but parts started breaking with three and four, and required multiple design updates to fix. [Destin] covered the physics of the project and took some really cool high speed video. He and [Jeremy Fielding] hold the current distance record of 617 ft with their crazy Mad Batter. Unfortunately on [Shane]’s final distance attempt the bat broke again, and the ball was lost in a field with tall grass beyond the 600-foot mark, so they could not confirm if the record was actually broken.

[Destin] and his team still remain the undisputed baseball velocity record holders, with their supersonic baseball canon. It sounds like there might be another collaboration between [Destin] and [Shane] in the future, and we’re definitely looking forward to the results of that crazy venture. Continue reading “Going For The Home Run Record With Explosive Help”

Complete Flight Sim Controller Set With 3D Printing And Hall-Effect Sensors.

[Tom Stanton] has been playing Microsoft Flight Simulator a lot recently, and decided his old desktop joystick needed an upgrade. Instead of just replacing it with a newer commercial model, he built a complete controller system with a long joystick that pivots at floor level, integrated rudder pedals and a throttle box. You can see it in action after the break.

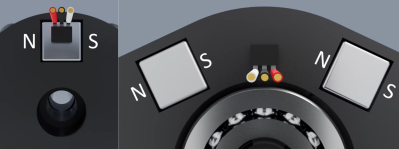
The throw of the joystick is limited by [Tom]’s legs and chair, with only 12° of travel in either axis, which is too small to allow for high resolution with a potentiometer. Instead, he used hall effect sensors and a square magnet for each axis, which gives good resolution over a small throw angle. The pivot that couples the two rudder pedals also makes use of a hall effect sensor, but needs more travel. To increase the size of the magnetic field, [Tom] mounted two magnets on either side of the sensor with their poles aligned. To center the rudder pedals and joystick, a couple of long tension springs were added.

The joystick (left) and rudder pedals (right) magnet configurations with a hall effect sensor.

A normal potentiometer was used in the throttle lever, and [Tom] also added a number of additional toggle switches and buttons for custom functions. The frame of the system is built with T-slot extrusions, so components can quickly moved to fit a specific user, and adjust the preload on the centering springs. All the electronic components are wired to an Arduino Micro, and thanks to a joystick library, the code is very simple.

At a total build cost of £212/$275 it’s certainly not what anyone would call cheap, but it’s less than what you’d pay for a commercial offering. All the design files and build details are linked in the second video if you want to build your own.

The flight sim controller builds are coming in thick and fast with the release of the latest MS Flight Simulator. With 3D printing you can augment an Xbox controller with a joystick and throttle, or just use tape and a few electronic components turn a desk drawer into a flight yoke.

Turning A Desk Drawer Into A Flight Yoke

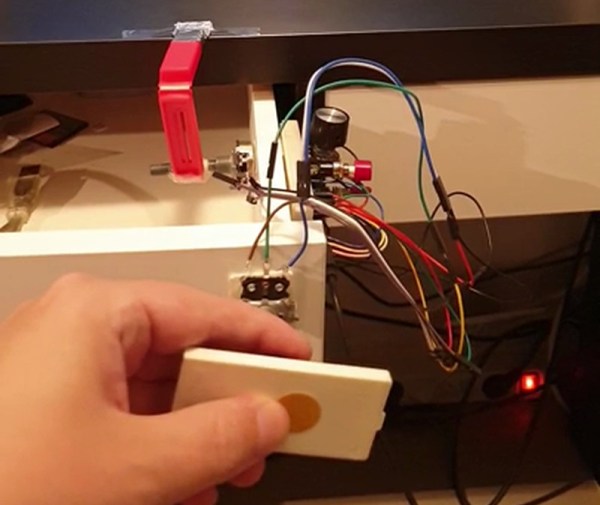
[Christofer Hiitti] found himself with the latest Microsoft Flight Simulator on his PC, but the joystick he ordered was still a few weeks out. So he grabbed an Arduino, potentiometers and a button and hacked together what a joke-yoke.

The genius part of this hack is the way [Christopher] used his desk drawer for pitch control. One side of a plastic hinge is attached to a potentiometer inside a drawer, while the other side is taped to the top of the desk. The second pot is taped to the front of the drawer for pitch control and the third pot is the throttle. It works remarkably well, as shown in the demo video below.

The linearity of the drawer mechanism probably isn’t great, but it was good enough for a temporary solution. The Arduino Leonardo he used is based on the ATmega32u4 which has a built-in USB, and with libraries like ArduinoJoystickLibrary the computer interface very simple. When [Christopher]’s real joystick finally arrived he augmented it with a button box built using the joke-yoke components.

There’s no doubt that Microsoft Flight Simulator 2020 will spawn a lot of great controller and cockpit builds over the next few years. We’ve already covered a new joystick build, and a 3D printed frame to turn an Xbox controller into a joystick.

Continue reading “Turning A Desk Drawer Into A Flight Yoke”