Soldering Glass And Titanium With Ultrasonic Energy

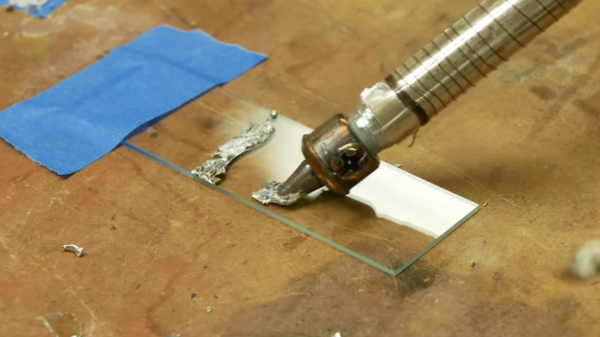
Ultrasonic soldering is a little-known technology that allows soldering together a variety of metals and ceramics that would not normally be possible. It requires a special ultrasonic soldering iron and solder that is not cheap or easy to get hold of, so [Ben Krasnow] of [Applied Science] made his own.

Ultrasonic soldering irons heat up like standard irons, but also require an ultrasonic transducer to create bonds to certain surfaces. [Ben] built one by silver soldering a piece of stainless steel rod (as a heat break) between the element of a standard iron and a transducer from an ultrasonic cleaner. He made his special active solder by melting all the ingredients in his vacuum induction furnace. It is similar to lead-free solder, but also contains titanium and small amounts of cerium and gallium. In the video below [Ben] goes into the working details of the technology and does some practical experimentation with various materials.

Ultrasonic soldering is used mainly for electrically bonding metals where clamping is not possible or convenient. The results are also not as neat and clean as with standard solder. We covered another DIY ultrasonic soldering iron before, but it doesn’t look like that one ever did any soldering.

Ultrasonic energy has several interesting mechanical applications that we’ve covered in the past, including ultrasonic cutting and ultrasonic welding.

Continue reading “Soldering Glass And Titanium With Ultrasonic Energy”

Learn About Historic Firearm Design With A 3D Printer

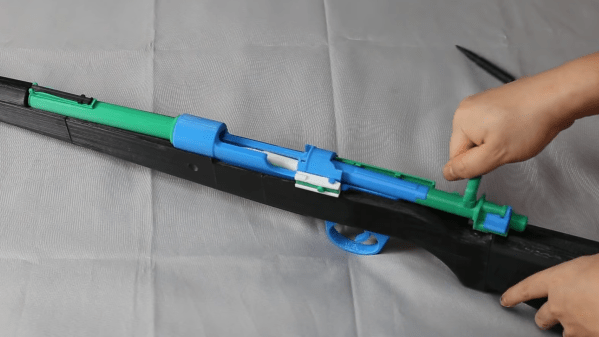
Over the last century, very little of the basic design of firearm cartridges has changed, but the mechanics of firearms themselves have undergone many upgrades. The evolution of triggers, safeties, magazines, and operating mechanisms is a fascinating field of study. Hands-on experience with these devices is rare for most people, but thanks to people like [zvc], you can 3D print accurate replicas of historical firearms and see how all the parts fit together for yourself.

[zvc] is slowly building up a library of 3D models, with nine available so far, from the Mauser C96 “Broomhandle” pistol to the modern M4 rifle. Except for springs and some fasteners, almost every single part of [zvc]’s models are 3D printed, down to the takedown pins and extractors. With the obvious exception of being able to fire a live round, it looks like all the components fit and work together like on the real firearms. None were ever designed with 3D printing in mind, so a well-tuned printer, lots of support structure, and post-processing are required to make everything work. The surface finish will be a bit rough, and some smaller and thin-walled components might be susceptible to breaking after the repeated operation or excessive force. The models are not free, but all prices are below €10.

These models do demonstrate one of the real superpowers of 3D printing: functional mock-ups and prototypes. The ability to do rapid iterative design updates and to have the latest design in hand within a few hours is invaluable in product development. [Giaco] used this extensively during the development of his kinetic driver. When you buy 3D printable models online, always make sure what possible pitfalls exist.

3D POV Display Has The Shakes

Persistence of vision projects are a dime a dozen, but by adding a third dimension [Madaeon] succesfully created one to stand out from the crowd. Instead of waving around a single line of LEDs, he is moving a 2D grid of them vertically to create a volumetric POV display.

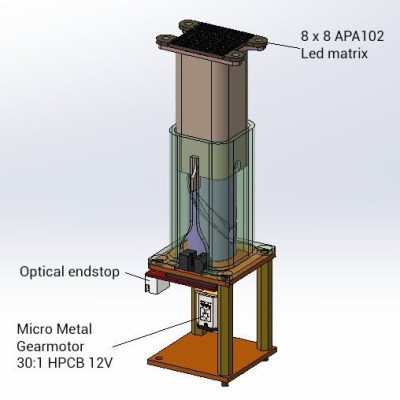
The display consists of oscillating 3D printed piston, powered by a small geared motor, on top of which sits a 8 x 8 RGB LED grid and diffusing film. The motor drives a cylindrical cam, which moves a piston that sits over it, while an optical end stop detects the bottom of the piston’s travel to keep the timing correct. [Madaeon] has not added his code to the project page, but the 3D files for the mechanics are available. The current version creates a lot of vibration, but he plans to improve it by borrowing one of  [Karl Bugeja]’s ideas, and using flexible PCBs and magnets.

He also links another very cool volumetric display that he constructed a few years ago. It works by projecting images from a small DLP projector onto an oscillating piece of fabric, to created some surprisingly high definition images.

POV displays are good projects for learning, so if you want to build your own, take a look a simple POV business card, or this well-documented POV spinning top.

Making Baseballs Go Supersonic

When professional engineers are giggling like kids, you know something interesting is about to happen. [Destin Sandlin] of [Smarter Every Day], [Jeremy Fielding], and a few other like-minded individuals have built a very impressive air cannon, capable of launching baseballs at supersonic velocities.

Baseball execution. Not for sensitive viewers.

The muzzleloading canon consists of a large pressure chamber and vacuum chamber stuck together, with a plug and baseball separating the two. The barrel forms part of the vacuum chamber, and is sealed off at the muzzle end with plastic tape that ruptures when fired. The firing mechanism runs the entire length of the pressure chamber, exiting out the back where it is held in place by a large pneumatic sear mechanism. When the sear is released, it “pops the cork” between the two chambers, sending high-pressure nitrogen into the vacuum chamber, forcing the ball forward. This causes the plug rod to shoot out the back of the pressure chamber, where it is stopped by a pneumatic piston. The entire thing is permanently mounted on a trailer. A professional-looking control box is used to operate the beast from behind the safety of a steel blast shield.

Be sure to watch the videos after the break with subtitles turned on. The first is the highlights reel, and the second is a very entertaining hour-long behind the scenes look. To the surprise of the builders, they were able to shoot a baseball at Mach 1.38 (1050 mph or 1690 km/h) on the very first try, with only a partially pressurized system and a leaking vacuum chamber. When impacting the thick steel target, the ball disintegrates completely, imprinting its stitches on the target. [Destin] and co recorded the results with his usual high-speed cameras, but also included a Schlieren rig that allowed them to photograph the shock waves and Mach cones generated by the speeding ball. After a few shots, the bolts were stripped out of the pneumatic piston that stops the plug rod, which is no surprise judging by how much the steel frame flexes in that area. Continue reading “Making Baseballs Go Supersonic”

Recognizing Activities Using Radar

Caring for the elderly and vulnerable people while preserving their privacy and independence is a challenging proposition. Reaching a panic button or calling for help may not be possible in an emergency, but constant supervision or camera surveillance is often neither practical nor considerate. Researchers from MIT CSAIL have been working on this problem for a few years and have come up with a possible solution called RF Diary. Using RF signals, a floor plan, and machine learning it can recognize activities and emergencies, through obstacles and in the dark. If this sounds familiar, it’s because it builds on previous research by CSAIL.

The RF system used is effectively frequency-modulated continuous-wave (FMCW) radar, which sweeps across the 5.4-7.2 GHz RF spectrum. The limited resolution of the RF system does not allow for the recognition of most objects, so a floor plan gives information on the size and location of specific features like rooms, beds, tables, sinks, etc. This information helps the machine learning model recognize activities within the context of the surroundings. Effectively training an activity captioning model requires thousands of training examples, which is currently not available for RF radar. However, there are massive video data sets available, so researchers employed a “multi-modal feature alignment training strategy” which allowed them to use video data sets to refine their RF activity captioning model.

There are still some privacy concerns with this solution, but the researchers did propose some improvements. One interesting idea is for the monitored person to give an “activation” signal by performing a specified set of activities in sequence.

Continue reading “Recognizing Activities Using Radar”

Comparing Shortwave Antennas With RTL-SDR And Python

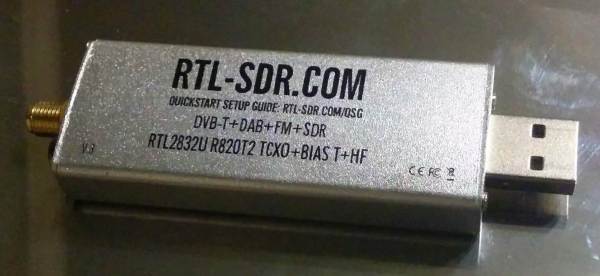
Measuring the performance of antennas in absolute terms that can involve a lot of expensive equipment and specialized facilities. For practical applications, especially when building antennas, comparing performance in relative terms is more practical. Using cheap RTL-SDR dongles and Python, [Eric Urban] was able to compare the performance of two shortwave/HF antennas, and documented the entire process.

The two antennas in question was a single band inverted-L and smaller broadband T3FD antenna. [Eric] first gathered performance data for each over few days, connected to separate PCs with RTL-SDRs via low-pass filters. These were set up to receive FT8 transmissions, a popular digital ham radio mode, which allowed [Eric] to automate data collection completely. GQRX, a software receiver, converted the signals to audio, which was then piped into WSJT-X for demodulation.

Data for each received FT8 transmission was recorded to a log file. [Eric] also modified GQRX and WSJT-X to give him all the remote control features he needed to automatically change frequencies. Between the two antenna setups, more than 100,000 FT8 transmissions were logged. Using the recorded data and Python he compared the number of received transmissions, the distance, and the heading to the transmitters, using the location information included in many FT8 transmissions. Where the same transmission was received by both antennas, the signal-to-noise ratios was compared.

From all this data, [Eric] was able to learn that the inverted-L antenna performed better than the T3FD antenna on three of the four frequency bands that were tested. He also discovered that the inverted-L appeared to be “deaf” in one particular direction. Although the tests weren’t perfect, it is impressive how much practical data [Eric] was able to gather with low-cost hardware. Continue reading “Comparing Shortwave Antennas With RTL-SDR And Python”

Automatic Arduino Bicycle Shifter

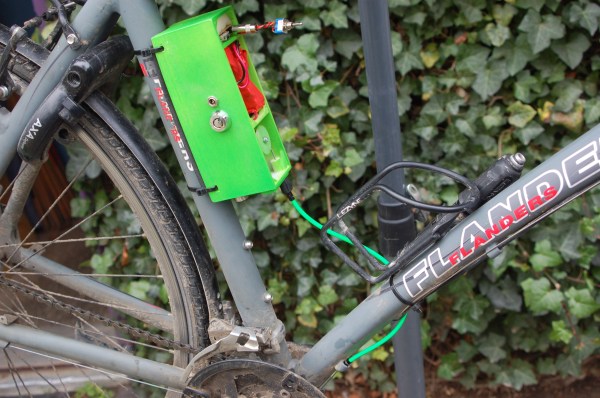
One of the keys to efficient cycling performance is a consistent pedalling cadence. To achieve this the cyclist must always be in the correct gear, which can be tricky when your legs are burning and you’re sucking air. To aid in this task, [Jan Oelbrandt] created Shift4Me, an open-source Arduino powered electronic shifter.

The system consists of a hall effect sensor at the pedals to measure cadence, an Arduino controller, and a servo mechanism to replace the manual shifter. Everything is mounted in a small enclosure on the frame. The only way to get one is to build your own, so a forum is available for Shift4Me builders, where the BOM, instructions, code and other documentation is available for download. Most bikes should be easy to convert, and [Jan] invites builders to post their modifications and improvements.

Since the only input is the cadence sensor, we wonder if the system will interfere more than help when the rider has to break cadence. It does however include allowance to hold on the current gear, or reset to a starting gear by pushing a button. One major downside is that you will be stuck in a single gear if the battery dies since the manual shifter is completely removed.

As one of the oldest continuously used forms of mechanical transport, there is no shortage of bicycle-related hacks. Some of the more recent ones we’ve seen on Hackaday include e-bike with a washing machine motor, and a beautifully engineered steam-powered bicycle.