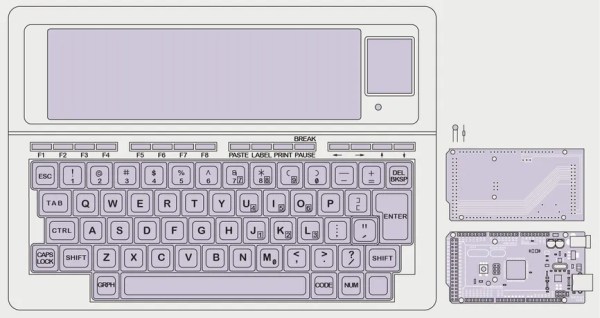
Sketch of a Tandy TRS-80 Model 100 with Arduino Mega 2560

TRS-80 Model 100 Gets Arduino Heart Transplant

When [Stephen Cass] found himself with a broken Tandy TRS-80 Model 100 portable computer, the simplest solution was to buy another broken one and make one working computer from two non-working computers. However, this left him with a dilemma — what to do with the (now even more) broken one left over?
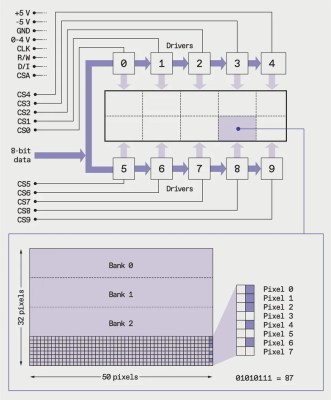
LCD layout is unusual by modern standard, but optimized for fast updates

Naturally, he did what a lot of us would do and used modern hardware to interface with the original parts that still work. In this case it meant replacing the motherboard with an Arduino Mega 2560.

Luckily, the Model 100 has a substantial fanbase and there’s a lot of helpful information available online, including the detailed service manual, that helped [Stephen] to understand how to drive the unusual display.  The LCD has a resolution of 240×64 pixels, which are broken down into eight zones of 50×32 pixels, and two zones of 40×42 pixels.  Each zone is then further divided into four banks, eight pixels tall, so that each column of eight pixels corresponds to a single byte.

Every one of the ten zones is controlled by an individual HD44102 driver IC, connected to a 30-bit wide bus for selecting the correct chip, bank and column.

With the Arduino handling the data, the old LCD still needed a -5 V supply for contrast and an RC filter to smooth out the PWM signal [Stephen] is using to adjust the viewing angle.

With the new interface, [Stephen] is able to access all of the pixels on the original display, and to use modern graphics libraries such as displayio. With the display issue solved, he intends to use a separate Teensy 4.1 to connect with the keyboard matrix and provide a VT100 terminal interface.
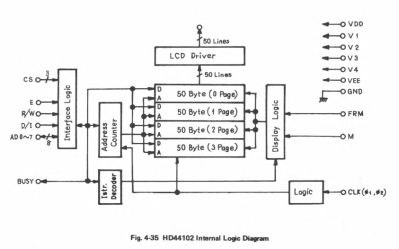
Schematic of the HD44102 driver circuit

Upcycling old, broken hardware can be a lot of fun and is always educational.  Understanding why certain design decisions were made at a time when the engineering trade-offs were different can lead to insights that are directly relevant to modern designs when resources get tight. In this case, the quirky LCD drivers were a response to making the display of text as efficient as possible, so as not to overburden the processor.

The TRS-80 computers are ripe for hacking, with their “built-for-service” designs, and we’ve featured a few in the past.  Some have replaced the motherboard with something newer, like [Stephen], whereas others have also replaced the display, or connected them to the cellphone network.

Have you found new ways to get old hardware working? Tell us in the comments below or send us a message on the Hackaday tips line.

Thanks to [nb0x0308] for the tip!

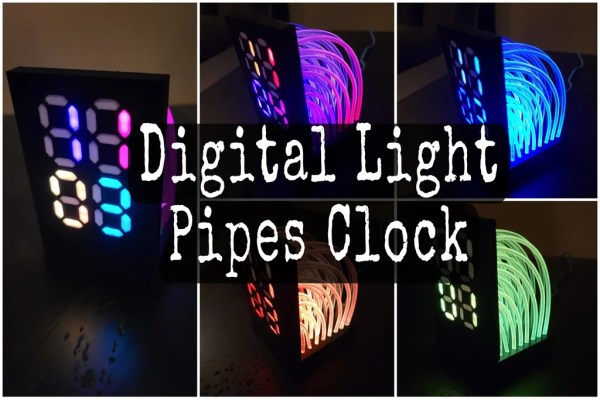
Digital Light Pipes Clock various view of seven-segment display using illuminated light-pipes

LED Clock Has Its Pipes On Display

For most hackers and makers, building a clock is a rite of passage. Few, though, will be as unusual and engaging as this design by [TerraG2].

By combining addressable LEDs, light pipes and 7-segment displays, [TerraG2] has built a timepiece that looks great and will surely be a great conversation starter as well. It’s packed full of features such as automatic brightness control, an accelerometer controlled user interface, and WiFi to make sure it’s always accurate.

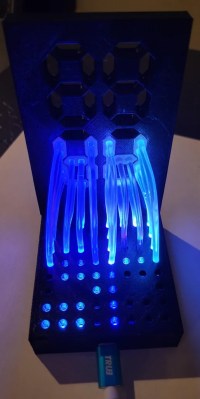
partial rear view of the clock showing illuminated light pipes
Partial rear view of the clock showing illuminated light pipes

The decision to leave the light pipes visible behind the main display really makes the project stand out from other clock builds, and the methods [TerraG2] has used to achieve this look will no doubt be transferable to a host of other projects.

The LEDs are courtesy of a standard 8×8 RGB matrix, with a custom 3D-printed shroud to hold the light pipes in place and a clever connector at the other end to illuminate the segments. With two LEDs per segment, seven segments per digit, and four digits, there’s even room for some extra features down the line if you can think of a use for those eight spare LEDs.

The brain of the project is an ESP8266 D1 with an MPU6050 inertial measurement unit (IMU) to detect when it’s flipped over to change the color scheme.

Full documentation is on Github, and a video of the clock in use is after the break.

Light pipes have been used to great effect in some other clock projects we’ve seen, such as this modern Nixie clock and this “clock of clocks”, as well as in this light organ that we showed recently.

Continue reading “LED Clock Has Its Pipes On Display”

Making A Tape Echo The Traditional Way

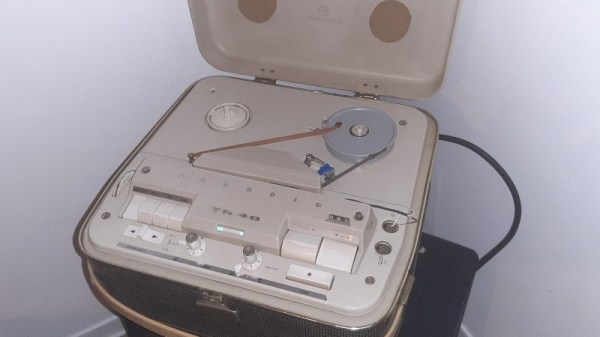
[Juan Nicola] has taken inspiration from the musician hackers of old and re-purposed a reel-to-reel tape recorder into a tape-echo for his guitar with a built-in valve amplifier (video in Spanish).

The principle is to record the sound of the guitar onto a piece of moving magnetic tape, then to read it back again a short time later.  This signal is mixed with the live input and re-recorded back onto the tape further back.  The effect is heard as an echo, and this approach was very popular before digital effects became readily available.

[Juan] installed a new read-head onto his Grundig TK40 and managed to find a suitable mechanical arrangement to keep it all in place.  He has since updated the project by moving to a tape loop, allowing an infinite play-time by re-using the same piece of tape over and over.

Turning tape machines into echo effects is not a new idea, and we’ve shown a few of them over the years, but every one is slightly different!

Both versions are shown after the break.  YouTube closed-caption auto-translate might come in handy here for non-Spanish speakers.

Continue reading “Making A Tape Echo The Traditional Way”