Holiday cookies are a joy, and to make things a bit more fun, [The Skjegg] created the Cookie Launcher. At the touch of a button, a door opens and the tin launches a cookie (and perhaps a few crumbs) skyward. Catching it is up to the operator, but since the tin can hold up to 40 cookies at once (39 in a magazine and 1 in the launcher), there’s enough to get some practice in.
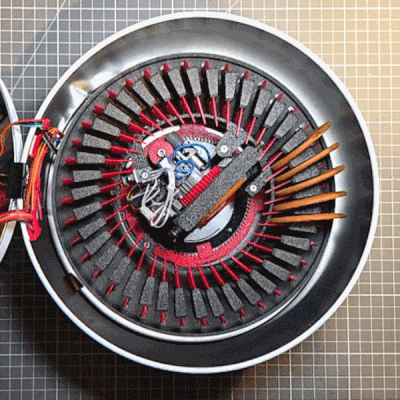 The design is a real thing of beauty, from the rotary cookie holder to the ejector. Individual cookies are held in a pan-style magazine that rotates until a tasty disk is lined up with the ejector. The red separators aren’t just for show, either. The little inward protrusion on each one interacts with an optical sensor to ensure the system always knows when things are lined up.
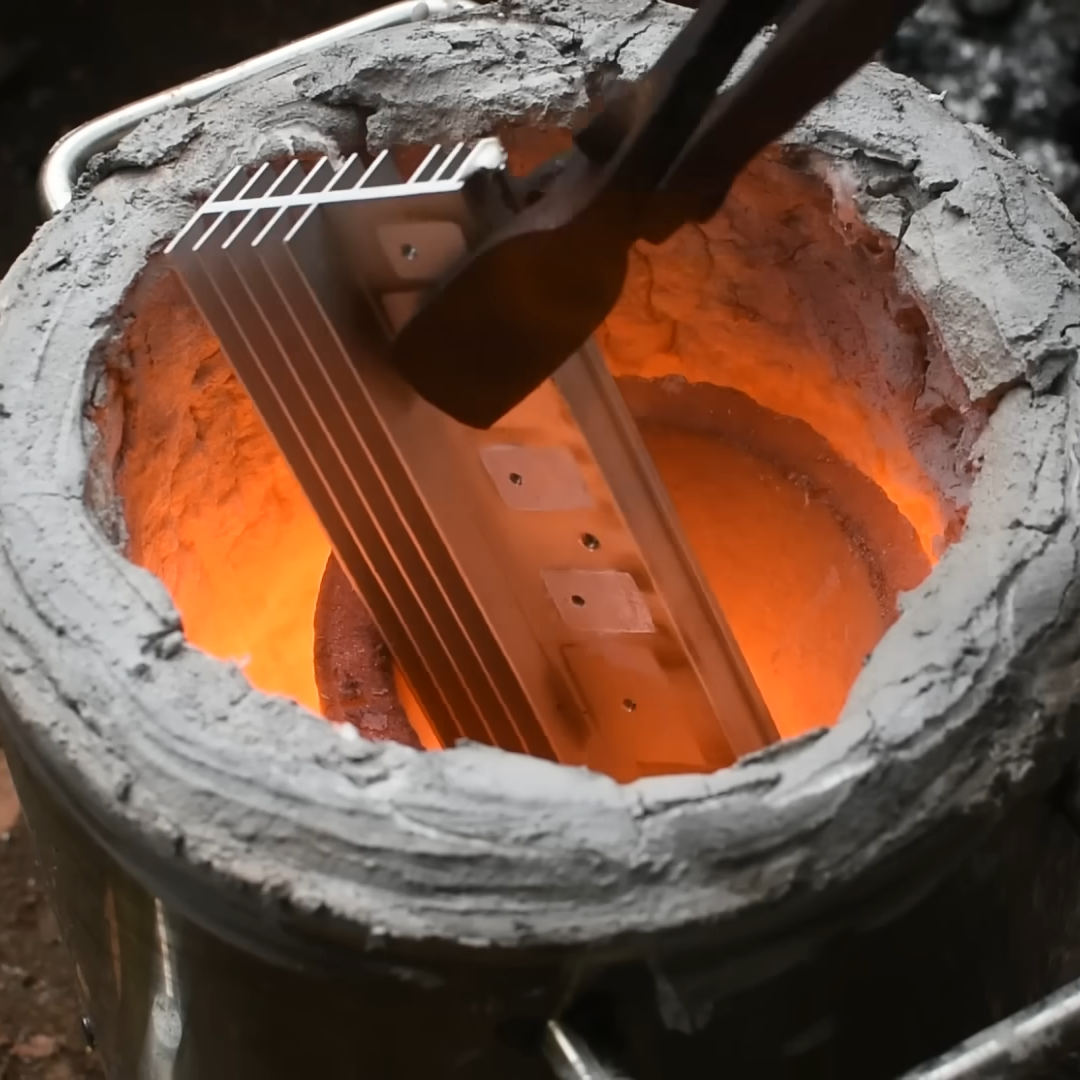
The launcher design is pretty neat, too. There’s a platform that uses two smooth bolts as guides, and elastic bands to store energy. A motor cranks it downward, where it locks into place. The rotary magazine then turns to line up a cookie, which gravity feeds into the launcher by rolling down an incline. When a cookie is in place, a door in the lid opens and the launcher platform releases, sending the cookie skyward.
The original concept for the Cookie Launcher involved voice activation, but training the voice module to trigger on custom Norwegian commands wasn’t very reliable. Luckily, a button is far more obedient. It may be a bit less magical to use, but in our opinion the physicality of a button push meshes perfectly well with the requirement to catch your own cookie.
You can get a good look at the operation and a detailed tour of the insides in the video, embedded below. Thanks to [Rohit] for sending in the tip!
If airborne cookies aren’t your bag, check out one a very different approach to hands-free cookie dispensing.
Continue reading “Cookie Launcher Makes You Catch Your Own Snack”