I2C From Your VGA Port

Breakout board for VGA to I2C

VGA, DVI, and HDMI ports use Display Data Channel (DDC) to communicate with connected displays. This allows displays to be plug and play. However, DDC is based on I2C, which is used in all kinds of electronics. To take advantage of this I2C port on nearly every computer, [Josef] built a VGA to I2C breakout.

This breakout is based on an older article about building a $0.25 I2C adapter. This adapter hijacks specific lines from the video port, and convinces the kernel it’s a standard I2C device. Once this is done, applications such as i2c-tools can be used to interact with the port.

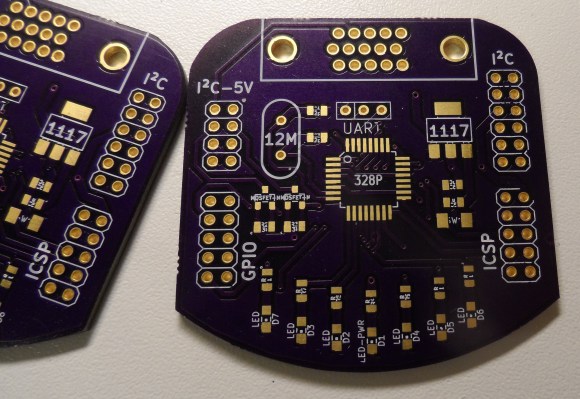
[Josef] decided to go for overkill with this project. By putting an ATmega328 on the board, control for GPIOs and LEDs could be added. Level shifters for I2C were added so it can be used with lower voltage devices. The end product is an I2C adapter, GPIOs, and LEDs that can be controlled directly from the Linux kernel through an unused video port.

A Robot’s Favourite Pen

A test of various pens using a robot

Some people are very picky about their pens. Entire forums exist to discuss the topic of pen superiority. However, it comes down to a personal choice. Some people like gel while others prefer ballpoint.

[Jens] built a drawing robot that produces drawings like the one seen here. It uses several linkages connected to two stepper motors, which give fine control over the pen. With the robot working [Jens] set out to find the best pen for robotic drawing.

Seven pens were tested on the machine, each drawing the same pattern. [Jens] found that gel and rollerball pens work the best on the robot, and started examining the performance of each.

The pens all performed differently, but two winners were chosen to use in the machine. The Pentel Energel Deluxe RTX and the Pilot G-2 07 beat out the competition since they maintained good lines at high speeds.

If you’re looking to build a drawing robot, [Jens]’ research should help you pick the best pen for your application. For inspiration, a video of the robot in action is waiting after the break.

Continue reading “A Robot’s Favourite Pen”

Heating Up A Printrbot’s Bed

A heated bed for the Printrbot 3D printer

Heated beds for 3D printers help reduce the amount of curling and warping of parts. The warping happens when the part cools and contracts. The heated bed keeps the part warm for the entire print and reduces the warping.

As an upgrade to her Printrbot, [Erin] added a heated bed. The first plan was to DIY one using Nichrome wire, but heated beds are available at low cost. They’re basically just a PCB with a long trace that acts as a resistor. She added a thermistor to monitor temperature and allow for accurate control.

The Printrbot heated bed worked, but didn’t heat up quite quick enough. [Erin] was quick to scratch off the solder mask and solder new leads onto the board. This converted the board into two parallel resistors, halving the resistance and doubling the power.

This version heated up very quickly, but didn’t have a steady heat. The simple control that was being used was insufficient, and a PID controller was needed. This type of control loop helps deal with problems such as oscillations.

The Printrbot’s firmware is based on Marlin, which has PID support disabled by default. After rebuilding the code and flashing, the PID gains could be adjusted using g-codes. With the values tuned, [Erin]’s printer was holding steady heat, and can now print ABS and PLA with minimal warping.

CY8CKIT-049-41XX Dev Kit

Cypress Launches $5 ARM Dev Board

We do love new development boards at Hackaday, and it’s always nice to see companies providing cheap tools for their products. For those needing a cheap ARM solution, Cypress has just released a PSoC based board that’ll cost you less than $5.

There’s two main ICs on the development board. The first is the target: an ARM Cortex M0+ based PSoC 4 MCU. The second is a CY7C65211 USB bridge. This device is communicates with the target’s built in bootloader for flashing code.

The bridge can also be configured to talk UART, GPIO, I2C or SPI.  If you need a USB to serial converter, this part of the board could be worth $5 alone.

The PSoC 4 target happens to be similar to the one our own [Bil Herd] used in his Introduction to PSoC video. If you’re looking to get into PSoC, [Bil] provides a good introduction to what makes these chips unique, and how to get started.

Thumbnail that say The Hacklet

The Hacklet #3

The Hacklet Issue 3

The third issue of The Hacklet has been released. In this issue, we start off with a roundup on the Sci-Fi Contest which recently concluded. After seeing the many great hacks you came up with for that contest, we’re looking forward to seeing what you think of for The Hackaday Prize.

Next up, we take a look at two hacks that deal with switching mains, which is a feature that most home automation projects need. These high voltage switches can be dangerous to build, but one hack finds a safe and cheap way to do it. The next looks at building your own high voltage circuitry.

Finally, we talk about two laser hacks. The first is practical: a device for exposing resins and masks using a laser. The second is just a really big laser, built from hardware store parts. Who doesn’t like big lasers? We definitely like big lasers, and so does the FAA.

The Hacklet #2

2

A new edition of The Hacklet is now available It covers some of our favorite stuff going on in the Hackaday Projects community.

In this edition, we round up a few hacks involving cars. There’s Bluetooth Low Energy connectivity, vehicle telematics, and tools to hack into your car’s CAN bus. If you’ve ever wanted to clear that pesky check engine light without paying the dealer, or unlock your car with a smart watch, these are worth a look.

Next up are a bunch of LED hacks. This starts with a DIY theater light, then looks at a portable DJ booth, finishing off with our Evil Overlords’ own LED visualization platform.

Finally, we check out a new 3D printer design. This one uses polar coordinates instead of the Cartesian coordinate system that most printers use. This gives it the unique ability to print with multiple extruders at the same time.

Once again, let us know what you think of this edition in the comments. Our goal is to keep you entertained with some of the coolest hacks on the site.

Building A Final Key

Final Key

Remembering passwords is a pain, and there’s a number of devices out there to make it easier. If you’re looking to roll your own, this guide to building a Final Key will walk you through the process.

We talked about the Final Key before. It’s a one button password manager that encrypts and stores your password. It acts as a virtual serial port for configuration. When you hit the button, it becomes a keyboard and types in the correct password.

The creator has no intentions of making this a commercial project for a number of reasons. Instead, easy build instructions are provided based on the Arduino Pro Micro. The 24LC512 EEPROM can be soldered directly to the Arduino by bending out the DIP legs. A few resistors, a button, and an LED finish off the project. The last step is to fill it with hot glue to prevent tampering.

The Final Key firmware is available on Github, and the case can be ordered from Shapeways. If you’re interested in hardware password management, you can also check out the Mooltipass which is being developed on Hackaday.

[Thanks to Lars for the tip!]