
A few months ago we reported on a case coming before the United States Supreme Court that concerned recycled printer cartridges. Battling it out were Impression Products, a printer cartridge recycling company, and Lexmark, the printer manufacturer. At issue was a shrinkwrap licence on inkjet cartridges — a legal agreement deemed to have been activated by the customer opening the cartridge packaging — that tied a discounted price to a restriction on the cartridge’s reuse.
It was of concern to us because of the consequences it could have had for the rest of the hardware world, setting a potential precedent such that any piece of hardware could have conditions still attached to it when it has passed through more than one owner, without the original purchaser being aware of agreeing to any legal agreement. This would inevitably have a significant effect on the work of most Hackaday readers, and probably prohibit many of the projects we feature.
We are therefore very pleased to see that a few days ago the Supremes made their decision, and as the EFF reports, it went in favor of Impression Products, and us, the consumer. In their words, when a patent owner:
…chooses to sell an item, that product is no longer within the limits of the monopoly and instead becomes the private individual property of the purchaser, with the rights and benefits that come along with ownership.
In other words, when you buy a printer cartridge or any other piece of hardware, it is yours to do with as you wish. Continue reading “Impression Products V. Lexmark International: A Victory For Common Sense”


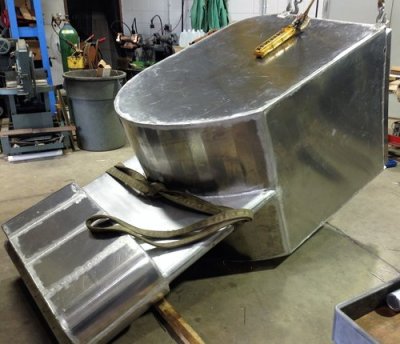 The boat’s design is definitely unusual, with a square aluminium hull of equal beam and length, and a very deep keel that has an emergency drinking water tank as its ballast. The sail is a square rig — imagine picture-book images of Viking ships for a minute — and it has two rudders. We are not nautical engineers here at Hackaday, but reading the descriptions of the boat we understand it to have more in common with a buoy in the way it handles than it does with a sleek racing yacht.


