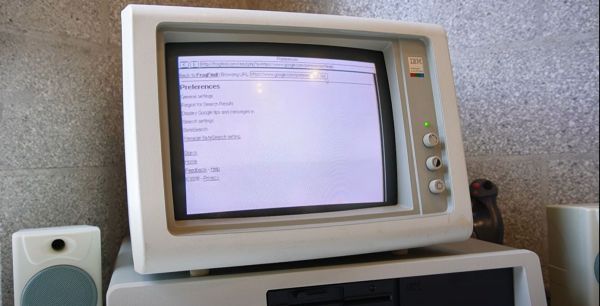
Do you ever sit at your 1981 vintage IBM PC and get the urge to pop onto that newfangled ‘WWW’ to stay up to date on all the goings-on in the world? Fret not, because [Al’s Geek Lab] has you covered with a new video (also embedded below), which you will unfortunately have to watch on a device that was made at the very least in the late 1990s. What makes this feat possible is a miniscule web browser called MicroWeb, created by [jhhoward], that will happily run on an 8088 CPU or compatible, without requiring any fiddling with EMS or similar RAM extensions.
Of course, you do need to have some kind of way to actually connect to the World Wide Web, which can be an ISA network expansion card, EtherSlip, as well as using a thin client as a network bridge with some Serial Line Interface Protocol (SLIP) action. Of course, some limitations exist, in that graphics and CSS are not rendered, JavaScript is totally off-limits, and for HTTPS-only websites a workaround like retro-proxy has to be used as TLS encryption would be completely unusable on a couple-of-MHz-CPU.
There’s also the FrogFind service, which will helpfully strip down a target website down to its barest HTML essentials, along with the 68K News site that strips down Google News, so that you can enjoy the WWW in its text-based glory as it would have looked in the early 1980s.
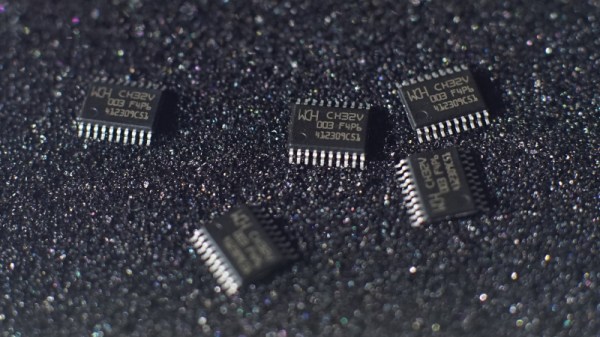
As cheap as the WCH CH32V003 MCU is, its approximately $0.10 price tag looks far less attractive when you need to start adding on external ICs for missing basic features, such as temperature measurement. This is a feature that’s commonly found on even basic STM32 MCUs. Fear not though, as [eeucalyptus] shows, you can improvise a working solution by finding alternative sources that can act as a thermometer.
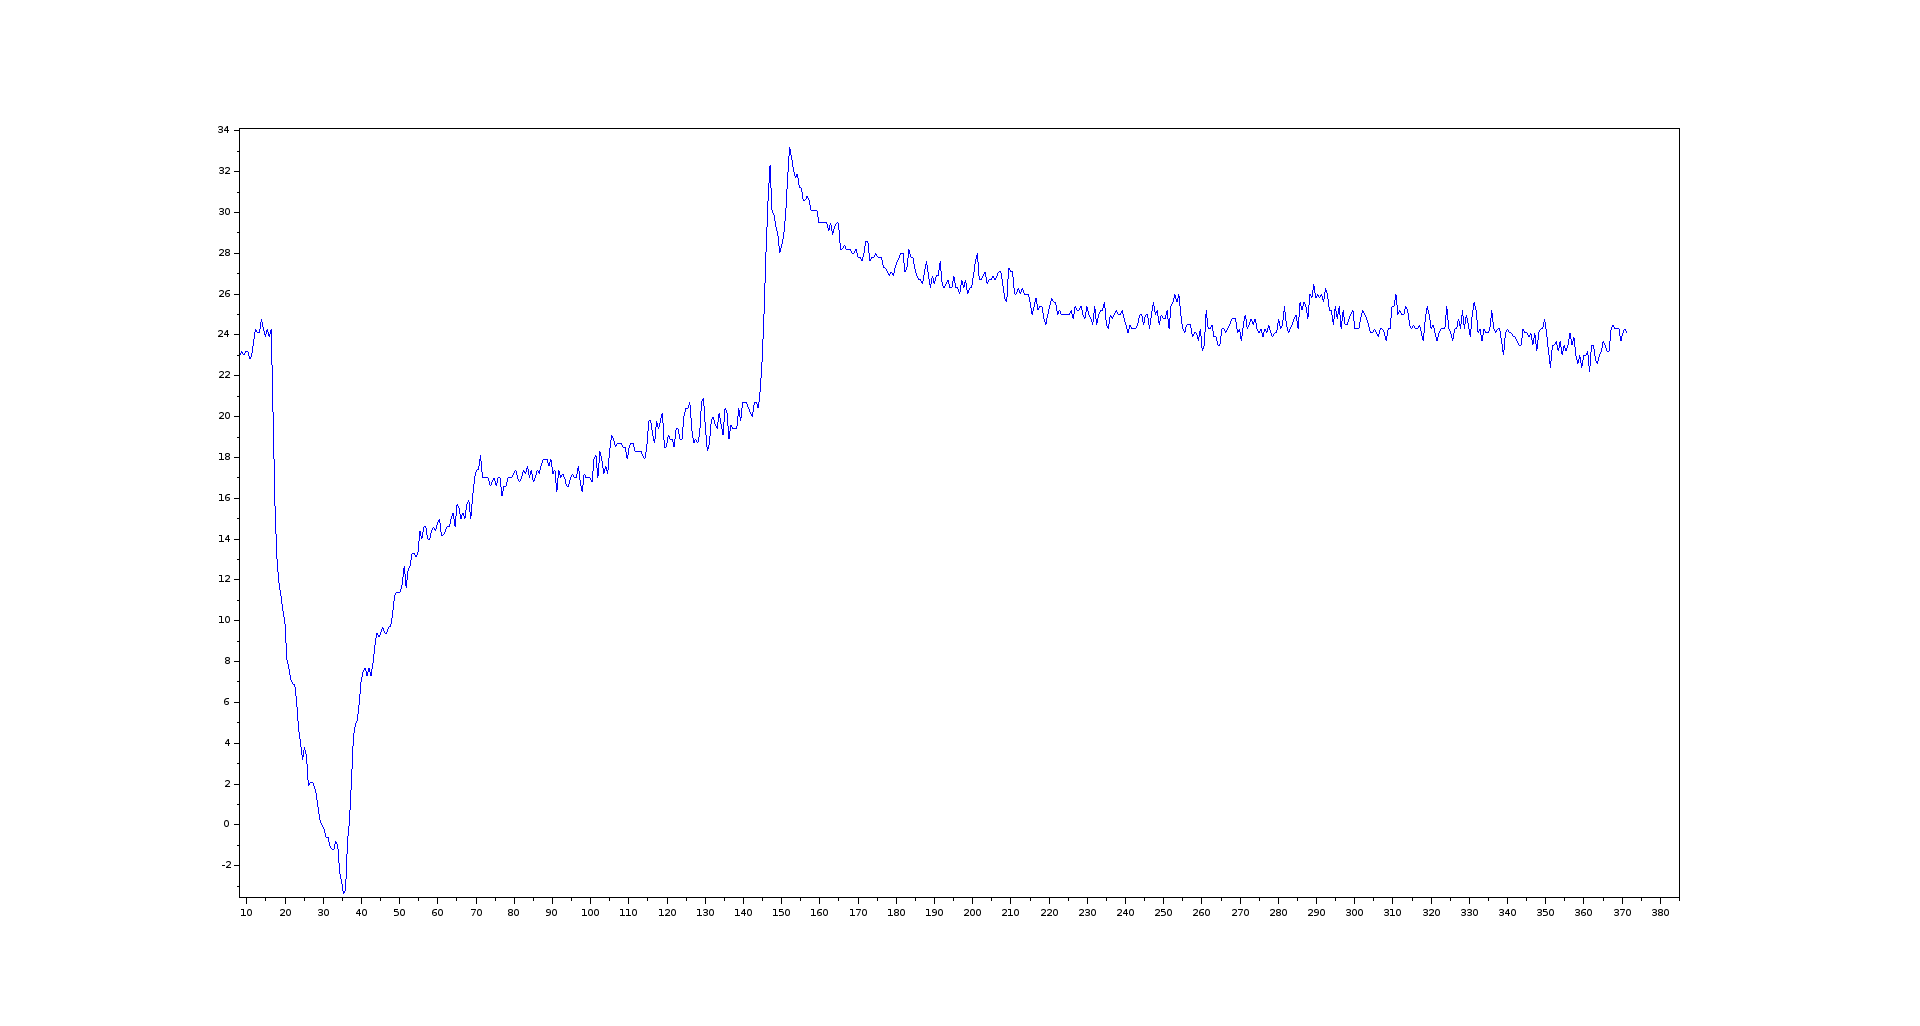
Plot of the temperature measurement using the improvised CH32V003 -based temperature sensor. (Credit: eeucalyptus)
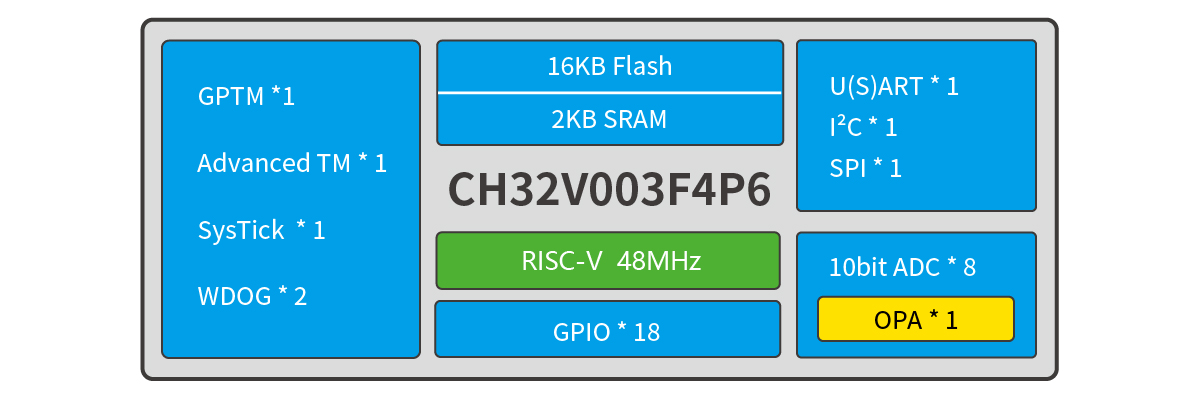
The CH32V003 is a low-end, 32-bit RISC-V-based MCU by the China-based Nanjing Qinheng Microelectronics, commonly known abbreviated as ‘WCH’, and featured on Hackaday previously. Although it features a single-core, 48 MHz CPU, its selection of peripherals is fairly basic:
So how do you create an internal temperature sensor using just this? [eeucalyptus] figured that all that’s needed is to measure the drift between two internal clocks – such as the LSI and HSI – as temperatures change and use this to calibrate a temperature graph.
Unfortunately, the LSI isn’t readily accessible, even through the Timer peripheral. This left the AWU (automatic wake-up unit) which also uses the LSI as a clock source. By letting it go to sleep and wake up after N LSI cycles, the AWU enabled indirect access to the LSI.
Internal diagram of the CH32V003 MCU. (Credit: WCH)
After calibrating against room temperature (~22 °C) and ice water (0 °C), a temperature plot was obtained, which could conceivably be somewhat accurate. As [eeucalyptus] warns, this is a kind of calibration that likely differs per MCU, and no attempt to quantify the absolute accuracy of this method has been made yet. Even so, as a crude temperature measurement, it might just be good enough.
As one of the most famous Ancient Egyptian pyramids, the Pyramid of Khafre on the plateau of Giza has been a true wonder of the Ancient World ever since its construction around 2570 BCE. Today, well over 4,500 years later, we are still as puzzled as our ancestors over the past hundreds of years how exactly this and other pyramids were constructed. Although many theories exist, including ramps that envelop the entire pyramid, to intricate construction methods from the inside out, the only evidence we have left are these pyramids themselves.
This is where the jokingly called [History for Granite] channel on YouTube has now pitched some new ideas, involving the casing stones that used to fully cover the Pyramid of Khafre, prior to widespread theft and vandalism.
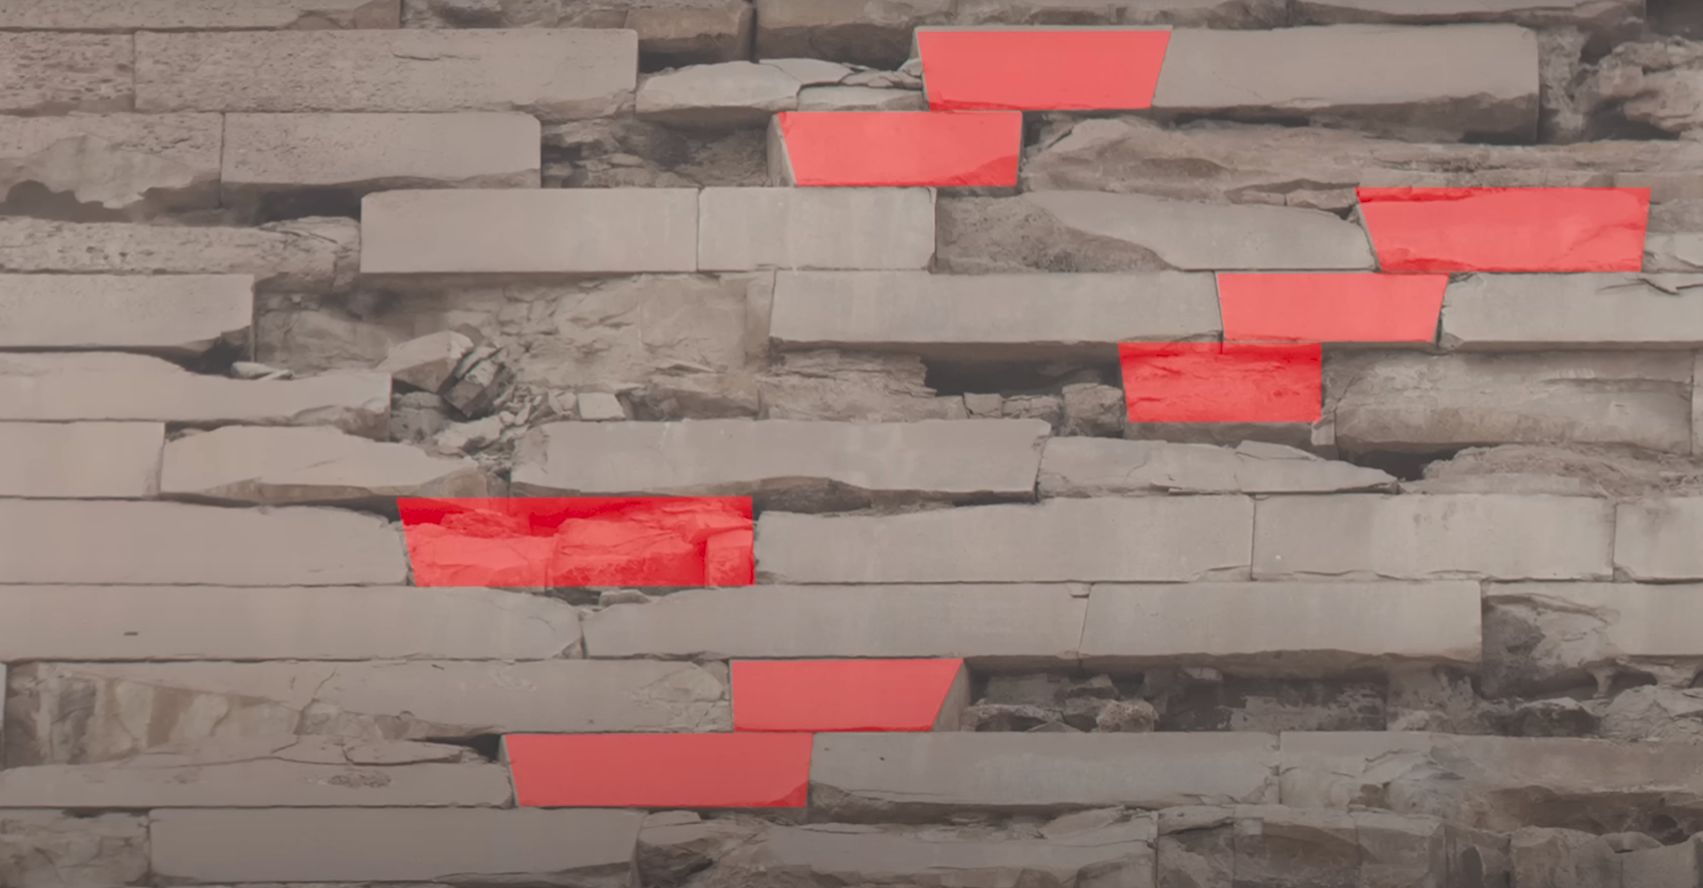
Bonding stones within the casing stones on the Pyramid of Khafre. (Credit: History for Granite, YouTube)
Despite the pyramids of Giza in particular being a veritable tourist trap, said tourists are heavily discouraged from climbing onto the pyramids, or even set up high-powered camera gear on tripods near them. Even with drone footage available, it was necessary to get a zoomed-in look on the casing stones that remain on the pyramid of Khafre near its top at well over 100 meters. Working within these limitations, it was possible to take detailed photos of three sides of the pyramid, which revealed interesting details.
In the top screenshot from the video the top of the pyramid is visible, which gives some indication of just how much the pyramid may have shifted out of alignment due to earthquakes over the millennia. This turned out to be not significant enough to account for some purported ‘gaps’ between the casing stones, with supposed ‘filler material’ from scaffolding holes explainable as just broken off sections of these casing stones. What was more interesting was that a pattern could be found in so-called bonding stones.
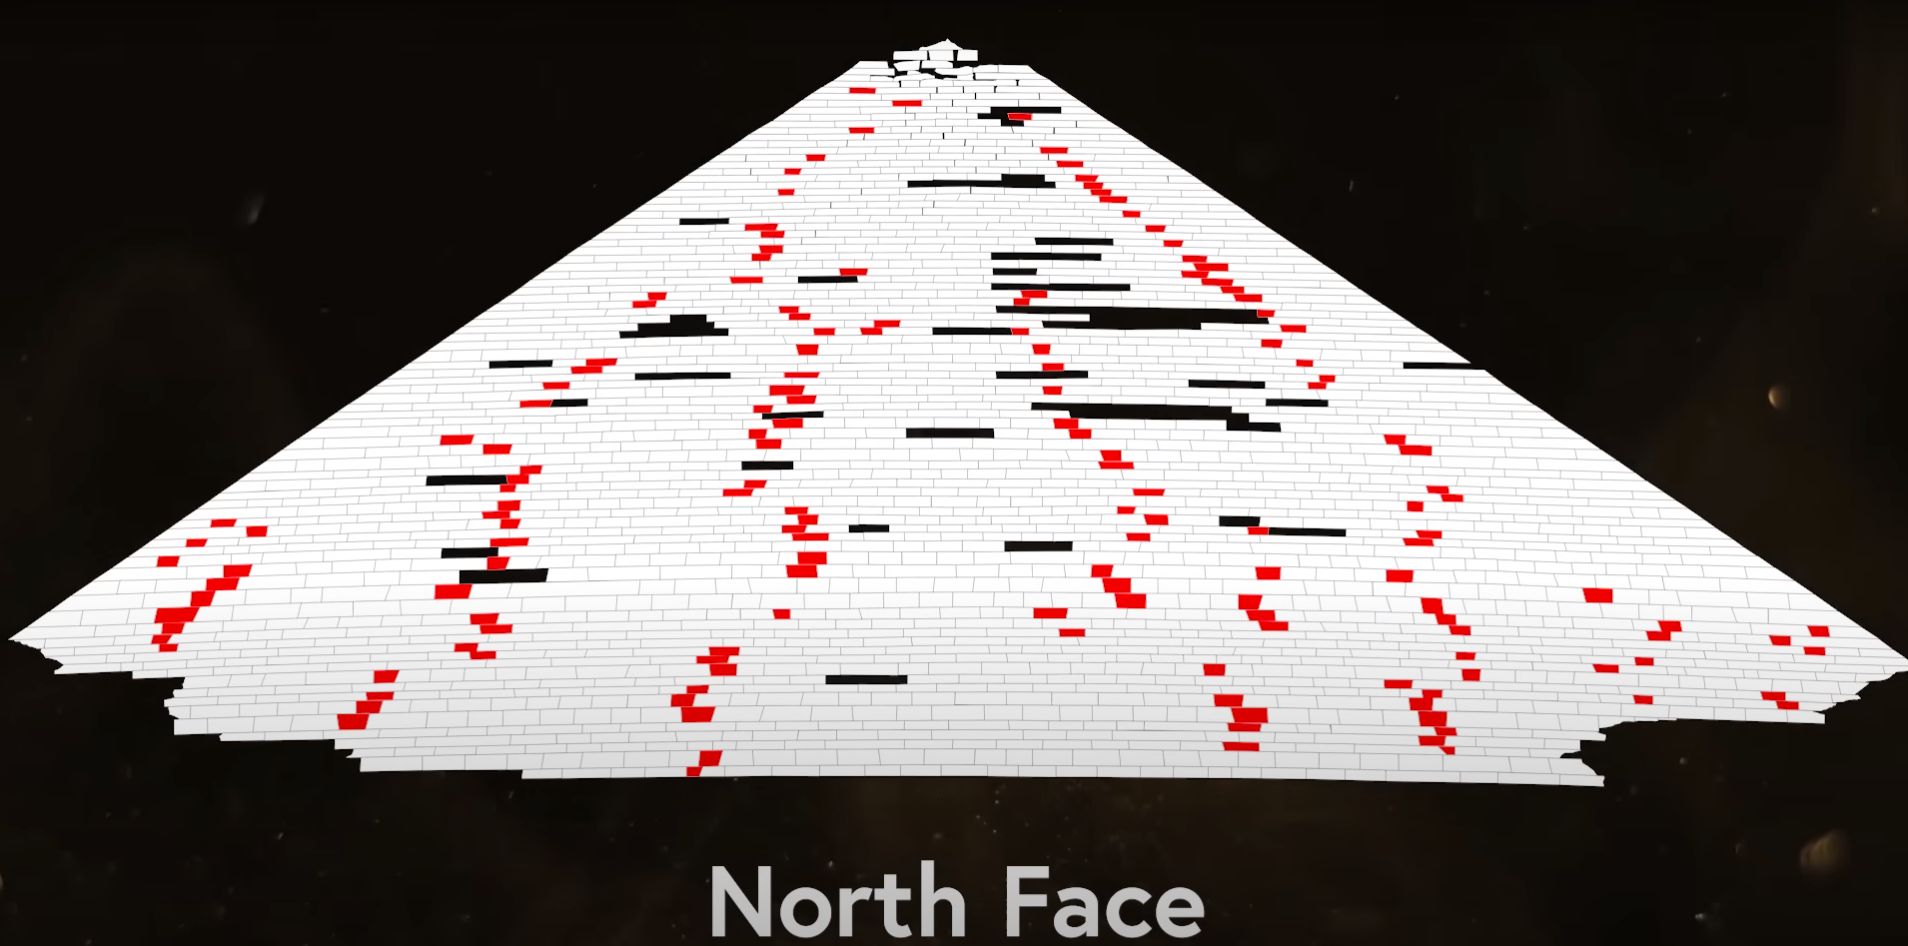
Pattern of bonding stones on the north face of the pyramid of Khafre. (Credit: History for Granite, YouTube)
These bonding stones have a slanted end, so that they can be lifted slightly above a matching slanted stone, before being lowered to complete a row of bricks or stonework. After analyzing the three faces of the still mostly intact casing stones, a clear pattern emerged, such as that on the north face, pictured here.
What this suggests is that each row of casing stones were laid down by multiple groups of workers, each starting at a specific point before coming together where those sections would be joined with a bonding stone. This lends credence to the theory that the pyramid was constructed layer by layer, including the outer covering. To further examine these clues, the even older Bent Pyramid at the royal necropolis of Dahshur with mostly intact casing stones will be examined in more detail next.
If anything this series shows just how much there still is that we don’t know about these massive construction projects that are really only preceded by the works of the Sumerian and Akkadian people.
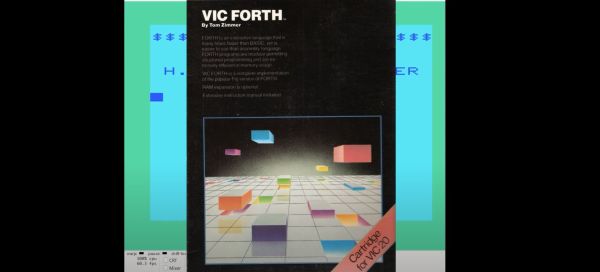
Although BASIC was most commonly used on home computers like the Commodore VIC-20, it was possible to write programs in other languages, such as Forth. Conveniently, all it took to set up a Forth development system was inserting the cartridge into the VIC-20 and powering it on, with the VIC-FORTH cartridge by [Tom Zimmer] being a popular choice for the Commodore VIC-20. In a recent video, the [My Developer Thoughts] YouTube channel covers Forth development using this cartridge.
In addition to the video tutorial, the original VIC-FORTH Instruction Manual is also available, together with the 1541 disk image. In an upcoming video, the Commodore 64 version of the cartridge will also be covered, which is called 64Forth, and which is also readily available to tinker with. For those interested in learning more about [Tom Zimmer] and his Forth-related work, a 2010 interview could be interesting. This covers the other platforms which he developed an implementation for.
As for why Forth might be interesting to developers and users, this comes mostly down to the much lower overhead of Forth compared to BASIC, while avoiding the pitfalls of ASM and resource-intensive nature of developing in C, as the entire Forth development system (compiler, editor, etc.) comfortably fits in the limited memory of the average 8-bit home computer.
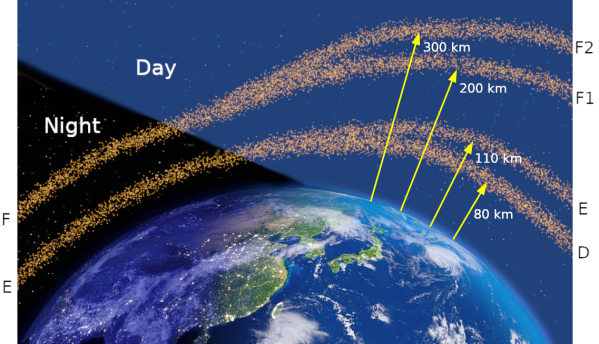
The Earth’s ionosphere is the ionized upper part of the atmosphere, and it’s also the most dynamic as it swells and ebbs depending on whether it’s exposed to the Sun or not. It’s the ionosphere that enables radio frequency communications to reach beyond the horizon, its thickness and composition also affects the range and quality of these transmissions. Using this knowledge, a group of ham radio operators used the October 14 solar eclipse to crowdsource an experiment, as part of the Ham Science Citizen Investigation (HamSCI) community.
A solar eclipse is an interesting consideration with ionospheric RF transmissions, as it essentially creates a temporary period of night time, which is when the ionosphere is the least dense, and thus weakening these transmissions and their total range. As with previous solar eclipses, they turned it into a kind of game, where each ham operator attempts to contact as many others as possible within the least amount of time. Using the collected data points on who was able to talk to whom on the globe, the event’s effect on RF transmissions could be plotted over time. For the August 21, 2017 solar eclipse, the results were published in a 2018 paper by N. A. Frissell et al. in Geophysical Research Letters.
One point which they wished to examine during the 2023 solar eclipse were the plasma bubbles that form near the Earth’s magnetic equator, in regions like Brazil. These plasma bubbles cause a lot of interference, which in the preliminary data can be seen as a clear Doppler shift of the signal due to the diffusion of the ionosphere as the eclipse’s effect took hold. For the next solar eclipse in April 2024 another experiment is scheduled, which will give even more ham radio operators the chance to sign up and contribute to ionospheric science.
Top image: A schematic representation of the different ionospheric sub-layers and how they evolve daily from day to night periods. (Credit: Carlos Molina)
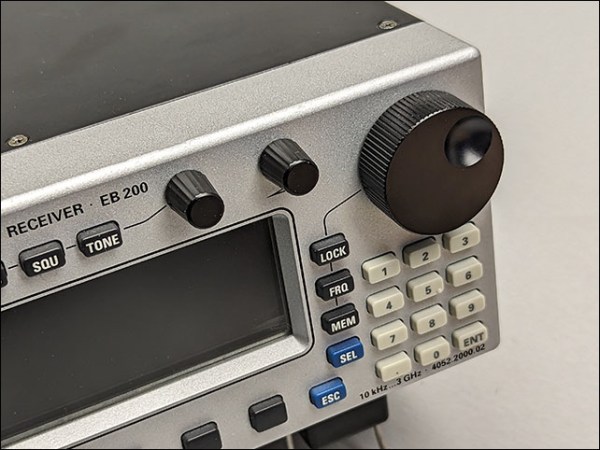
Recently [Roberto Barrios] got his hands on a Rohde & Schwarz EB200 monitoring and surveillance receiver that, despite its late 90s vintage, was in mint condition. Aside from damage to the main dial, that is, which was very much broken. With no off-the-shelf replacement available in 2023, the obvious answer was to get a close-enough dial knob with the rough proportions and use a lathe to machine it into shape. Initially, [Roberto] had used some filler material to replace the front of the original knob that was missing, but this was a decidedly inferior tactile experience with questionable long-term reliability.
Dimensions of the Rhode & Schwarz EB200 dial knob. (Credit: Roberto Barrios)
The challenge in replacing the original knob with a proper replacement was in how the dial knob is mounted on the receiver, as an internally threaded shell that goes on the internal dial encoder assembly. With a lathe at his behest, taking an off-the-shelf dial knob that accepts a 6 mm shaft and turning it into a compatible knob was a straightforward affair. Removing the excess material and creating the internal 1 mm pitch thread allowed the newly made knob to fit on the receiver like an OEM part. The only niggle was having to remove 1.8 mm off the face of the brass body to get the knob to sit close to the front panel.
Unlike the old patched-up knob, this new one is fully out of metal and has the absolutely essential feature of the recessed area for easy fine-tuning. Although perhaps not the most exciting fix for old gear, it’s decidedly essential to keep it functional.
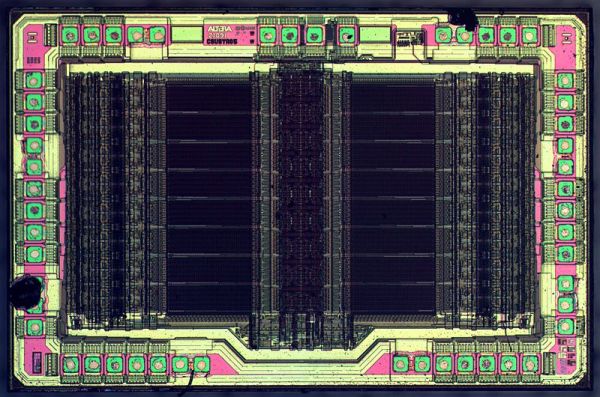
That EPROMs, EEPROMs and kin can be used as programmable logic should probably not come as a major surprise, but [Jimmy] has created a Lisp-based project that makes using these chips as a logic array very straightforward. All it takes is importing the package into one’s Lisp project and defining the logic, before the truth function generates the binary file that can be written to the target chip.
Suggested is the one-time-programmable AT27C512R EPROM (64k x8), but any 8-bit parallel interface (E)EPROM should work, with non-OTP chips being nice unless the chip has to go into a production device. A possible future improvement is the addition of 16-bit (E)EPROM support.
The use of EEPROMs is common with PLA-replacements, as with, for example, the Commodore 64, where the official PLA IC tends to go bad over time. Due to the complexity of the logic in these PLA ICs, here CPLDs are used, which internally are still EEPROM-based, but feature many more programmable elements to allow for more complex logic. If all you need is a bit of glue logic and you are looking for something in between a stack of 74-logic ICs and a CPLD, an EEPROM may be just be the solution, regardless of whether you prefer to create the binary image with Lisp or C.