Measuring How Components React To Extremely Cold Temperatures

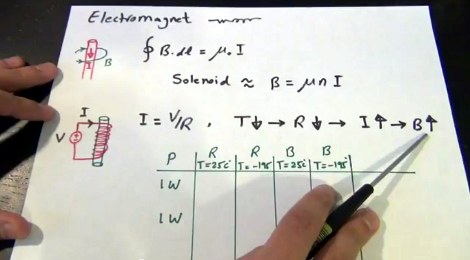
[Shahriar Shahramian] is playing with some liquid nitrogen in order to see how various components react to extremely low temperatures. After the break you will find forty-one minutes of video in which he conducts and explains each experiment. This does have practical applications. If you’re designing hardware for use in space you definitely need to know how the hardware will be affected. We’ve actually seen test rigs built for this very purpose.

During the presentation he doesn’t water down the concepts observed, including the equations governing each reaction to temperature change. If you’re in the mood for a little bit lighter faire you should check out some of the liquid nitrogen cooking hacks like this super-cold cocktail pops project.


Continue reading “Measuring How Components React To Extremely Cold Temperatures”

Task Scheduler For Arduino

For their recent high altitude balloon project LVL1 member [Brad] programmed a pretty complicated brain based on an Arduino. It was responsible for collecting data from all of the sensors, and reporting back in a few different ways. One of the things he did to simplify the project was develop a task scheduler for the Arduino board. It lets you add functions to a queue of jobs, along with data about when they should be run.

The task scheduler does make coding a bit easier, but where it really shines is in situations like this where you don’t have access to the hardware if there’s a problem. In his description of the scheduler [Brad] mentions the possibility that one of the sensors could fail as the cold of the upper atmosphere takes its toll. This could leave the whole system stuck in a subroutine, and therefore it will stop sending reports back to the team on the ground. Since he was using the task scheduler it was a snap to add watchdog timer servicing to the mix. Now if program execution gets stuck the watchdog will reset the chip and all is not lost.

[Thanks  JAC_101]

Building Fiber Optic Chandeliers

This chandelier keeps the light source hidden and uses fiber optics to illuminate the acrylic diffusers. It’s the second attempt [TheCreator] has made at building his own. Bother projects are interesting in their own way.

The first attempt used marbles as diffusers and had a much different look to it. This time around he’s using what he calls acrylic dowels. They’re not round, but square (which is why we’re not sure dowel is the right term), and he says they work better than marbles for several reasons. The marbles weren’t very heavy so they didn’t really weigh down the glass fibers to keep then straight. They were also difficult to attach to the fibers and prone to breakage.

To attach the dowels he drilled a hole in the end and epoxied a fiber optic strand in place. To direct light into the other end of the filament he built his own frustum (a pyramid with the tip cut off) of inward facing mirror. This helps to focus what is coming from the RGB LEDs in the appropriate direction so that as much light as possible makes it into the fibers.

He didn’t really give any final thoughts so we wonder if it puts out enough light for his needs. We’re sure that if it’s purely a mood piece he’s satisfied.

Building A Steam Punk Style Time And Weather Display

This is [Pierre Cauchois’] digital weather display. Since weather displays are ubiquitous in this day of smart phones in every pocket he went out of his way to give it a unique look. He started with a wooden voltmeter case, swapping the ancient display for a modern LCD screen.

He used Gadgeteer components for the retrofit. The images for the LCD are stored on an SD card and displayed on demand. Since the digital bezel will be the same no matter what the time or environmental conditions [Pierre] used the power of the .NET framework that drives the system. He made up an image using magenta for all of the dial openings. This way a sprite can be used just for the changing numbers, weather icon, and graphing area.

Looking at all that went into coding the project we think the Gadgeteer components are perfect for those that are well-versed in upper-level languages and don’t really want to deal with low-level microcontroller issues.

[Thanks George]

Robot Trash Can Catches Anything You Throw Near It

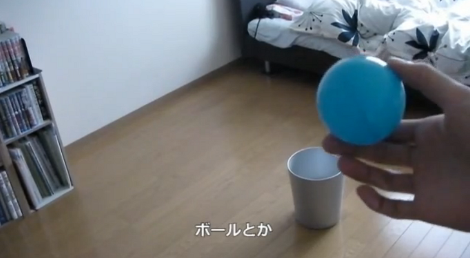
This guy is about to toss the blue ball half way between the book shelf and the waste basket. By the time it gets there the waste basket will have moved into position to catch the ball perfectly. It’ll do the same for just about anything you throw.

We’re unable to read the captions but it looks like this may have been made as part of a commercial which is shown in the first few seconds of the video after the break. From there we see the development of a locomotive mechanism which will fit into the bottom of the bin. It start as a single swivel wheel, but gets more complicated quite quickly. Once the low-profile three-wheeler is milled and assembled it’s time to start writing the code to translate input from a Kinect 3D camera and extrapolate the position for catching the trash. The final result seems to do this perfectly.

Continue reading “Robot Trash Can Catches Anything You Throw Near It”

Giving An ATX Bench Supply The Case It Deserves

Your bench supply doesn’t need to look sad just because you’re using an ATX power supply instead of a commercial product. Follow [Ian Lee’s] example and you could have beautiful wooden enclosures for the tools in your own shop.

The woodworking skills used here aren’t all that advanced, but you need to have a knack for it so we suggest running some test pieces before you start the actual build. [Ian] ran a dado for the front and back panel in each piece of the wood sides. At each corner the inside of the the pieces were mitered at 45 degrees. To put it all together he laid the pieces end to end on a the work bench, then applied painters tape to the outside of the joints. This holds the joints together so that he can flip the collection over, apply glue, and then start hinging the sides into place. It’s almost like rolling up a box.

As with other ATX supply projects we’ve seen [Ian] designed this so that the PSU can be swapped out later if necessary. Instead of wiring his own cable harness he used an ATX breakout board. To get the interface layout he wanted he mounted the banana jacks separately and just ran jumper cables back to that board.

Self Balancing Robot Uses Cascading PID Algorithms

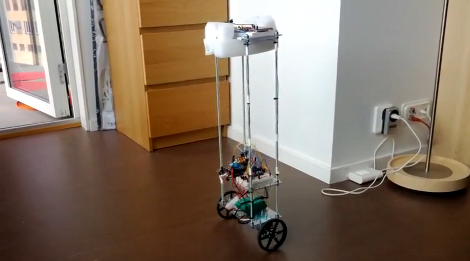
At this point we’re beginning to think that building a self-balancing robot is one of the rights of passage alongside blinking some LEDs and writing Hello World on an LCD screen. We’re not saying it’s easy to pull off a build like this one. But the project makes you learn a lot about a wide range of topics, and really pushes your skills to the next level. This latest offering comes from [Sebastian Nilsson]. He used three different microcontrollers to get the two-wheeler to stand on its own.

He used our favorite quick-fabrication materials of threaded rod and acrylic. The body is much taller than what we’re used to seeing and to help guard against the inevitable fall he used some foam packing material to protect the top level. Three different Arduino boards are working together. One monitors the speed and direction of each wheel. Another monitors the IMU board for position and motion feedback, and the final board combines data from the others and takes care of the balancing. Two PID algorithms provide predictive correction, first by analyzing the wheel motion, then feeding that data into the second which uses the IMU feedback. It balances very well, and can even be jostled without falling. See for yourself in the clip after the break.

Continue reading “Self Balancing Robot Uses Cascading PID Algorithms”