Automotive Backup Alarm

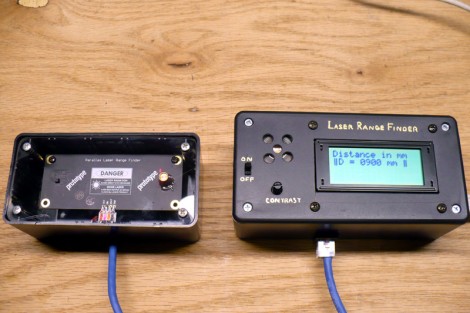
[Dino’s] project of the week is a backup alarm for your car. This is a feature that has become popular on many large vehicles like SUVs where visibility is an issue when moving in reverse. But it doesn’t sound like he was motivated by the need to have this in his own car. Instead, he was looking for something to build using a laser range finder.

[Joe Grand] (the brains behind DEFCON badges) has been working on an inexpensive laser range finder for Parallax. He sent one of the first-run prototype boards to [Dino] for beta testing and we’re glad that [Dino] decided to show it off. It uses a small red laser diode and a camera module to measure distance in millimeters. The board communicates serially and this particular project uses an Arduino along with a character LCD and speaker to display distance and sound an alarm when the car is within a meter of an object.

Check out the video after the break to see the build in its entirety. The system works reasonably well, if the object you’re about to hit is perfectly lined up with the laser dot.

Continue reading “Automotive Backup Alarm”

Measuring RPM With Reflective Sensors

[Arao] wanted to measure the RPM of a spinning wheel using parts that he could scavenge from his junk box. A bit of thought led him to build a reflective sensor which can measure the spinning of a wheel (translated).

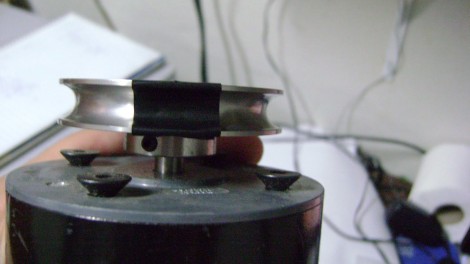
He got his hands on an infrared phototransistor which had been used as part of the remote control for some consumer electronics. Snooping around with his multimeter helped him establish the pin out of the device. By positioning an IR LED inside of a shroud, yet adjacent to the phototransistor, he can measure the intensity of the LED’s light as it is reflected off of nearby surfaces. The pulley seen above has a piece of electrical tape on it. When this passes by the LED, less of the infrared light is reflected and the drop in intensity is picked up by the phototransistor. [Arao] made the system rock-solid by rolling an LM358 op-amp into the circuit. He’s posted the schematic as well as some screen shots from an oscilloscope during testing.

Semi-automatic PCB Drill Press

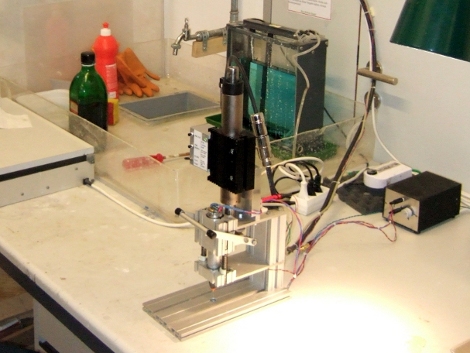
Kiss the days of breaking bits while drilling through-hole PCBs goodbye thanks to this semi-automatic drill press (translated). Now it’s not going to line up the bit with the exact location of the hole (that would make it a fully automatic drill press). This works by lining up the board manually, then stepping on a pedal to activate the plunging motion of the drill.

A linear motor is responsible for the smooth, accurate motion along the Z-axis. Many hobby setups use a Dremel drill press, or even rely on prayer-based systems such as doing it free-hand with a rotary tool or by using a piece of acrylic as a guide hole. The hobby drill press tends to have some play in it and free-handing with tiny bits that are as fragile as glass both result in far too many broken drill bits. In the video after the break you can see that the linear motion is perfectly plumb with the table of the device, preventing the movements that cause breakage. The addition of the pedal makes it easy to position the boards because you can use both hands.

Having a tool like this takes all of the frustration out of using through-hole parts.

Continue reading “Semi-automatic PCB Drill Press”

Building A Robot Without Using A Machine Shop

We usually avoid the prospect of buying new tools just for one project. In the long run we’re sure we’d use them again, but sometimes even with that outlook you can’t afford it. Case in point is our life-long-lust for a laser cutter; we just can’t justify the upfront cost but we sure would use it constantly if we had one.

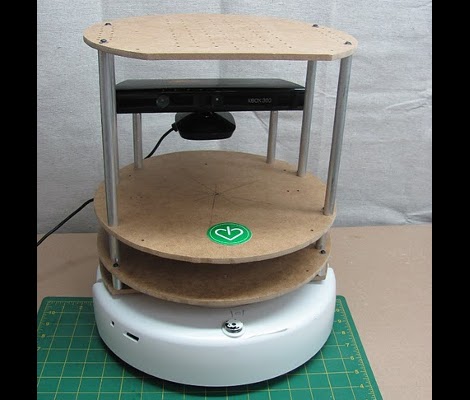
If you do find that you’re interested in taking on a project that calls for laser cut parts, [I Heart Robotics] shows you how to do it with a few simple hand tools. The bot seen above is their TurtleBot. You can cut your own parts using a laser cutter, you can buy a kit from them, or you can bust out a ruler, compass, drill, coping saw, printer, and tape to make the pieces by hand.

It’s a simple enough concept. Print out the templates, tape them to your hard board, then start drilling and sawing. You won’t get the precision a machine tool can, but in some cases you don’t need to be all that perfect.

[via Adafruit]

A Pick And Place Machine For Under $1k

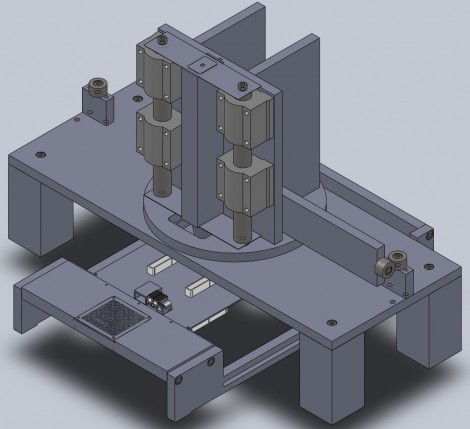
Pick and place machines are marvels of modern technology. They the can lift, orient, align and drop tiny electronic components onto a circuit board that is headed for the reflow oven. On an industrial scale they move so fast it’s a blur in front of your eyes, and they use imaging to ensure proper placement. But that kind of specialized equipment is going to cost a real bundle of money. [Bootstrap] is working on a design that will still be feature-rich, but will allow you to purchase your own pick-and-place machine for under $1000.

The design calls for a two-headed beast. One head is a vacuum tweezers which is capable of moving the parts. The other is a digital microscope that is used for precise positioning. The two heads pivot in and out of place, but it’s the table which holds the PCB that is responsible for positioning the parts. Although there’s nothing built yet, the depth of information that [Bootstrap] published in his post is impressive. He’d like your help making sure there’s no errors in the design before he builds the first three prototypes. If you’re a Solidworks guru he’ll even send you the files upon request.

We’ve seen a couple of different pick and place machines lately so take another look if you missed them the first time.

[via Adafruit]

10,000 Year Clock Sounds Like An Indiana Jones Flick – Makes Us Wonder If We’re Being Trolled

So you hear that someone is building a clock that will run for 10,000 years and you think ‘oh, that’s neat’. Then you start looking into it and realize that it’s being built on a mountain-sized scale in a remote part of the US and things start to get a bit strange. As much as it might sound like a Sci-Fi novel (or some creative trolling), the Long Now Foundation is in the process of building and installing a clock that will chime once per year for the next ten millennia.

The clock, currently under construction will be over 200 feet tall, residing in a shaft drilled in a limestone mountain in West Texas. The allusion to [Indian Jones] sprung to mind when we read that the shaft will be drilled from the top down, then have a shaft with a robot arm installed to mill a spiral staircase into the stone walls. And this isn’t the only clock planned; a second site in Nevada has already been purchased.

There are a lot of interesting features, not the least of them is a ‘chime engine’ that plays a unique tune each year that will never be repeated again. [Alex] sent us the original tip to a Wired article that covers the project in incredible detail. But we also found a SETI talks video that runs for an hour. You’ll find that embedded after the break.

Continue reading “10,000 Year Clock Sounds Like An Indiana Jones Flick – Makes Us Wonder If We’re Being Trolled”

24 Cellphone Buttons Controlled With 6 Microcontroller Pins

[J8g8j] has been playing around with an old cellphone. He wanted to control it using a microcontroller but since there’s 24 buttons he wasn’t thrilled about hooking up a couple dozen relays to do the switching. Instead, he managed to control all 24-buttons using just 6-pins of a microcontroller.

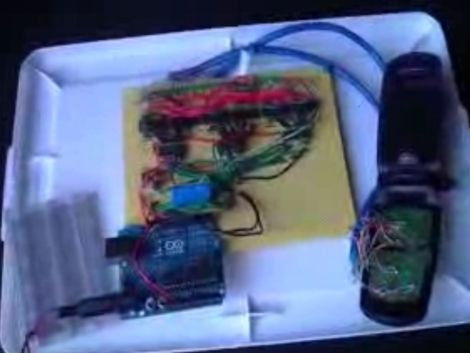
The proof-of-concept video that he posted on his site shows the phone responding to an arbitrary string of button presses. [J8g8j] spent the majority of his time reverse engineering how the phone’s keypad is wired. Once he figured out the rows and columns of the key matrix he soldered wires to access each of them. This turns out to be 14 connections. To these, he wired up a set of opto-isolators to handle the switching. These are in turn controlled by a set of three 74HC138A 3-8 bit decoders. what’s left are six input pins that leave plenty of room for him to hook up other items to the Arduino serving as the microcontroller.