LEDs Invade Coffee Table Crevice

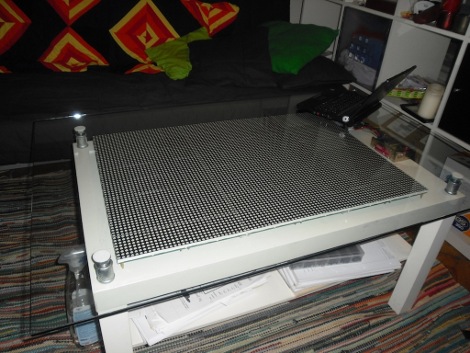
That’s a lot of LEDs, and a little bit of glass cleaner. [Tobias] spiced up his IKEA coffee table by adding 6144 LEDs. This is a larger realization of SparkFun’s LED coffee table which used 64 8×8 modules. [Tobias] sourced three display boards from Sure Electronics for a total of 96 8×8 modules. These boards are addressed through a serial interface; four serial lines for each board but a shared data bus for each of the row select pins and the data/latch/clock pins.  This method uses 19 of the 20 pins on the Arduino that drives the display. After the break you can see a demonstration. If this is more than you need there’s always the 112-LED and 81-LED table projects that can produce a full color range. Continue reading “LEDs Invade Coffee Table Crevice”

Dr. Boardman’s Color Conundrum

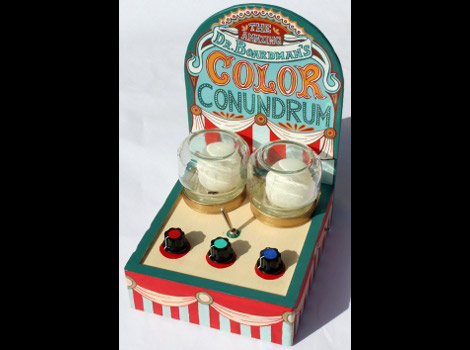
We feel like trumpets should be sounding. Someone took the overused project of connecting RGB LEDs to a microcontroller and produced something useful. [Paul] created Dr. Boardman’s Color Conundrum which works much like a simple mechanical coin-op game you might find at a carnival. When switched on, a random color is displayed by the ping-pong ball covered LED on the left. The player then manipulates three knobs to color-match the two lights.

Inside you’ll find a minimalist set of hardware. An ATmega8 polls the three potentiometers and uses them to mix the appropriate user color. Everything is wired-up using prototyping board and draws power from two AA batteries. He’s using a random seed stored in EEPROM and increments it every time the uC boots up. This keeps the input color different for every game.

Fun and simple, it’s not going to make your guests marvel at the complexity but [Paul’s] come up with a unique game that we think has marketing potential.

Give 1984 Mac A Leopard Makeover

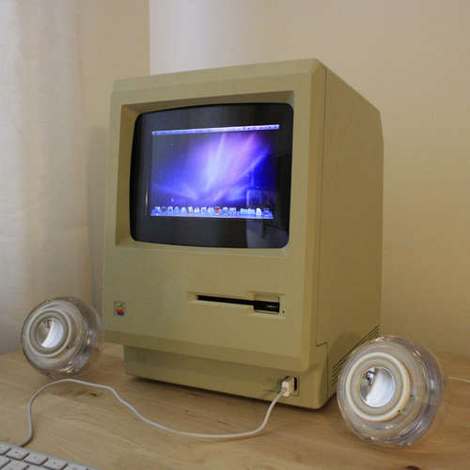
[Jake Howe] brought his 1984 Mac up-to-date by cramming new guts inside of the classic case. The goal from the start was to run OS X Snow Leopard on the machine without altering the externals. He heated and formed acrylic around the original CRT screen to make a bezel for the replacement LCD screen. The floppy drive slot was used to hide an SD card slot and USB port. The original serial port openings were even outfitted with their own USB ports. In the end he did a brilliant job of hiding the Hackintosh mini-ITX board and components inside this iconic enclosure.

RC Truck Source For Robotics Platform

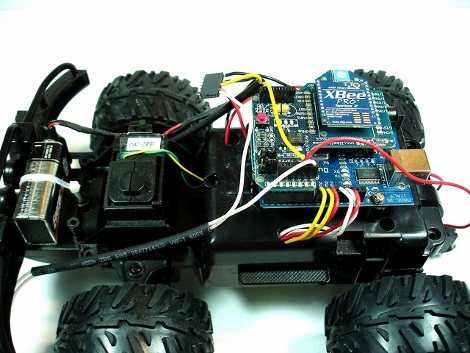
[Michael] sent us a link to his RC robotic platform. He started with the same RC toy as the iPhone Robot (CAR) but ended up with a blank slate waiting for more features. What he has is an Arduino with a motor driver, three bump switches for the front and rear, and a XBee module.  On the other side of things he used a SparkFun USB to FTDI connector to interface another XBee module with a PC in order to use Processing.

In the clip after the break you can see the motor control needs to have more fine-tuning done so the beast isn’t just out of control when running. But there’s a ton of potential here. It should not be a problem to add at lease rudimentary video feedback from the device. The Arduino is currently only being used marginally, leaving plenty of space to add on-board sensing such as IR, proximity, or light.

It’s a clean start, we expect to see updates! Continue reading “RC Truck Source For Robotics Platform”

USB Oscilloscope

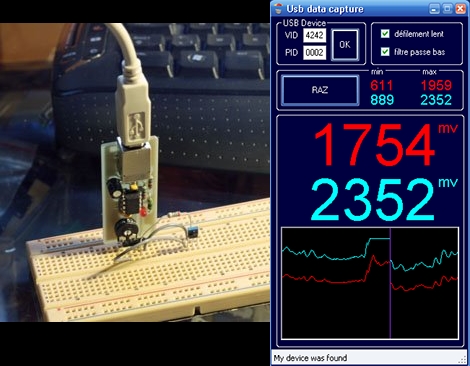
Here’s a USB oscilloscope project from a few years back. It’s easy to build on a single-sided PCB and very cheap because it uses just a handful of parts. At the center, an ATtiny45 microcontroller uses its ADC capabilities for the two traces and also handles the USB connectivity. The internal oscillator is used and trimmed up for accuracy by referencing the USB clock. On the PC side of things, a program written in C# displays the data coming over the serial bus. Quick, small, and useful; a schematic, board layout, firmware, and PC software sources are all available for download.

[Thanks Shri]

Space Invaders Clock 6 Years Ahead Of Pong Clock

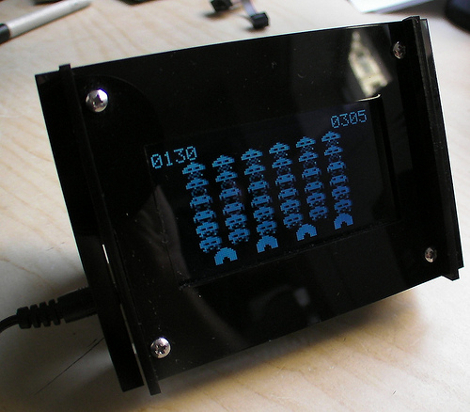
Space Invaders came out in 1978, six years after Pong. That means this Space Invaders clock uses newer technology, right? Nope, it’s the same hardware as the Adafruit Pong Clock with some updated firmware. Still, as you can see after the break, the effect is pretty nice. Pong was cool, but having a clock that scrolls through several classic games would be cooler.

[Dataman], the guy responsible for this firmware hack shared his code. It should be easy enough to alter it for any clock using a KS0108 graphic LCD screen. So what’s next? Can someone pull off a black and white Ms. Pac-Man that looks decent on the 128×64 display?

Continue reading “Space Invaders Clock 6 Years Ahead Of Pong Clock”

A VU Meter For Your PSP

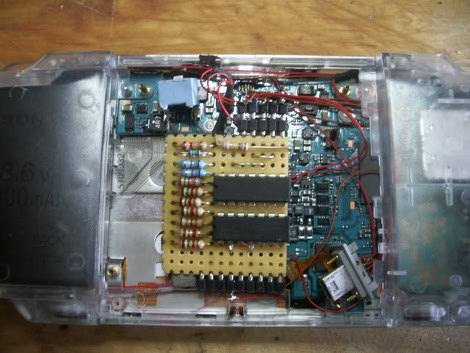
[Christian Doran] wanted some blinky goodness to go along with the tunes on his PSP. He built a VU meter circuit around a couple of LM324 op-amp chips and fit it into the UMD space on the back of the PSP. Using surface mount LEDs and some fine wire he lined up a string of indicator lights round the circle on the clear UMD cover. As you can see in the video after the break, the back of the case now pulses along with the music.

[Christian] notes that building the VU circuit around an LM3915 would have been much easier but he’s working with what he has on hand. Looks like he achieve the effect he was after. If you want to learn a bit more about how the op-amps work, take a look at the tutorial from our links post.

Continue reading “A VU Meter For Your PSP”