Recovering A Corrupted EEE PC BIOS

recovering_eeepc_bios

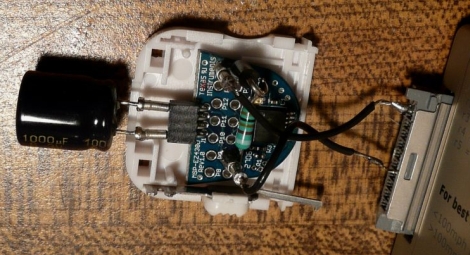
[Jeremy] had an ASUS EEE PC 1000HE netbook on his hands which had succumbed to a corrupted BIOS. In most situations, people replace a motherboard when the BIOS is damaged beyond repair, but considering the price of motherboards, especially those built for portable devices, he simply refused to go that route.

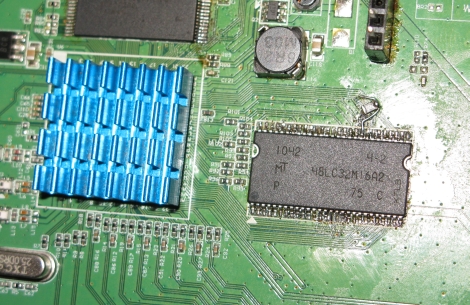
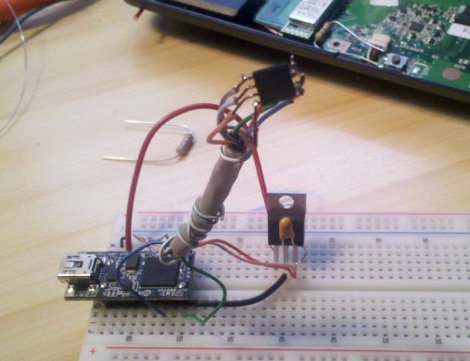
Instead, he took it apart and did a little investigation to find out what SPI flash chip ASUS used in the netbook. With that information in hand, he put together an SPI flash programmer using a breadboard and a DLP-USB1232H USB to UART module. He couldn’t program the flash chip in-circuit, so he had to desolder it and deadbugged it onto his programmer. Using a few Linux-based flashing tools, he was able to reprogram the chip with a functioning BIOS in short order, saving him from a costly motherboard replacement.

While some motherboard manufacturers have built in secondary BIOS chips to prevent the need for this sort of recovery, it’s nice to know that the process is relatively straightforward, provided you have some basic soldering and Linux skills.

This also isn’t the first time we’ve seen someone recover an EEE PC from the brink – if you’re looking for an Arduino-based alternative, be sure to check this out.

Minimalist DIODER Hack Requires No External Microcontroller

pic_dioder_hack

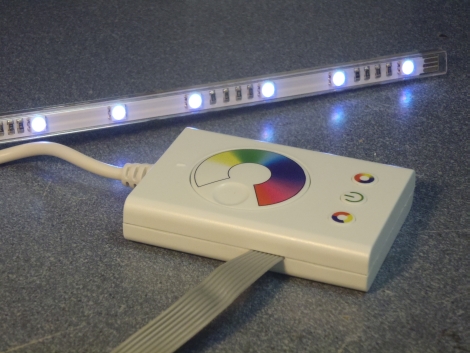
Hackaday reader [chrysn] picked up a 3-button RGB model DIODER light from IKEA and thought he might as well take it apart to see what he could do with it. Having seen several DIODER hacks featured here, he knew it was easily hackable, but he didn’t want to simply rehash what other had already done.

All of the DIODER hacks we have come across thus far incorporate some sort of AVR chip or add-on board to expand its capabilities. [chrysn] saw that the controller already had a PIC16F684 inside, and thought that installing his own firmware onto the existing hardware would be a far more simple solution. He installed a small programming cable onto the DIODER’s control board, and using his PICkit2 programmer, flashed the chip with a custom firmware image.

His modifications worked great, and [chrysn] says that there is plenty potential in the existing hardware to have all sorts of fun with it. Even so, he notes that there are several AVR-flavored drop-in replacements that can be used if that happens to be your microcontroller family of choice.

Toy Car Fitted With Lights And Sirens Is A Children’s Delight

police_car_lights_and_sirens

[Nathan], a member of the DangerousPrototypes forums, was looking for a project he could use to enter the 7400 logic competition they are holding. His kids had a small ride on police car, but the light bar on top contained no lights, and the car made no sounds when his children were in pursuit of baddies around the house. [Nathan] had all the inspiration he needed, and took to his workshop in order to fix this glaring oversight by the toys’ creators.

He designed a circuit based loosely around a Cylon-style light that he saw a while back at the Evil Mad Scientist Labs, which employed an oscillator and a 4107 decade counter to control the lights. His design uses a 74HC04 hex inverter as the oscillator, while the decade counter is used to modulate the siren’s frequency and control the rotating LED beacons.

The final result is great if you ask us. An “unnamed adult female” in the house was not nearly as impressed by the additions based upon how much time [Nathan] spent on the project, but his children were absolutely thrilled.

Continue reading to see a quick video of the revamped police car in action.

Continue reading “Toy Car Fitted With Lights And Sirens Is A Children’s Delight”

Extending Battery Life While Taking Time Lapse Photos

msp430_camera_control

[Peter] loved using his GoPro HD camera, but he found the time lapse functionality a bit lacking. It wasn’t that there were not enough settings to satiate his needs, but that the camera would run through its batteries in just a few short hours.

He found that the camera did not turn off or enter any sort of sleep mode between shots, wasting precious battery life. He could have simply added a bigger external battery pack to the camera, but for the sake of portability, he had a far better idea in mind.

The GoPro has a pretty well documented interface called the “Hero Bus”, so all it took was a little bit of online research before [Peter] had all the information he needed. The camera has a neat feature that immediately snaps a picture when it is powered on, so he decided that he would use a microcontroller to turn the camera on and off at specific intervals, rather than using its built-in time lapse function. He chose a Texas Instruments MSP430 for the job, since it is very well known for being a power miser.

Once he had his code up and running, he connected it to his camera and found that it worked perfectly right off the bat. Now, he can take anywhere between 1,500 and 2,000 shots before the batteries run out, instead of the measly 200 he was getting without the modifications – quite an improvement!

Rear Window LED Display Gives Other Drivers A Piece Of Your Mind

rear_window_led_matrix

[Gagandeep] was sick and tired of discourteous drivers on the highway, so he decided that he would put together a display to let them know what he thought of their poor driving skills. He planned on putting the display up in the rear window of his car, so he had to ensure that it did not obstruct his view while driving.

He decided that an LED matrix would be the best way for displaying images and text while on the go, so he got busy constructing a 40×16 mesh grid for his rear window. Using a wooden template to get the spacing and positioning just right, he spent several days soldering the 600+ LEDs to one another. He used 74HC595 shift registers to manage the LEDs in groups of 5 columns, while an ATmega AT89C51 was tasked with generating the text and images to be displayed. All of the ICs were deadbugged in place, helping achieve [Gagandeep’s] desire of keeping his view unobstructed.

While we’re not well-versed on the legality of such a display, it looks great when animated. There are plenty of pictures of the grid in various stages of construction as well as videos of it in action in his Picasa album, so be sure to check them out. If you are looking for code or Eagle files, you can find those here.

Creepy Delta Bot Follows Your Every Move

tim_tracking_interactive_mechanism

The creation you see above is the work of art student [Daniel Bertner] who is wrapping up his Bachelor of Fine Arts degree at the School of the Art Institute of Chicago. He calls the incredibly intriguing, yet somewhat disturbing device “TIM”, which is short for Tracking Interactive Mechanism.

A culmination of different projects he has tinkered with over the last year or so, TIM is an interactive delta bot with an attitude. Mounted on the wall of the Art Institute’s Sullivan Galleries, TIM is as interested in you as you are in it. While passers by investigate the curious device, it watches them back, following their every movement.

The robot’s motors are controlled using an Arduino, and its ability to track people standing nearby is provided via a video stream processed with Open CV.

It really is a cool project, and we think it would make for an awesome prop in some sci-fi horror flick. Check out the video below to see TIM’s personality in action – he doesn’t like it when people stand too close!

Continue reading “Creepy Delta Bot Follows Your Every Move”

Unbricking And Upgrading An ASUS Wl520 Router

unbricking_upgrading_asus_wl520

[Andrew] has an ASUS wl520-gU router that he is pretty fond of, despite its numerous problems. CPU clock bug aside, the router only has 16MB or memory like many others on the market. While tooling around with the bootloader he bricked the device, so he decided it was time for an overhaul.

After some searching online, he found that the router could be unbricked by shorting out one of the pins on its flash chip. With an emergency unbrick button installed on the board, he can now reset it in seconds by power cycling the device.

Now that he had a working router again, he proceeded to remedy his initial gripe – the lackluster amount of memory. He soldered in a 512Mbit (64MB) module in the original chip’s place, crossed his fingers and booted the router. It started up just fine, so he ran a few commands to instruct the router to recognize the new memory capacity. After rebooting, he found that it only recognized 32MB of RAM, which was remedied by soldering a 22 Ohm resistor to one of the module’s pins.

It did take a bit of careful soldering to get things upgraded and working, but we think it was well worth the effort.