Hackaday Prize Entry: CNC Mill Lets Kids Engrave On The Fly

The manufacturing revolution has already begun, and there are 3D printers, CNC machines, and laser cutters popping up in garages and workspaces all around the world. The trouble with these machines is that they’re fiddly to use, and you don’t want a kid playing around with them.

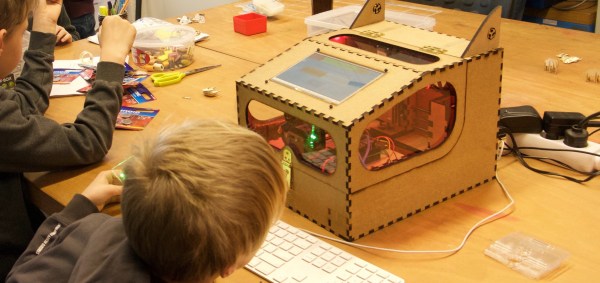
[moritz.messerschmidt]’s Hackaday Prize entry is a desktop Badgemaker that engraves acrylic name badges for kids. Under the hood, an Arduino with a custom-built shield with 3 SilentStepStick stepper drivers on it operates the three NEMA-11 motors. Meanwhile, the kids interact with a 7” touchscreen powered by a Raspberry Pi.

Once the kid selects what to engrave, motors move the piece of acrylic against a rotary tool’s milling bit, carving the acrylic as instructed. These cards are then equipped with watch batteries and LEDs to light up.

The touch screen is key. Bummed out by basic CNC machines that were difficult to use — like hobbyist 3D printers with a newbie-befuddling interface — [moritz.messerschmidt] went out of his way to make the interface kid-friendly, with just a simple set of choices necessary for creating one’s own name badge.

Is this a feature-packed CNC machine with all the bells and whistles? No, but that’s not the point. The purpose of the Badgemaker is to introduce a new generation to personal fabrication technology. It’s a toy, but that’s the point: a CNC machine that’s so easy to use, even a child can do it.

Hackaday Prize Entry: Thingspeak IoT Heart Rate Monitor

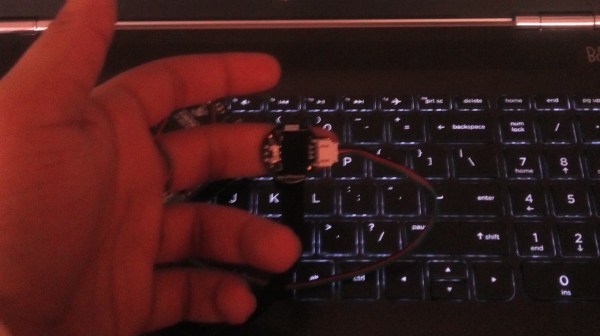
[Naman Chauhan]’s 2017 Hackaday Prize entry consists of a heartbeat detection and monitoring system that centers around everyone’s favorite WiFi board, the ESP8266. The monitor is hooked up to the patient’s finger, keeping track of his or her vitals and publishing the data on the cloud.

By using Thingspeak to manage the data, [Naman] leverages the platform’s data visualization and analytical features. Also, by making the data accessible on the cloud, he offers an intriguing opportunity to help friends and relatives to monitor the data. If you think about it, if you had a loved one in the hospital, wouldn’t having all of his or her chart available on your phone be great?

Using An Arduino To Re-Create A Computer’s Keyboard Decoder

[Max Breedon] found an old Apple IIe clone twenty years ago. He recently dug this Epson AP-200 out of the salvage heap and quickly discovered that the keyboard decoder chip was fried. The old chip was way too obscure to source a replacement — and soon this post will be the top Google result for the string, ‘C35224E’ — so he busted out his trusty UNO and created a replacement keyboard decoder.

Unlike the Apple II, where all the keyboard decoding happens on the keyboard, this clone used a dedicated chip on the main board. Although it’s a rare part that’s virtually ungoogleable, this chip’s architecture and pinout can be figured out by testing out every trace for continuity. After locating what looked like four data pins, he had the Arduino send signals onto the clone to see what characters popped up. That didn’t work, but it led him to idea that two of the wires were clock and data, and after a bit of experimenting figured out that the third pin was a latch enable of some sort that sent the character.

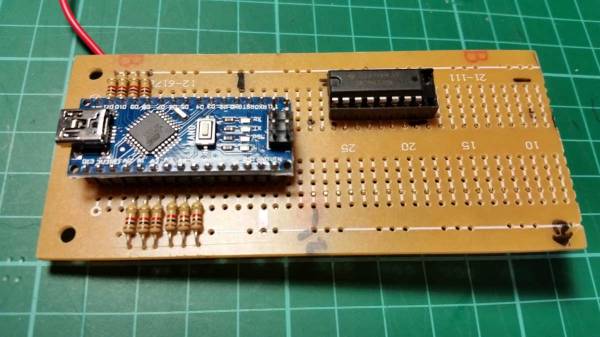
So, [Max] created an Arduino rig to do the same thing. The Arduino uses a shift register to interact with the keyboard’s 8×10 matrix, and the sketch translates any serial data it receives into the keypresses the clone is expecting. After prototyping with the UNO, [Max] hardwired an Arduino Nano (as well as the shift register) into a daughter board with pins extending into the old chip’s sockets. A permanent solution!

In addition to a weird keyboard controller that has been lost to the sands of time, this Apple IIe clone features a few more parts that are downright weird. There are two chips that are found in a few other Apple clones labeled STK 65301 and STK 65371, used as ASICs, MMUs, or a 20-IC expression of Wozzian brilliance condensed into custom silicon. There’s another weird chip in this clone, a 27c32 ROM loaded up with repetitive bits. There is no obvious 6502 code or strings in this ROM, so if anyone has an idea what this chip does, send [Max] a note.

Making Music With The Wind

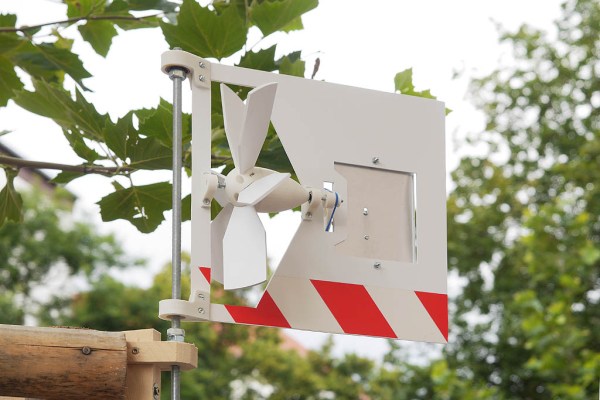
[Niklas Roy] built a windmill-powered music box for his backyard, and it was so awesome all the neighbors wanted to take a picture of it. Someone even liked it so much that he stole [Niklas]’s windmill in the middle of the night. (We kind of don’t blame them, it’s a gorgeously clean build.)

In the past few weeks [Niklas] has been mass-producing 20 windmills for the KIKK Festival 2017 to be held in November in Namur, Belgium. The windmills will operate in a cluster, and all play “Für Elise” when the wind blows. However, each one is driven independently and so the music is asynchronous. Since he was building a bunch anyway, he built a replacement windmill for his backyard, and documented how to do it.

Continue reading “Making Music With The Wind”

Reading 16 Rotary Encoders At The Same Time

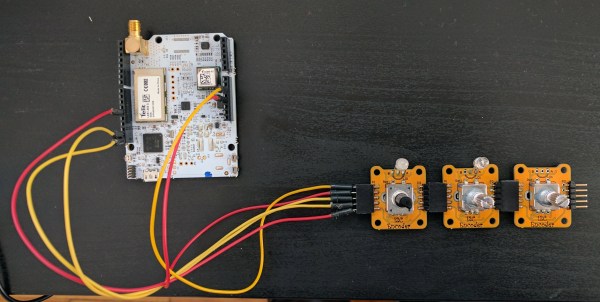
We’re digging these daisy-chainable encoders built by [fattore.saimon]. Each module consists of a rotary encoder attached to a PCB with a PIC16F15386 on the back. As we’ve covered in the past, the Microchip released their feature-rich PIC16 microprocessor just this year, and it’s great to see them start to crop up in projects. With 4 address jumpers on the back of each PCB, [fattore.saimon] is able to connect up to 16 of the encoders on the bus. The modules also have male and female plugs so he can connect them physically as well, to simplify wiring. Each module also has a PWMable bicolor LED for keeping track of each encoder’s setting.

If you’re interested in making your own you can buy the PCBs from Tindie or download the project files from the creator’s GitHub, including an Arduino library.

We love encoders here on Hackaday — building DIY encoders, as well as using them in projects like this precision cutting jig. And definitely read our colleague [Al]’s great piece on encoders.

Cable Bots, Arise! Domination Of The Universe Is At Hand

Most CNC robots people see involve belts and rails, gantries, lead screws, linear bearings, and so forth. Those components need a rigid chassis to support them and to keep them from wobbling during fabrication and adding imperfections to the design. As a result, the scale is necessarily small — hobbyist bots max out at cabinet-sized, for the most part. Their rigid axes are often laid out at Cartesian right angles.

One of the exceptions to this common configuration is the delta robot. Deltas might be the flashiest of CNC robots, moving the end effector on three arms that move to position it anywhere in the build envelope. A lot of these robots are super fast and precise when charged with carrying a light load, and they get put to work as pick-and-place machines and that sort of thing. It doesn’t hurt that delta bots are also parallel manipulators, which means that the motors work together to move the end effector, with one motor pulling while the matching motor pulls.

But while Cartesian CNC bots are sturdy workhorses, and deltas are fly-weight racehorces, neither can really cut it when you want to go gigantic. In terms of simplicity and scale, nothing beats cable bots.

Cable Bots

Cable bots use wires or strings pulled by reel-mounted motors, with dimensions limited only by the room to mount the motors and the tensile strength of the cables used. When the strings are tensioned you can get a surprising degree of accuracy. Why not? Are they not computer-controlled motors? As long as your kinematic chain accounts for the end effector’s movement in one direction by unwinding another cable (for instance) you can very accurately control the end effector over a very wide scale.

The following are some fun cable bots that have caught my eye.

Continue reading “Cable Bots, Arise! Domination Of The Universe Is At Hand”

Hackaday Prize Entry: Pyrotechnics Sequencer With Wireless Control

[visualkev]’s friend was putting on his own fireworks show by lighting each one in turn, then running away. It occurred to [visualkev] that his friend wasn’t really enjoying the show himself because he was ducking for cover instead of watching the fun. Plus, it was kind of dangerous. Accordingly, he applied his hacker skills to the challenge by creating a custom fireworks sequencer.

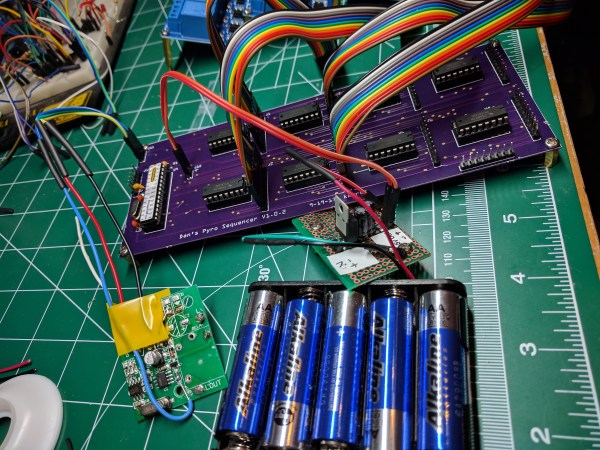
He used a custom PCB from OSH Park with an ATMega328P controlling eight TPIC6C595 8-bit shift registers, which in turn trip the 64 relays connecting to the fireworks. A 5V regulator supplies the project from 5 5AA batteries, and he kept the wires neat with 8-wire ribbon cables.

Starting the sequence is a generic wireless remote — a cheapie from Walmart — allowing [visualkev]’s friend can launch the fireworks with one hand while working the barbecue tongs with the other.