FruitNanny: The Raspberry Pi Baby Monitor For Geeks

Having a child is perhaps the greatest “hack” a human can perform. There’s no soldering iron, no Arduino (we hope), but in the end, you’ve managed to help create the most complex piece of machinery in the known galaxy. The joys of having a child are of course not lost on the geekier of our citizens, for they wonder the same things that all new parents do: how do we make sure the baby is comfortable, how many IR LEDs do we need to see her in the dark, and of course the age old question, should we do this with a web app or go native?

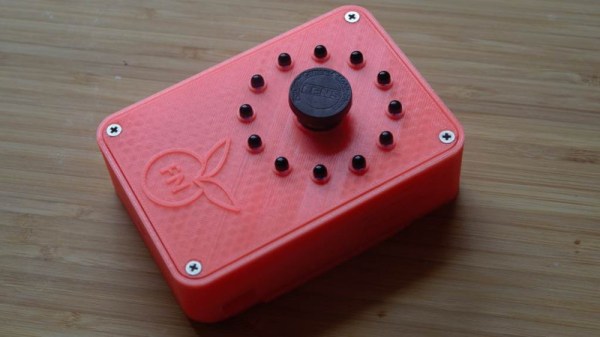
If you’re the kind of person who was frustrated to see that “What to Expect When You’re Expecting” didn’t even bother to mention streaming video codecs, then you’ll love FruitNanny, the wonderfully over-engineered baby monitor created by [Dmitry Ivanov]. The product of nearly two years of development, FruitNanny started as little more than a Raspberry Pi 1n a plastic lunch box. But as [Dmitry] details in his extensive write-up, the latest iteration could easily go head-to-head with products on the commercial market.

[Dmitry] gives a full bill of materials on his page, but all the usual suspects are here. A Raspberry Pi 3 paired with the official NoIR camera make up the heart of the system, and the extremely popular DHT22 handles the environmental monitoring. A very nice 3D printed case, a lens intended for the iPhone, and a dozen IR LEDs round out the build.

The software side is where the project really kicks into high gear. Reading through the setup instructions [Dmitry] has provided is basically a crash course in platform-agnostic video streaming. Even if a little bundle of joy isn’t on your development roadmap, there’s probably a tip or two you can pick up for your next project that requires remote monitoring.

It probably won’t surprise you that geeky parents have been coming up with ways to spy on their kids for some time now, and if you can believe it, some don’t even include a Raspberry Pi.

Making Music With The Wind

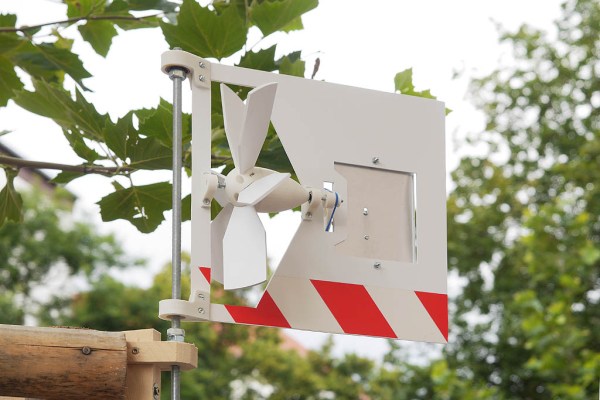
[Niklas Roy] built a windmill-powered music box for his backyard, and it was so awesome all the neighbors wanted to take a picture of it. Someone even liked it so much that he stole [Niklas]’s windmill in the middle of the night. (We kind of don’t blame them, it’s a gorgeously clean build.)

In the past few weeks [Niklas] has been mass-producing 20 windmills for the KIKK Festival 2017 to be held in November in Namur, Belgium. The windmills will operate in a cluster, and all play “Für Elise” when the wind blows. However, each one is driven independently and so the music is asynchronous. Since he was building a bunch anyway, he built a replacement windmill for his backyard, and documented how to do it.

Continue reading “Making Music With The Wind”

Reading 16 Rotary Encoders At The Same Time

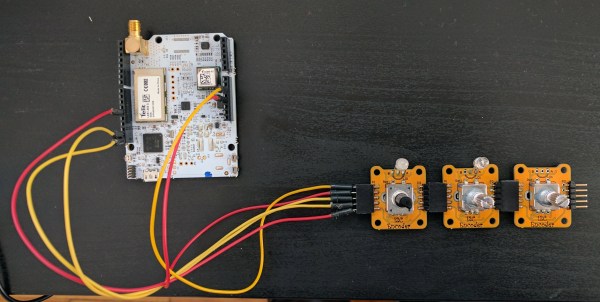
We’re digging these daisy-chainable encoders built by [fattore.saimon]. Each module consists of a rotary encoder attached to a PCB with a PIC16F15386 on the back. As we’ve covered in the past, the Microchip released their feature-rich PIC16 microprocessor just this year, and it’s great to see them start to crop up in projects. With 4 address jumpers on the back of each PCB, [fattore.saimon] is able to connect up to 16 of the encoders on the bus. The modules also have male and female plugs so he can connect them physically as well, to simplify wiring. Each module also has a PWMable bicolor LED for keeping track of each encoder’s setting.

If you’re interested in making your own you can buy the PCBs from Tindie or download the project files from the creator’s GitHub, including an Arduino library.

We love encoders here on Hackaday — building DIY encoders, as well as using them in projects like this precision cutting jig. And definitely read our colleague [Al]’s great piece on encoders.

These Twenty Projects Won $1000 In The Hackaday Prize

For the last several months, we’ve been hosting the greatest hardware competition on Earth. This is the Hackaday Prize, and we’ve just wrapped up the last of our five hardware challenges. For the Anything Goes challenge in this year’s Hackaday Prize, we’re asking hardware hackers to build the best, the coolest thing. No, it doesn’t matter what it is. We’re looking for technical skill and awesome applications. There are no limits here.

We just wrapped up the Anything Goes challenge last week, and now it’s time to announce the winners. These are the best, the coolest projects the Hackaday Prize has to offer.

The winners of the Anything Goes challenge are, in no particular order:

Anything Goes Hackaday Prize Finalists:

Continue reading “These Twenty Projects Won $1000 In The Hackaday Prize”

SegaPi Zero Shows Game Gear Some Respect

If you were a gamer in 1991, you were presented with what seemed like an easy enough choice: you could get a Nintendo Game Boy, the gray brick with a slightly nauseating green-tinted screen that was already a couple of years old, or you could get yourself a glorious new Sega Game Gear. With full color display and games that were ported straight from Sega’s home consoles, it seemed like the Game Gear was the true future of portable gaming. But of course, that’s not how things actually went. In reality, technical issues like abysmal battery life held the Game Gear back, and conversely Nintendo and their partners were able to squeeze so much entertainment out of the Game Boy that they didn’t even bother creating a true successor for it until nearly a decade after its release.

While the Game Gear was a commercial failure compared to the Game Boy back in the 1990s and never got an official successor, it’s interesting to think of what may have been. A hypothetical follow-up to the Game Gear was the inspiration for the SegaPi Zeo created by [Halakor]. Featuring rechargeable batteries, more face buttons, and a “console” mode where you can connect it to a TV, it plays to the original Game Gear’s strengths and improves on its weaknesses.

As the name implies the SegaPi Zero is powered by the Raspberry Pi Zero, and an Arduino Pro Micro handles user input by tactile switches mounted behind all the face buttons. A TP4056 charging module and step-up converter are also hiding in there, which take care of the six 3.7 lithium-Ion 14500 batteries nestled into the original battery compartments. With a total capacity of roughly 4,500 mAh, the SegaPi Zero should be able to improve upon the 3 – 4 hour battery life that helped doom the original version.

There’s no shortage of projects that cram a Raspberry Pi into a classic game system, but more often than not, they tend to be Nintendo machines. It could simply be out of nostalgia for Nintendo’s past glories, but personally we’re happy to see another entry into the fairly short list of Sega hacks.

3D Printed Dashboard CB Mount Is Convoy Ready

Some may be surprised to hear that CB radio is alive and well in the 21st century. From disaster response to operating in areas without reliable communication infrastructure, there are plenty of reasons people are still reaching for their radio and not their smartphone. Unfortunately, modern automotive interior design doesn’t have such an enlightened view. It’s hard enough to get decent cup holders in some cars, let alone a spot to hang your microphone.

When presented with this problem in his Subaru Forester, [Alex Loizou] did what any modern hacker would, he 3D printed a mount that snaps into the stock dash. No drilling was required to attach his radio mount, it simply replaces a decorative trim piece that wasn’t doing anything anyway. Obviously this particular mount would only really work on the same year and make of vehicle as [Alex] has, but this is a good demonstration of how 3D printing can be used to adapt to existing hardware.

As is often the case when trying to print something to match perfectly with an existing object, there was a fair amount of trial and error required. It took a few attempts before [Alex] got the proper shape, and things weren’t made any easier by the fact he was doing his designing in TinkerCAD. While we appreciate the fact that TinkerCAD provides a web-based CAD tool that is easy enough for anyone to use, using a parametric design tool like OpenSCAD is generally preferred when you need to make slight adjustments to your model.

Software limitations aside, [Alex] managed to come up with a mount that not only holds his CB microphone, but also his handheld transmitter. All while looking about as close to stock hardware as something like this could. We especially like that he switched to a darker filament color for his final version to blend it into the dashes color scheme a bit better.

If your radio interest is a little full-fat for CB, take a look at what keeps ham radio alive and well in 2017, and if you’re a radio amateur with a hankering for the CB days we’ve got you covered.

Pop Goes The Haunted Jack-in-the-Box

Is Halloween sneaking up on you, too?  It’s less than two weeks away, but there is still plenty of time to build something that will scare the pants off trick-or-treaters and party guests alike. This year, Hackaday regular [Sean Hodgins] hacked his favorite holiday by taking something that ships with a base level of scariness and making it autonomous. What could be more frightening than a haunted toy?

The (decades-old) jack-in-the-box mechanism is simple. Turning the crank operates a mechanical music box that plays the traditional “Pop Goes the Weasel”. When the music box hits the high note, a jutting piece of plastic on the barrel of music box disturbs the other end of the latch, which frees the scary clown inside. [Sean] used a 100:1 DC motor to turn the crank from the inside, and a Pi camera to detect victims in the vicinity. Once the camera locks on to a face, the box cranks itself and eventually ejects the jester. Since most of the space inside is already taken up by the spring, [Sean] housed the electronics in a custom 3D-printed base with a hole cut out for the camera’s eye.

Many modifications are possible with a project like this. [Sean] is now in complete control of the latch operation, so he could make the clown pop appear instantly, or randomly, or sometimes not at all. Check out [Sean]’s entertaining build video after the break.

Want to make your own fright machine from scratch? We’ve got all the inspiration you need, from tabletop to trash can-sized monsters. Continue reading “Pop Goes The Haunted Jack-in-the-Box”