Cable Vise

New Cable-Based Vise Improves Woodworking Workshop

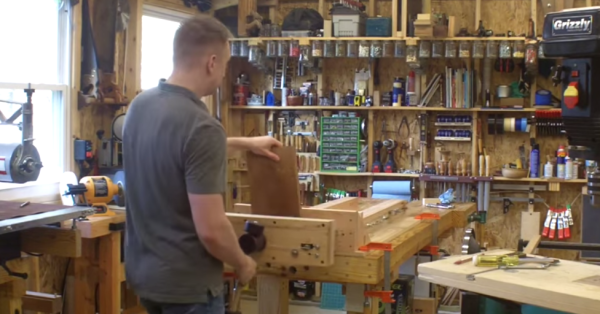
We are all aware of the typical wood shop vice, the type that is mounted underneath the workbench and takes forever to open and close by continuously spinning a large handle. These vises normally only open several inches due to the length of the operating screw. They are also not very wide because a cantilevered wide jaw would provide less force the further away it is from the center-mounted operating screw.
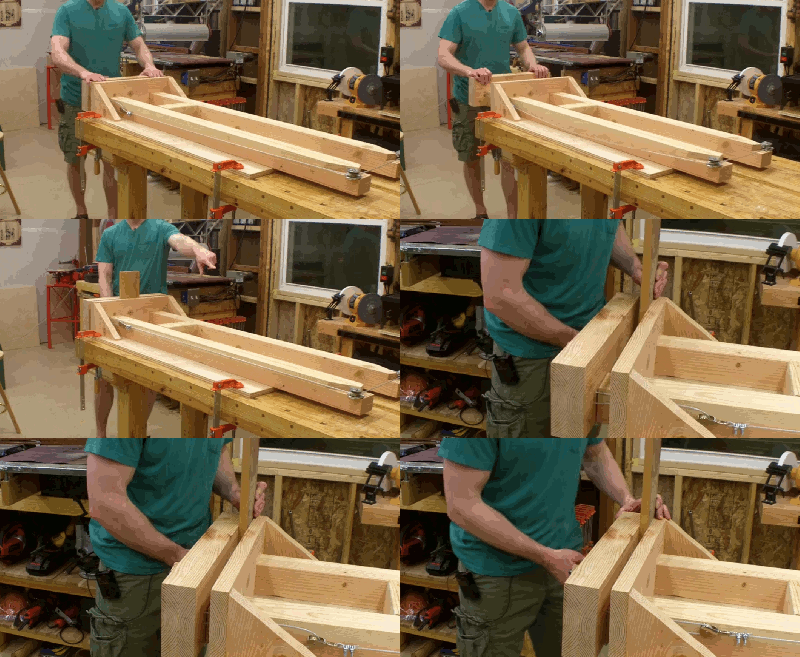
Cable ViseWood worker [Andrew] wanted a very versatile and large vise for his shop. It needed to be wide, provide equal clamping force along the jaw and be able to hold very thick objects as well. One more thing, he wanted it to have a quick release clamping system so there would be none of that continuous handle spinning nonsense.

Spoiler Alert: [Andrew] did it! The end product is great but the interesting part is the journey he had taken along the way. There were 4 revisions to the design, each one making the vise just a bit better.

Continue reading “New Cable-Based Vise Improves Woodworking Workshop”

DIY Belt Sander

Handheld Belt Sander Converted To Bench Top Unit

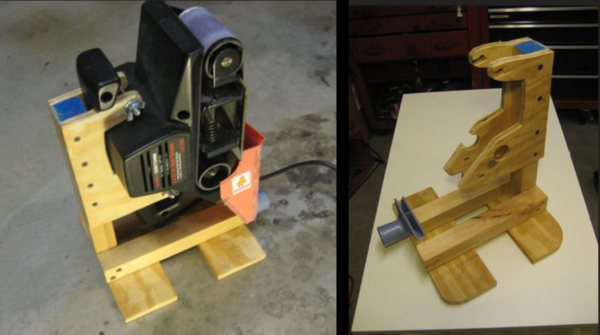
Having a basement or garage shop sure comes in useful for the home handyman. One downside to having a self-funded show is that you may not have every tool that you need. [unknownuser2007] had a hand-held belt sander and regularly used it to round off sharp corners on small parts instead of using it for its intended purpose; smoothing out long flat boards. It was typical for [unknownuser2007] to hold the sander in one hand and his work in the other while sanding his wooden parts.

This method of sanding was not very precise (or safe) so he decided it was time to do something about it and build a stand for the sander. The frame is built from 1/2 inch plywood, with pieces jig-sawn to fit the contour of the belt sander housing. After the frame was assembled, a dust collection system was made using an old vacuum attachment and some plastic sheet. The finished rig mounts solidly to the work bench and now allows [unknownuser2007] to use both hands to shape his creations.

As much as we love these types useful tool mods, on revision 2 we’d like to see an easily accessible on/off switch and a work support square to the belt. If you’re interested in more DIY sander solutions, check out this 20 inch disk sander.

Craft Bead NES Controller

NES Controller Made Out Of Fused Craft Beads

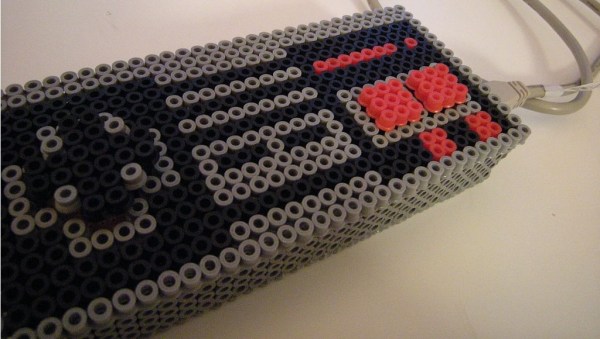
Close your eyes and think back, far back when you were a wee kid. Remember those colored beads that a child would populate on a small plastic peg board, arranged in some sort of artsy pattern, then ironed to fuse the beads together into a crafty trinket? They were fun for kids but what good are they to us adults nowadays? Well, [Lalya] has shown that they can be used to make a unique and interesting NES Controller.

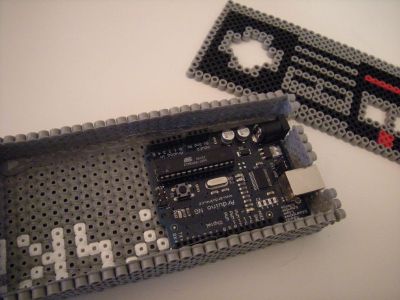
First, the controller’s front panel was laid out on the pegboard, remembering to lay it out in reverse so the melted side of the beads was facing into the controller. Holes were left in the top panel for the D-pad and B/A buttons. The sides, back and bottom panels of the controller were made the same way. Hot glue holds the case panels together.

Craft Bead NES Controller

Inside the case is an Arduino and breadboard with three through-hole momentary buttons. These are wired up to the Arduino inputs and a sketch emulates keystrokes when connected to a computer. Unfortunately, the D-pad’s functionality is just a button right now. [Lalya] uses the project to control iTunes.  Maybe the next revision will be more video game friendly.

Having your own NES controller recreation might not be high on your list. But you have to admit that this s a pretty simple and inexpensive way to make custom enclosures.

3D Scanning Rotary Table

3D Scanning Rig And DIY Turntable

It seems almost every day 3D scanning is becoming more and more accessible to the general DIYer. The hardware required is minimal and there are several scanning softwares and workflows to choose from. However, if you have slowly walked around a subject while holding a Kinect and trying to get a good scan, you know this is not an easy task. A quick internet search will result in several DIY scanning setup solutions that have been cobbled together and lack substantial documentation…. until now! [aldricnegrier] is fighting back and has designed and documented a rotary table that will spin at a constant speed while a subject is 3D scanned, making person scanning just that much easier.

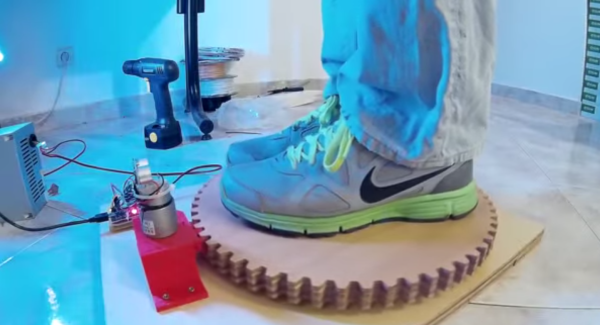
The project starts off with a plywood base with a Lazy Susan bearing assembly attached to the top. The Lazy Susan supports the rotating platform for the subject person to stand on, but it’s not just a platform, it’s also a huge gear! The platform teeth mesh with a much smaller 3D printed gear mounted on the shaft of a DC motor and reduction gearbox assembly.

Another goal of the project was to make the rotary table autonomous. There is an ultrasonic sensor mounted to the base aimed above the rotating platform. The ultrasonic sensor is connected to an Arduino and if the system senses someone or something on the platform for 3 seconds, the Arduino will command a DC motor driver to start spinning the platform.

As cool as this project is so far, [aldricnegrier] wanted to make it even cooler: he added speech recognition. Using Microsoft’s Speech Toolkit, saying the words ‘Start Skanect‘ will start the scanning process on the PC. Now, a sole person can scan themselves easily and reliably.

[aldricnegrier] has made all of his CAD files, STL files and Arduino code available so anyone wanting to build this clearly capable setup can do so!

Making a Hackerspace Passport Stamp

How To Make A Hackerspace Passport Stamp

A few years ago, [Mitch Altman] from Noisebridge came up with the idea of a Hackerspace Passport. The idea behind it was not to hinder or monitor travels but to encourage visiting other hackerspaces. These passports can be purchased for just a few dollars or, in true open source fashion, be made with nothing more than a computer printer… the Hackerspace Passport design files are totally free and available here.

So next time you’re visiting a new hackerspace, bring your passport and get it stamped to document the trip…. and that brings us to the point of this post: The Stamp. At around $25, having a custom ink stamp made at an office supply store isn’t that much money, but buying a stamp is not as fun as making one! That is what we are going to do today; make a stamp… or more specifically, several stamps using different techniques. Then we’ll compare the performance of each method.

DESIGN

Since this is Hackaday, we will be making a Hackaday Logo stamp. Back a couple years ago we ran a contest asking folks to make unique things with the Hackaday logo. To make it easy for the entrants, the Hackaday logo was made available in SVG format. We’ll start with that, since it is available, and make a minor change by adding some lettering, as most soon-to-be stamp makers will probably want letters on their stamps too. This is easily done in the FOSS vector graphic editor software: Inkscape.

The stamp size is important. A Hackerspace Passport page has room for 4 stamps up to 41 x 47mm and we’ll try to keep our stamp within those limits.

Continue reading “How To Make A Hackerspace Passport Stamp”

LEGO NES Controller

Large NES Controller Made From LEGOs

If LEGO are cool, and abnormally large NES controllers are cool, then what [Baron von Brunk] has created is pretty dang cool. It’s a super large functional NES game controller…. made out of LEGO! Yes, your favorite building blocks from the past (or present) can now be use to make an unnecessarily large game controller.

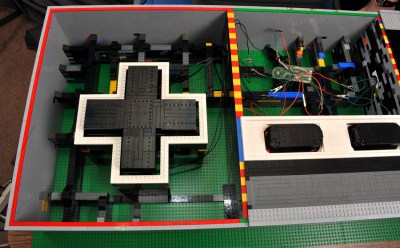
lego-nes-internalsThe four main sides of the controller case are standard stacked grey LEGO bricks. The inside of the case is mostly hollow, only with some supporting structures for the walls and buttons. The top is made from 4 individual LEGO panels that can be quickly and easily removed to access the interior components. The large LEGO buttons slide up and down inside a frame and are supported in the ‘up’ position care of some shock absorbers from a Technic Lego set. The shocks create a spring-loaded button that, when pressed down, makes contact with a momentary switch from Radio Shack. Each momentary switch is wired to a stock NES controller buried inside the large replica. The stock controller cord is then connected to an NES-to-USB adapter so the final product works with an NES Emulator on a PC.
[Baron von Brunk] is no stranger to Hackaday or other LEGO projects, check out this lamp shade and traffic light.

Continue reading “Large NES Controller Made From LEGOs”

Laminated iPod Dock Speaker

Solid Plywood Enclosure IPod Speaker Dock

Portable Media Players are great for listening to music on the go. At home though, using headphones may not be the most convenient or comfortable option. [decpower] didn’t have a stereo to connect his iPod to. Since he didn’t want to shell out a bunch of money to buy one, he decided to build his own iPod dock and powered speaker combo.

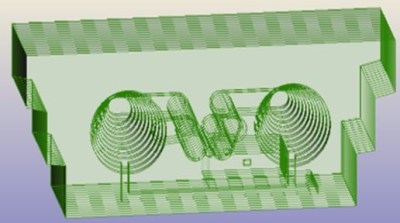
Laminated iPod Dock Speaker The case is made out of plywood: many, many layers of plywood. Each layer of plywood was cut out using a laser cutter. Unlike most speaker cabinets that have a distinct boxy enclosure, this unit is mostly solid with cutouts in each layer only where voids were designed to be. [decpower] tried to replicate the Bose Wave Radio internal sound passages. Up top a dock slot complete with a 30-pin connector makes connecting an iPod super simple.

Unfortunately, [decpower] doesn’t say what he’s using for an amplifier or where his speakers came from. He does indicate that there is an internal battery for powering the setup and it appears there is a volume knob out back. Regardless, the final project looks pretty good and [decpower] deserves some kudos for the unique construction method.