If you’ve spent any time around the modified car scene in the last few years, you’ve probably heard about E85. Maybe you’ve even noticed a sweet smell emanating from the pitlane, or heard people cracking jokes about “corn juice.”
The blended fuel, which combines alcohol and traditional gasoline, can have significant performance benefits if used properly. Today, we’ll explore what those are, and how you can set your ride up to run on E85.
A small stepper motor is used to run the clock’s movement, a small part of the 28BYJ-48 variety. The motor is driven once per second, making the gear train tick along in a rather compelling way that is somehow more visually interesting. Of course, with some modification to the design, continuous motion could easily be done as well.
The stepper motor is driven by an Arduino Nano, which also handles the timekeeping. One thing that’s missing is a real-time clock, something that should be added to the design if you wish it to keep accurate time. As it is, the included Arduino sketch simply uses the delay() function to time the stepping of the motor. It makes the clock tick along, but will quickly drift out of sync.
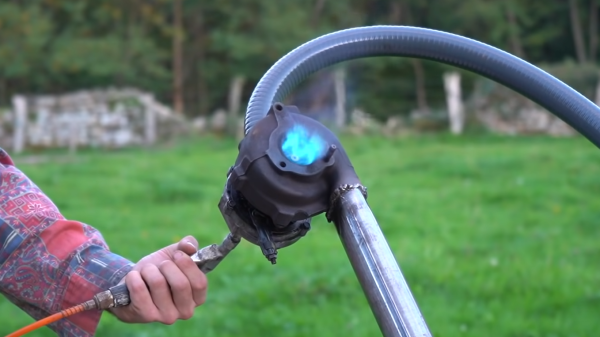
Turbochargers as used on cars bear some similarities with jet engines. Fundamentally, both contain a turbine that harvests energy from hot gas, using it to spin a compressor which sucks in fresh air for combustion. Thus, turning a turbocharger into a jet engine is entirely possible, and [HRom] decided to have a crack at it.
The build starts with a turbo that appears to have been used on a diesel engine from the Volkswagen group. The first step was to cut the integral exhaust manifold off the turbo housing. A combustion chamber is then added which takes in fresh air from the compressor housing, and delivers hot combustion products to the turbine inlet. The homebrewed jet engine burns propane as fuel, introduced into the chamber via a nozzle.
The initial test failed as combustion was occurring at the turbine exhaust rather than in the combustion chamber, likely due to the lack of a proper ignition source inside the combustion chamber. A redesign employed a bigger combustion chamber built out of a fire extinguisher, with smouldering wood pellets inserted inside to get the injected propane burning.
The redesign works, and the turbocharger jet engine releases a thunderous scream as it turns at ever-increasing speed. However, with no oiling system or any way of controlling air or fuel flow in the engine, it eventually stops in a huge puff of smoke. Regardless, the engine did run in a sustained manner even if the ignition method was rudimentary.
We’ve seen similar builds before, and the rudimentary construction means they’re typically nowhere near being flight-weight engines. They are incredibly cool, however, and a great way to learn the basic principles of how jet engines work. Video after the break.
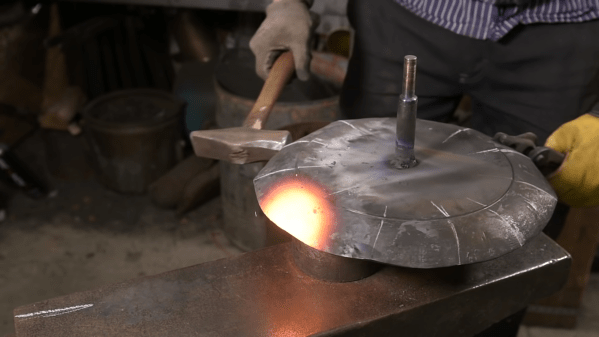
Cookware isn’t something we typically build ourselves; you’d want a well-equipped metal shop to do the job and do it right. [Torbjörn Åhman] has just that, however, and set about forging a stout-looking skillet from scratch.
The build starts with a round disc of steel serving as a blank for the project. The blank is spun up and the outer perimeter ground down thinner with an angle grinder in what looks like a moderately sketchy operation. A forge is then used to heat the blank so that it can be shaped into a pan using a hammer. Slowly, as the metal is beaten one way and then t’other, the skillet begins to form. A belt sander takes off high points on the outside, and a torch is then used to square up the base of the pan so it sits nicely. Finally a handle attached with some stout rivets, and the newly formed piece of cookware gets a seasoning with sunflower oil.
The project shows just how many special skills are required to make even simple cookware by hand. It’s nice to see some keeping the old methods alive, too. Video after the break.
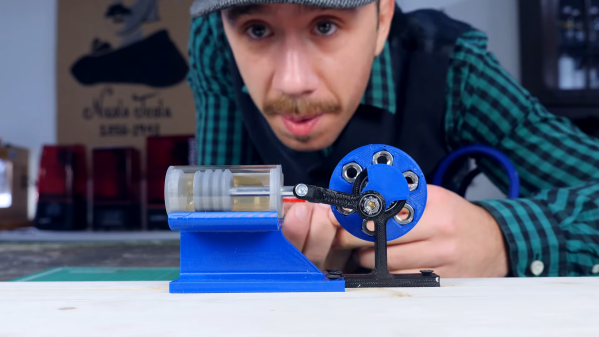
3D prints aren’t typically known for their heat resistance. However, [Integza] noted that using the right techniques, it was possible to 3D print parts that could handle steam heat without failing. Thus, the natural progression from there was to build a piston-type steam engine.
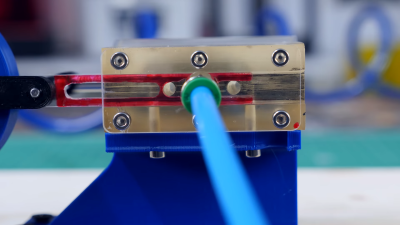
The sliding valve alternately feeds steam to each side of the piston.
Resin prints are key here, as the melting point of such parts is much higher than that of those turned out by typical FDM printers. Try this same build using PLA for the hot parts, and you’ll quickly end up with a pile of molten goo.
To make such an engine work, valves are required to allow steam to flow into alternating sides of the piston to let it reciprocate continuously. A simple slide valve is used, allowing steam to flow to one side of the piston and the other alternately, as driven by an arm coming off the flywheel attached to the engine’s output shaft.
Tested on compressed air and steam, the engine ran continuously, chugging away enthusiastically. However, steam performance was compromised by the low pressure output of just 1.5 bar from [Integza]’s pressure cooker. Similarly, the cooker’s steam capacity was low, so the engine ran for just 15 seconds.
However, it suggests that with a better supply of steam, the printed steamer could indeed run for some time. If you’re not into the wetter engines out there, though, consider extruding a Stirling engine instead. Video after the break.
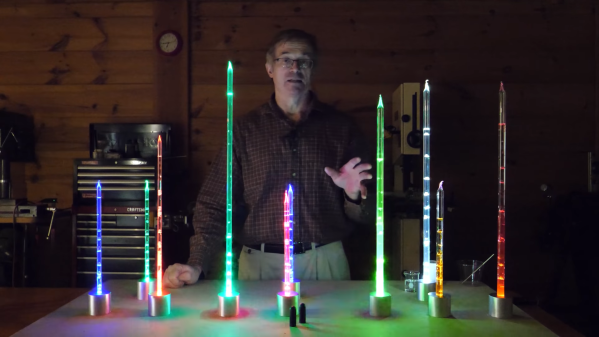
Bubble lights are mesmerizing things to watch, up there with lava lamps as one of the nicer aesthetic creations of the mid-20th century. [Tech Ingredients] decided to head into the lab to whip up some of their own design, taking things up a notch beyond what you’d typically find in a store.
Bubble lights have a liquid inside glass that is held under a vacuum. This reduces the boiling point of the fluid, allowing a small heat input to easily create bubbles that float to the top of the chamber inside. The fluid used inside is also chosen for its low boiling point, with [Tech Ingredients] choosing dichloromethane for safety when using flames to work the glass.
The video shows off the basic glass working techniques required to make the glass bubble tubes, as well as how to build the bases of the bubble lamps that light the fluid up and provide the heat to create bubbles. The use of different materials to create nucleation points for the boiling fluid is also discussed, giving different visual effects in the final result. It’s a great primer on getting started building these beautiful decorations yourself.
Bubbles are pretty things, and with different techniques, we’ve even seen them used to make displays. Video after the break.
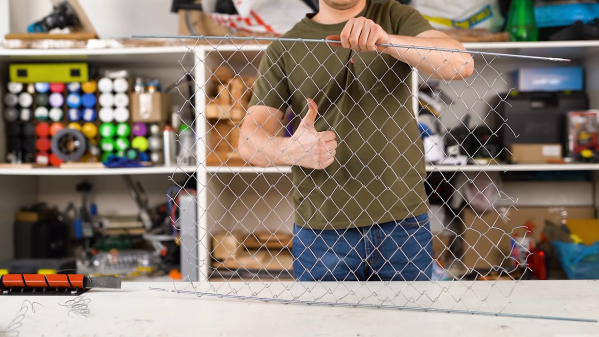
If you find yourself in need of chain link fencing, you’d probably just head down to the hardware store. However, [The Q] has shown us that you can make your own at home with a simple machine.
The build starts with a length of pipe, into which spiral slots are cut with an angle grinder. This pipe is the forming tool which shapes the wire into the familiar chain-link design. The pipe is then welded onto a backing plate, and fitted with a removable handcrank that turns a flat bar. Feed wire into the spiral groove, turn the crank, and out comes wire in the shape required.
From there, formed lengths of wire can be linked up into a fence of any desired size. Of course, fastening each end of the fence is left as an exercise for the reader, and the ends are sharp and unfinished. However, if you don’t like the chain link fencing on sale at your local hardware store, or you want to weave your own in some fancy type of wire, this machine could be just the thing you need.