Taking Apart IKEA’s Latest Air Quality Sensor

Whether it’s because they’re concerned about worsening pollution or the now endemic variants of COVID-19, a whole lot of people have found themselves in the market for a home air quality monitor thee last couple of years. IKEA noted this trend awhile back, and released the VINDRIKTNING sensor to capitalize on the trend.

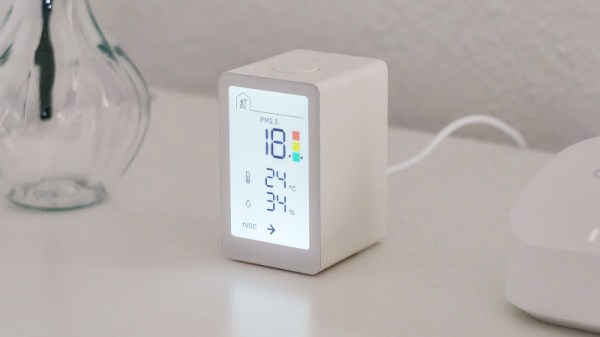
The device must have sold pretty well, because last month the Swedish flat-packer unveiled the considerably more capable (and more expensive) VINDSTYRKA. Now thanks to the efforts of [Oleksii Kutuzov] we’ve got a fantastic teardown of the new gadget, and some more information on the improvements IKEA made over its predecessor.
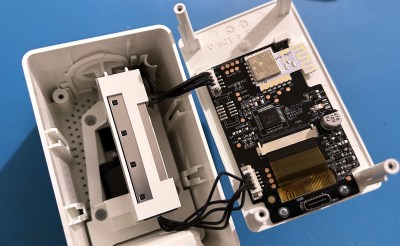
Certainly the most obvious upgrade is the addition of an LCD readout that displays temperature, humidity, and how many particulates the device detected in the air. There’s even a “traffic light” colored indicator to show at a glance how bad your air supply is. The other big change is the addition of wireless, though unlike the WiFi hacks we saw for the VINDRIKTNING, this built-in capability uses Zigbee and is designed to plug into IKEA’s own home automation ecosystem.

Speaking of those hacks, a GitHub user by the name of [MaartenL] chimes in to say they’ve managed to hook an ESP32 up to test pads on the VINDSTYRKA motherboard, allowing the parasitic microcontroller to read the device’s sensors and report their data on the network over a service like MQTT, without impacting the sensor’s normal operations. This is how the first hacks on the older VINDRIKTNING were pulled off, so sounds like a promising start.

But even if you aren’t looking to modify the device from its original configuration (how did you find this website?), it seems pretty clear the VINDSTYRKA is a well-built piece of kit that will serve you and your family well. Which is more than what could be said for some of the cheapo environmental sensors flooding the market.

Thanks to [killergeek] for the tip.

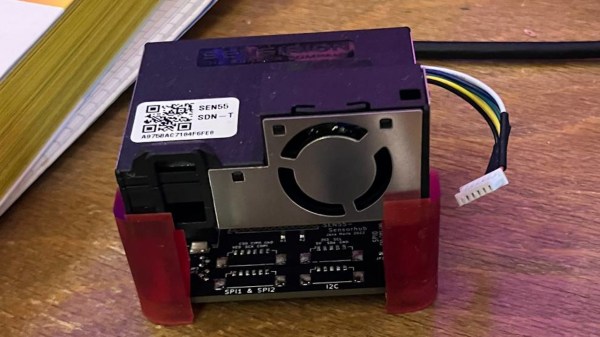
The sensor hub in all its glory, sensor itself on top, standing on 3D-printed feet, and the PCB on the bottom

Hacker-Friendly And Elegant Air Quality Sensor Hub

Ever wanted an indoor environment sensor that’s dead simple yet a complete package? That’s the anotter-sensor-hub project from [Jana Marie], designed for the Sensirion SEN05x series sensors, with a SEN055 sensor shown in the picture above. Given such a sensor, you can measure VOCs and NOCs (Volatile and Non-Volatile Organic Compounds), as well as PM1, PM2.5, PM4 and PM10 particulate matter indices, with temperature and humidity sensing thrown in for good measure. Fully open and coupled with 3D printable stand files, this alone makes for an air quality hub fit for a hacker’s desk. That’s not all, however — this board’s elegant extensibility is a good match for the sensor’s impressive capabilities!

The PCB itself might look simple, it’s simply an ESP32 and some supporting circuitry required. But you’ll notice there’s also a trove of connector footprints for different interfaces; whatever else you might want to add to your sensor hub, whether it connects through I2C, SPI or PWM, you can! As usual, the sensor itself is the most expensive part of such a project — the boards themselves are around $5 USD apiece fully assembled, but one sensor-included hub will set you back roughly $42 USD. That said, it’s a great value for the price, and the trove of sensing data you can get might just more than pay for itself in quality-of-life improvements you make. Of course, everything is open-source and comes as a complete packages for you to start using. The firmware, KiCad files, 3D holder and even Grafana dashboard files can be found on GitHub.

Such air quality sensor platforms have been getting more and more popular, and hackers have been paying attention. Having a full open-source package like this at our disposal is amazing. If you’re looking for a cheaper “baby’s first air quality sensor”, drop by your local IKEA — there’s a way less featureful but quite cheap sensor that you can equip with an ESP8266, perhaps, even on a custom PCB.

LoRa Air Quality Monitor Raises The Bar On DIY IoT

We’ve seen an incredible number of homebrew environmental monitors here at Hackaday, and on the whole, they tend to follow a pretty predicable pattern. An ESP8266 gets paired with a common temperature and humidity sensor, perhaps a custom PCB gets invited to the party, and the end result are some values getting pushed out via MQTT. It’s a great weekend project to get your feet wet, but not exactly groundbreaking in 2022.

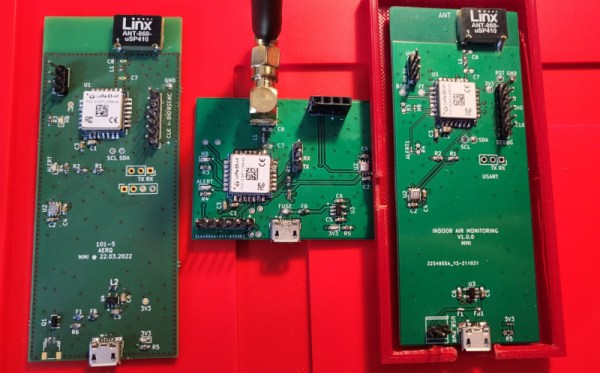
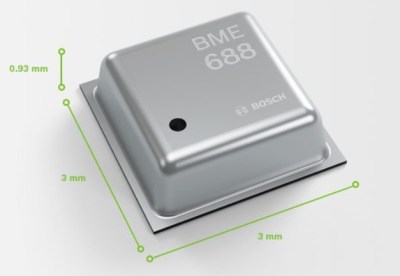
Which is why we find the AERQ project from [Mircea-Iuliu Micle] so refreshing. Not only does this gadget pick up temperature and humidity as you’d expect, but its Bosch BME688 sensor can also sniff out volatile organic compounds (VOCs) and gases such as carbon monoxide and hydrogen. The datasheet actually claims this is the “first gas sensor with Artificial Intelligence (AI)”, and while we’re not sure what exactly that means in this context, it’s a claim that apparently warrants a price tag of $15+ USD a pop in single quantities.

There’s an AI hiding in there someplace.

But the fancy sensor isn’t the only thing that sets AERQ apart from the competition. Instead of a member of the ubiquitous ESP family, it’s using the Wio-E5, a relatively exotic STM32 package that integrates a long-range LoRa radio. [Mircea-Iuliu] has paired that with a Linx USP-410 chip antenna or, depending on which version of the four-layer PCB you want to use, a u.Fl connector for an external antenna. The whole thing is powered by a simple USB connection, and its Mbed OS firmware is setup to dump all of its collected data onto The Things Network.

All told, it’s a very professional build that certainly wouldn’t look out of place if it was nestled into some off-the-shelf air quality monitor. While the high-end detection capabilities might be a bit overkill for home use, [Mircea-Iuliu Micle] points out that AERQ might provide useful insight for those running indoor events as COVID-19 transitions into its endemic stage.

ESP32 Brings Air Purifier Online With Home Assistant

A lot of hackers are rightfully concerned about the privacy issues that surround many of today’s “smart” gadgets, but it’s hard to argue that the ability to remotely control devices around your home isn’t convenient. Enter self-hosted, open source projects like Home Assistant. This provides the framework for building out a home automation system without having your soul information sold, but as you might expect, you’re going to have to put some effort in to get the most of it.

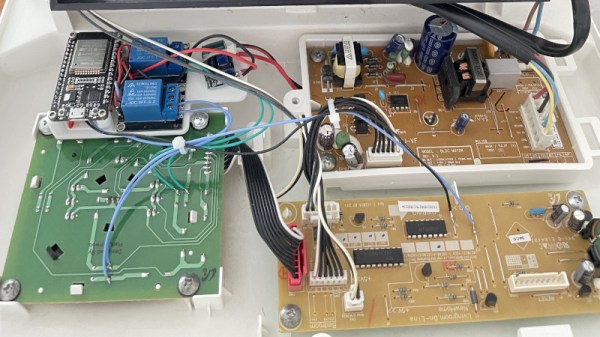
For example, take a look at this Phillips AC4014 air purifier that [Anton] connected to Home Assistant by way of an ESP32. Rather than getting too bogged down in reverse engineering the purifier’s surprisingly complex internal electronics, he took the easy way out and wired a couple of relays across the power and fan speed buttons; this allows the device to be easily controlled by the microcontroller, without impacting the functionality of the original controls.

But since those front panel controls still work, that meant [Anton] needed a way for the ESP32 to detect the device’s status and report that to Home Assistant so everything stayed in sync. So he looked around on the PCB for a trace that got powered up when the air purifier was up and running, which he connected to a pin of the microcontroller through a transistor. This let’s the firmware determine if the machine is running or not just by checking if the appropriate pin has gone high.

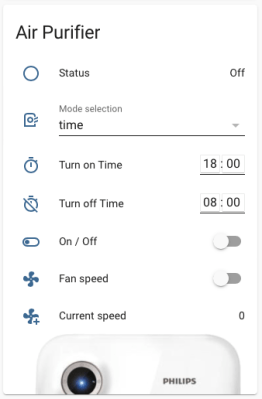
Speaking of the firmware, [Anton] decided to use ESPHome rather than trying to write his own code from scratch. This project allows you to rapidly add new devices to Home Assistant by providing the firmware with a relatively simple YAML configuration file, which he’s provided as an example. In fact, he’s provided quite a lot of examples with this project, down to an annotated image of the PCB that shows where to tap your wires into. He’s done quite a service for anyone who’s got this same model of air purifier.

This unit doesn’t appear to have any capability of actually checking the quality of the air in the room, but we’ve recently seen a low-cost IKEA product that can do exactly that. Even better, it can be easily modified to report its findings over the network using the ESP8266.

Hackaday Podcast 132: Laser Disco Ball, Moore’s Law In Your Garage, Cheap Cyborg Glasses, And A Mouse That Detects Elephants

Hackaday editors Elliot Williams and Mike Szczys debate the great mysteries of the hacking universe. On tap this week is news that Sam Zeloof has refined his home lab chip fabrication process and it’s incredible! We see a clever seismometer built from plastic pipe, a laser, and a computer mouse. There’s a 3D printed fabric that turns into a hard shell using the same principles as jamming grippers. And we love the idea of high-powered lasers being able to safely direct lighting to where you want it.

Take a look at the links below if you want to follow along, and as always, tell us what you think about this episode in the comments!

Direct download (60 MB or so.)

Continue reading “Hackaday Podcast 132: Laser Disco Ball, Moore’s Law In Your Garage, Cheap Cyborg Glasses, And A Mouse That Detects Elephants”

Hacked IKEA Air Quality Sensor Gets Custom PCB

Last month we brought word of the IKEA VINDRIKTNING, a $12 USD air quality sensor that could easily be upgraded to log data over the network with the addition of an ESP8266. It only took a couple of wires soldered to the original PCB, and since there was so much free space inside the enclosure, you didn’t even have to worry about fitting the parasitic microcontroller; just tape it to the inside of the case and button it back up.

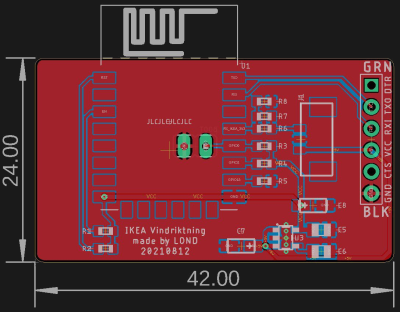
Now we’ve got nothing against the quick and dirty method around these parts, but if you’re looking for a slightly more tidy VINDRIKTNING modification, then check out this custom PCB designed by [lond]. This ESP-12F board features a AP2202 voltage regulator, Molex PicoBlade connectors, and a clever design that lets it slip right into a free area inside the sensor’s case. The project description says the finished product looks like it was installed from the factory, and we’re inclined to agree.

Nothing has changed on the software side, in fact, the ESP-12F gets flashed with the same firmware [Sören Beye] wrote for the Wemos D1 Mini used in his original modification. That said [lond] designed the circuit so the MCU can be easily reprogrammed with an FTDI cable, so just because you’re leaving the development board behind doesn’t mean you can’t continue to experiment with different firmware builds.

It’s always gratifying to see this kind of community development, whether or not it was intentionally organized. [lond] saw an interesting idea, found a way to improve its execution, and released the result out into the wild for others to benefit from. It wouldn’t be much of a stretch to say that this is exactly the kind of thing Hackaday is here to promote and facilitate, so if you ever find yourself inspired to take on a project by something you saw on these pages, be sure to drop us a line.

ESP8266 Adds WiFi Logging To IKEA’s Air Quality Sensor

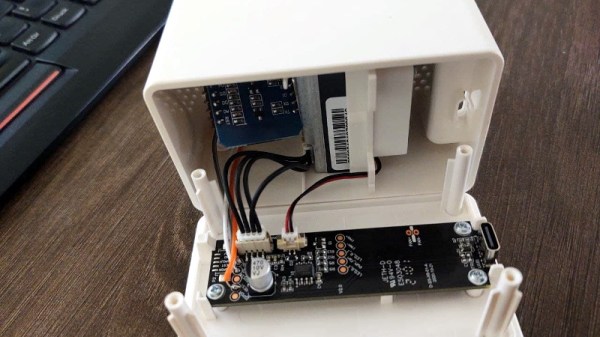
Introduced back in June, the IKEA VINDRIKTNING is a $12 USD sensor that uses colored LEDs to indicate the relative air quality in your home depending on how many particles it sucks up. Looking to improve on this simplistic interface, [Sören Beye] tacked an ESP8266 to the board so it can broadcast sensor readings out over MQTT.

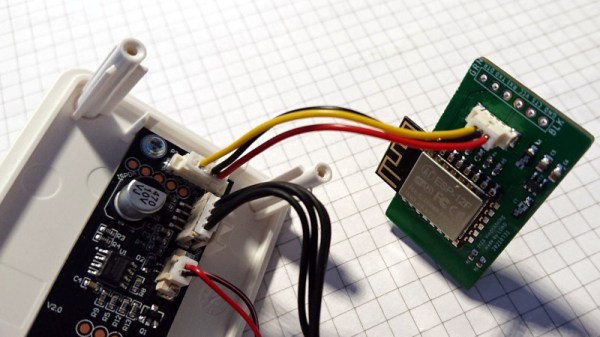
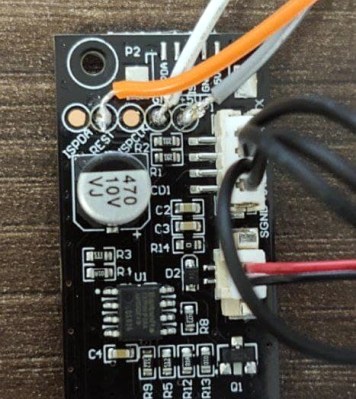
Just three wires link the ESP8266 to the PCB.

While some of us would have been tempted to gut the VINDRIKTNING and attach its particle sensor directly to the ESP8266, the approach [Sören] has used is actually quite elegant. Rather than replacing IKEA’s electronics, the microcontroller is simply listening in on the UART communications between the sensor and the original controller. This not only preserves the stock functionality of the VINDRIKTNING, but simplifies the code as the ESP doesn’t need to do nearly as much.

All you need to do if you want to perform this modification is solder a couple wires to convenient test pads on the VINDRIKTNING board, then flash the firmware (or write your own version), and you’re good to go. There’s plenty of room inside the case for the ESP8266, though you may want to tape it down so it doesn’t impact air flow.

While not required, [Sören] also recommends making a small modification to the VINDRIKTNING which makes it a bit quieter. Apparently the 5 V fan inside the sensor is occasionally revved up by the original controller, rather than kept at a continuous level that you can mentally tune out. But by attaching the sensor’s fan to the ESP8266’s 3.3 V pin, it will run continuously at a lower speed.

We’ve seen custom firmware for IKEA products before, but this approach, which keeps the device’s functionality intact regardless of what’s been flashed to the secondary microcontroller, is particularly appealing for those of us who can’t seem to keep the gremlins out of our code.

[Thanks to nexgensri for the tip.]