I2C Sniffing Comes To The Bus Pirate 5

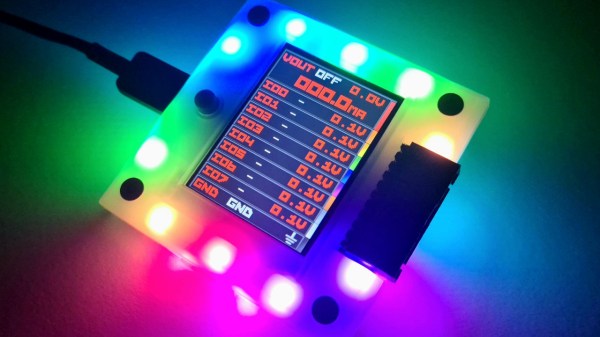
While the Bus Pirate 5 is an impressive piece of hardware, the software is arguably where the project really shines. Creator [Ian Lesnet] and several members of the community are constantly working to add new features and capabilities to the hardware hacking multi-tool, to the point that if your firmware is more than a few days old there’s an excellent chance there’s a fresher build available for you to try out.

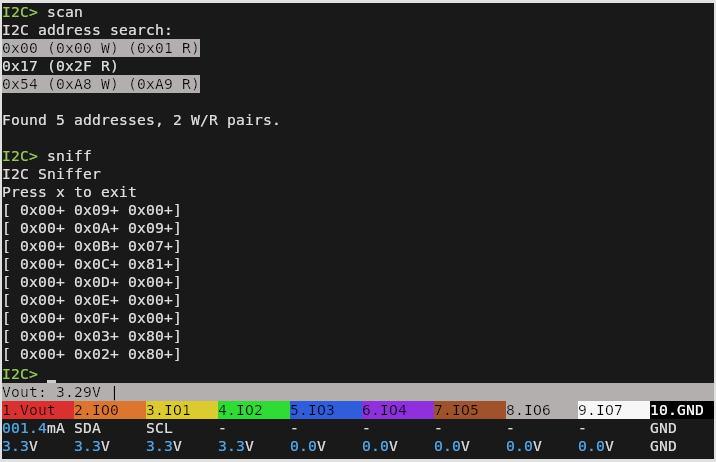
One of the biggest additions from the last week or so of development has been the I2C sniffer — a valuable tool for troubleshooting or reverse engineering devices using the popular communications protocol. [Ian] has posted a brief demo video of it in action.

It’s actually a capability that was available in the “classic” versions of the Bus Pirate, but rather than porting the feature over from the old firmware, [Ian] decided to fold the MIT licensed pico_i2c_sniffer from [Juan Schiavoni] into the new codebase. Thanks to the RP2040’s PIO, the sniffer works at up to 500 kHz, significantly outperforming its predecessor.

Admittedly, I2C sniffing isn’t anything you couldn’t do with a cheap logic analyzer. But that means dealing with captures and making sure the protocol decoder is setup properly, among other bits of software tedium. In comparison, once you start the sniffer program on the Bus Pirate 5, I2C data will be dumped out to the terminal in real-time for as long as you care to see it. For reverse engineering, it’s also very easy to move quickly from sniffing I2C packets to replaying or modifying them within the Bus Pirate’s interface.

If you already have a Bus Pirate 5, all you need to do is flash the latest firmware from the automated build system, and get sniffing. On the fence about picking one up? Perhaps our hands-on review will help change your mind.

I2C The Hard Way

[Igor] has an AS5600 magnetic rotary encoder chip on a breakout board. Normally, you’d think that was an easy device to work with since it has an I2C interface. But [Igor] wanted to do it the hard way. What’s the hard way? By hand. He directly manipulates the clock and data lines using some push buttons. You can see how it goes in the video below.

This is possible because the controlling device — in this case [Igor] — gets to set the clock rate, and there’s no reason it has to be regular. We have to admit that it never occurred to us to do this, but we have written “bit banged” I2C-like code before.

Continue reading “I2C The Hard Way”

I2C For Hackers: Digging Deeper

Last time, I gave you an overview of what you get from I2C, basics like addressing, interface speeds, and a breakdown of pullups. Today, let’s continue looking into I2C capabilities and requirements – level shifting, transfer types, and quirks like combined transfers or clock stretching.

Level Shifting

Continue reading “I2C For Hackers: Digging Deeper”

I2C For Hackers: The Basics

You only really need two data wires to transfer a ton of data. Standards like UART, USB2, I2C, SPI, PS/2, CAN, RS232, SWD (an interface to program MCUs), RS485, DMX, and many others, all are a testament to that. In particular, I2C is such a powerful standard, it’s nigh omnipresent – if you were to somehow develop an allergy to I2C, you would die.

Chances are, whatever device you’re using right now, there’s multiple I2C buses actively involved in you reading this article. Your phone’s touchscreen is likely to use I2C, so is your laptop touchpad, most display standards use I2C, and power management chips are connected over I2C more often than not, so you’re covered even if you’re reading this on a Raspberry Pi! Basically everything “smart” has an I2C port, and if it doesn’t, you can likely imitate it with just two GPIOs.

If you’re building a cool board with a MCU, you should likely plan for having an I2C interface exposed. With it, you can add an LCD screen with a respectable resolution or a LED matrix, or a GPS module, a full-sized keyboard or a touchpad, a gesture sensor, or a 9 degree of freedom IMU – Inertial Measurement Unit, like a accelerometer+compass+gyroscope combination. A small I2C chip can help you get more GPIOs for your MCU or CPU, or a multi-channel motor driver, or a thermal camera, or a heap of flash memory; if you’re adding some sort of cool chip onto your board, it likely has an I2C interface to let you fine-tune its fancy bits.

As usual, you might have heard of I2C, and we sure keep talking about it on Hackaday! There’s a good few long-form articles about it too, both general summaries and cool tech highlights; this article is here to fill into some gaps and make implicit knowledge explicit, making sure you’re not missing out on everything that I2C offers and requires you to know!

Continue reading “I2C For Hackers: The Basics”

screenshot of the code defining a hid descriptor by using essentially macros for common descriptor types

Coupling STM32 And Linux? Consider HID Over I2C

If you’re pairing a tiny Linux computer to a few peripherals — perhaps you’re building a reasonably custom Pi-powered device — it’s rightfully tempting to use something like an STM32 for all your low-level tasks, from power management to reading keyboard events.

Now, in case you were wondering how to tie the two together, consider HID over I2C, it’s a standardized protocol with wide software and peripheral support, easily implementable and low-power. What’s more, [benedekkupper] gives you an example STM32 project with a detailed explanation on how you too can benefit from the protocol.

There are several cool things about this project. For a start, its code is generic enough that it will port across the entire STM32 lineup nicely. Just change the pin definitions as needed, compile it, flash it onto your devboard and experiment away. Need to change the descriptors? The hid-rdf library used lets you define a custom descriptor super easily, none of that building a descriptor from scratch stuff, and it even does compile-time verification of the descriptor!

The project has been tested with a Raspberry Pi 400, and [benedekkupper] links a tutorial on quickly adding your I2C-HID device on an Linux platform; all you need is DeviceTree support. Wondering what’s possible with HID? We’ve seen hackers play with HID aplenty here, and hacking on the HID standard isn’t just for building keyboards. It can let you automate your smartphone, reuse a laptop touchpad or even a sizeable Wacom input surface, liberate extra buttons on gamepads, or build your own touchscreen display.

Human-Interfacing Devices: HID Over I2C

In the previous two HID articles, we talked about stealing HID descriptors, learned about a number of cool tools you can use for HID hacking on Linux, and created a touchscreen device. This time, let’s talk about an underappreciated HID standard, but one that you might be using right now as you’re reading this article – I2C-HID, or HID over I2C.

HID as a protocol can be tunneled over many different channels. If you’ve used a Bluetooth keyboard, for instance, you’ve used tunneled HID. For about ten years now, I2C-HID has been heavily present in laptop space, it was initially used in touchpads, later in touchscreens, and now also in sensor hubs. Yes, you can expose sensor data over HID, and if you have a clamshell (foldable) laptop, that’s how the rotation-determining accelerometer exposes its data to your OS.

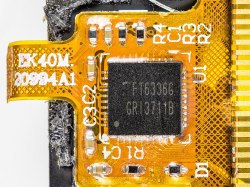
This capacitive touchscreen controller is not I2C-HID, even though it is I2C. By [Raymond Spekking], CC-BY-SA 4.0
Not every I2C-connected input device is I2C-HID. For instance, if you’ve seen older tablets with I2C-connected touchscreens, don’t get your hopes up, as they likely don’t use HID – it’s just a complex-ish I2C device, with enough proprietary registers and commands to drive you crazy even if your logic analysis skills are on point. I2C-HID is nowhere near that, and it’s also way better than PS/2 we used before – an x86-only interface with limited capabilities, already almost extinct from even x86 boards, and further threatened in this increasingly RISCy world. I2C-HID is low-power, especially compared to USB, as capable as HID goes, compatible with existing HID software, and ubiquitous enough that you surely already have an I2C port available on your SBC.

In modern world of input devices, I2C-HID is spreading, and the coolest thing is that it’s standardized. The standardization means a lot of great things for us hackers. For one, unlike all of those I2C touchscreen controllers, HID-I2C devices are easier to reuse; as much as information on them might be lacking at the moment, that’s what we’re combating right now as we speak! If you are using a recent laptop, the touchpad is most likely I2C-HID. Today, let’s take a look at converting one of those touchpads to USB HID.

A Hackable Platform

Continue reading “Human-Interfacing Devices: HID Over I2C”

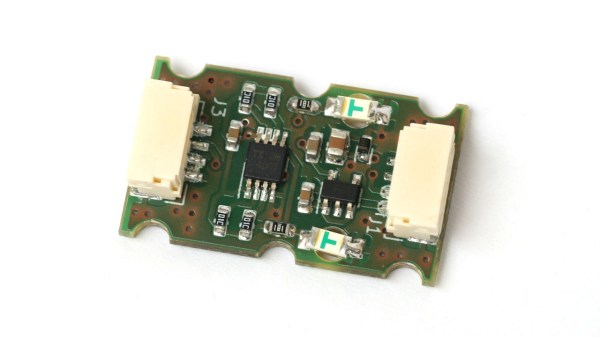
The I2C extender board on a white background, fully assembled, with two connectors and two indicator LEDs

Extenders And Translators For Your I2C Toolkit

If you’ve ever been laying out a network I2C devices inside a project box or throughout your robot’s body, you’ll probably know that I2C is not without its pitfalls. But for many of those pitfalls, there’s a handy chip you can use. [Roman Dvořák] from ThunderFly has experienced it on their drone building journeys, and that’s why they bring us two wonderful open source hardware boards: an I2C bus extender, and an I2C address translator.

The first board, an I2C bus extender, is based around the TCA4307 chip, and not only it lets you extend the bus further than it would normally go, it would also protect you. When the bus capacity is no longer handleable by your devices, or a particular misbehaving device gets the bus stuck, this chip will take care of it and dissipate your troubles. It will even let you know when your bus is wired up correctly, with a handy shine-through LED!

The second board is an I2C address translator. We’ve covered them before, but in short, address translators let you avoid I2C address conflicts while using multiple devices that share the same address. This particular module uses the LTC4317 chip, a common choice for such translation, and the board leaves no feature unimplemented. In the README, there’s quite a few pictures with examples of where this sensor proves mighty useful, too!

It appears that ThunderFly open sources a lot of their designs on GitHub, an effort that we salute. The designs are great to learn from, but if you’re just looking for turn-key hardware, you can get both of these boards from their Tindie store. The cables they use have locking connectors, but as long as the pinout matches, you should be able to solder a JST-SH socket and add these modules to your QWIIC toolkit.