A Vector Network Analyser, or VNA, is the ultimate multi-tool of RF test equipment. They can now be had in not very capable form for almost pocket money prices, but the professional-grade ones cost eye-watering sums. Enough to make an older VNA for a few hundred on eBay a steal, and [W3AXL] has just such a device in an HP 8714C. It’s the height of 1990s tech with a floppy drive and a green-screen CRT, but he’s homing right in on the VGA monitor port on the back. Time for a colour LCD upgrade!
There are two videos below the break, posted a year apart, because as we’re sure many of you will know, events have a habit of getting in the way of projects. In the first, we see the removal of the CRT module and safe extraction of its electronics, followed by the crafting of a display bezel for the LCD. Meanwhile, the second video deals with the VNA itself, extracting the VGA signal and routing it forward to the new module. Continue reading “A 1990s VNA Gets An LCD”→
These days, you can buy full graphical LCD or OLED displays for just a few dollars. However, if you’re so inclined, you can actually get your own segmented LCDs made to suit your own projects. [Icoso Labs] explains how it’s done, with plenty of handy tips along the way.
There are three primary things you need to do to design a segmented LCD. First, you need to design it visually, laying out all the individual elements you want on the display. Then you need to determine how you want to split them up into segments. Some elements you’ll just want to be a single monolithic on-or-off shape, while other areas you might want to create things like seven-segment numerals for displaying numbers and so on. With that done, you also need to specify various engineering details—such as whether you want a transmissive, reflective, or transflective display, and thicknesses, colors, and other important things. Armed with all that, you can take your design to a manufacturer and get them to make a bunch for you. Often, there’s a moderately high tooling cost to start a run, but you can then turn out more examples of your design for just a few bucks apiece.
It’s a neat guide to designing something few of us have ever considered sourcing for ourselves. We’ve featured other insights into the world of segmented LCDs before, too. Video after the break.
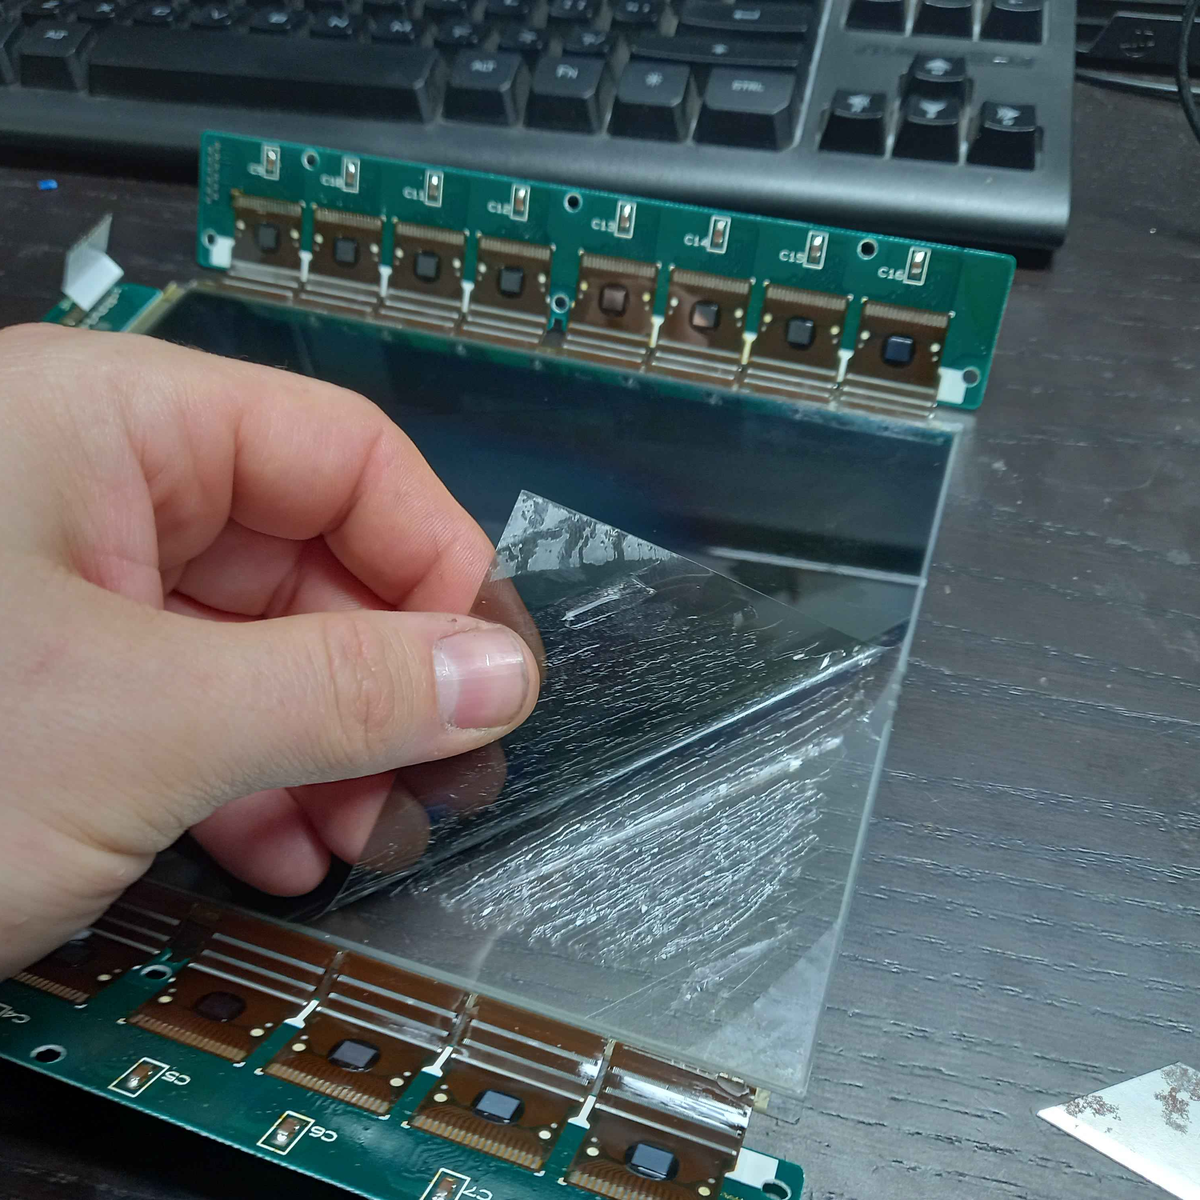
Coming straight to the point: [Ron Hinton] is significantly braver than we are. Or maybe he was just in a worse situation. His historic Acer K385s laptop suffered what we learned is called vinegar syndrome, which is a breakdown in the polarizers that make the LCD work. So he bit the bullet and decided to open up the LCD stack and replace what he could.
Nothing says “no user serviceable parts inside” quite like those foil-and-glue sealed packages, but that didn’t stop [Ron]. Razor blades, patience, and an eye ever watchful for the connectors that are seemingly everywhere, and absolutely critical, got the screen disassembled. Installation of the new polarizers was similarly fiddly.
In the end, it looks like the showstopper to getting a perfect result is that technology has moved on, and these older screens apparently used a phase correction layer between the polarizers, which might be difficult to source these days. (Anyone have more detail on that? We looked around and came up empty.)
This laptop may not be in the pantheon of holy-grail retrocomputers, but that’s exactly what makes it a good candidate for practicing such tricky repair work, and the result is a readable LCD screen on an otherwise broken old laptop, so that counts as a win in our book.
The old cable in place on the Samsung monitor. (Credit: MisterHW)
Dumpster diving is one of those experiences that can net you some pretty cool gear for a reasonable price. Case in point the 24″ Samsung S24E650XW LCD monitor that [MisterHW] saved from being trashed. Apparently in very good condition with no visible external damage, the unit even powered up without issues. It seemed like a golden find until he got onto the Windows desktop and began to notice quaint red shimmering in darker areas and other issues that made it clear why the monitor had been tossed. Of course, the second best part about dumpster diving is seeing whether you can repair such issues.
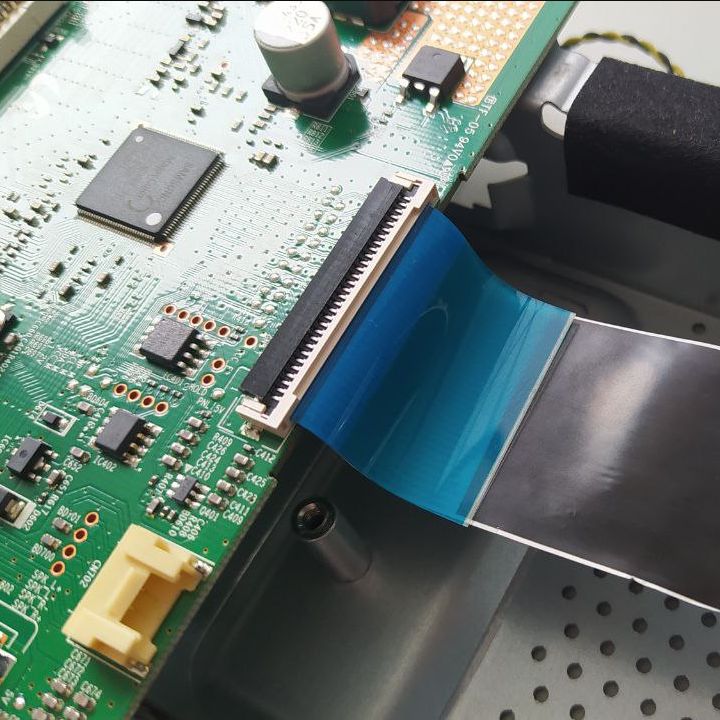
Prior to disassembly it had been noted that percussive maintenance and bending of the frame changed the symptoms, suggesting that something was a bit loose inside. After taking the back cover and shielded enclosure off, a quick visual inspection of the boards and cables quickly revealed the likely suspect: broken traces on one of the cables.
Apparently somewhere during the assembly step in the factory the cable had been pushed against the PCB’s edge, causing the initial damage. Based on the listed assembly date the monitor had only been in use for a few years before it was tossed, so likely the symptoms would have begun and worsened as one after another of the traces gradually cracked and broke due to vibrations, thermal expansion, etc.
This issue made fixing the monitor very simple, however, assuming a suitable replacement cable could be found. The broken cable is a 30P 1.0 pitch PFC, with EBay throwing up a cable with similar specs for a Thomson brand TV. One purchase and anxious wait later, the replacement cable was installed as in the featured image alongside the old cable. Perhaps unsurprisingly it restored the monitor to full working order, demonstrating once again that dumpster diving is totally worth it.
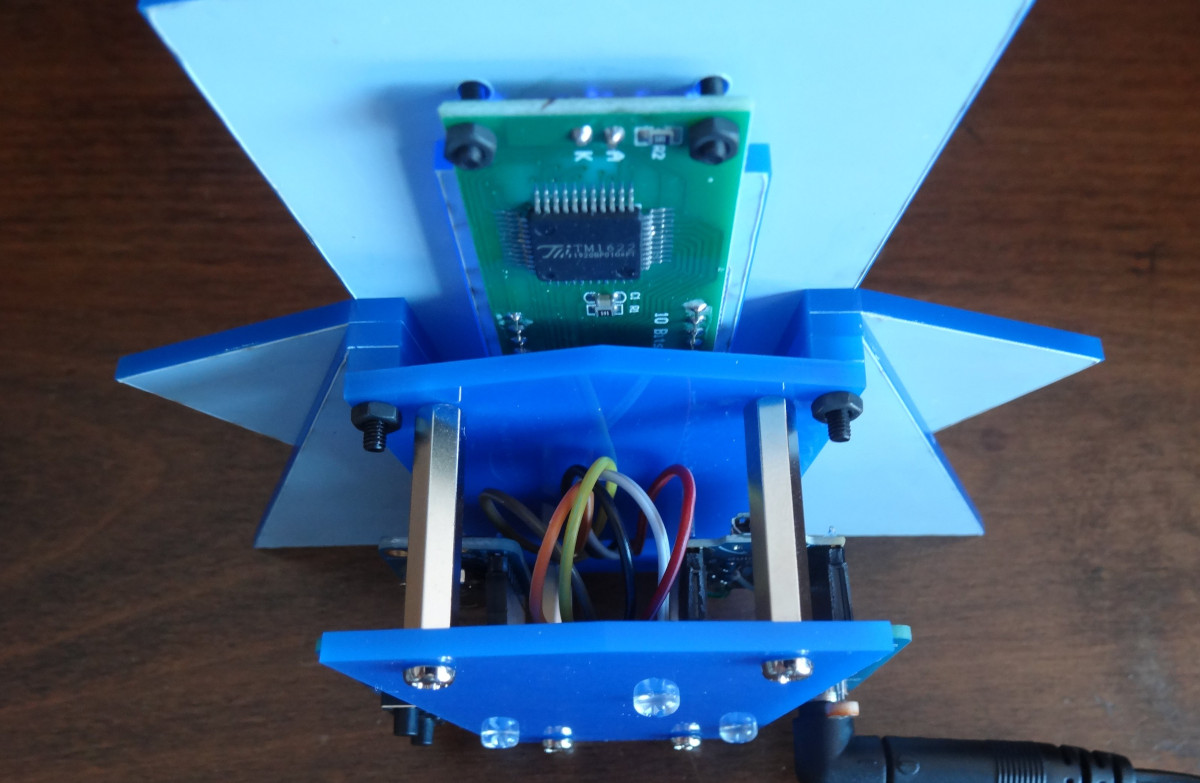
Sometimes, all it takes is looking at an existing piece of tech in a new way to come up with something unique. That’s the whole idea behind FallingWater, a gorgeous Art Deco inspired clock created by [Mark Wilson] — while the vertical LCD might look like some wild custom component, it’s simply a common DM8BA10 display module that’s been rotated 90 degrees.
As demonstrated in the video below, by turning the LCD on its side, [Mark] is able to produce some visually striking animations. At the same time the display is still perfectly capable of showing letters and numbers, albeit in a single column and with noticeably wider characters.
In another application it might look odd, but when combined with the “sunburst” style enclosure, it really comes together. Speaking of the enclosure, [Mark] used OpenSCAD to visualize the five layer stack-up, which was then recreated in Inkscape so it could ultimately be laser-cut from acrylic.
Rounding out the build is a “Leonardo Tiny” ATmega32U4 board, a DS3221 real-time clock (RTC), a couple of pushbuttons, and a light dependent resistor (LDR) used to dim the display when the ambient light level is low. All of the electronics are housed on a small custom PCB, making for a nicely compact package.
This build is as simple as it is stylish, and we wouldn’t be surprised if it inspired more than a few clones. At the time of writing, [Mark] hadn’t published the source code for the ATmega, but he has provided the code to generate the cut files for the enclosure, as well as the Gerber files for the PCB. If you come up with your own version of this retro-futuristic timepiece, let us know.
[CNLohr] has been tinkering with some fun parts of late. He’d found out that ordinary LCD screens could be used as simple touch sensors, and he had to try it for himself. He ended up building a little doohickey that combined USB C, an LCD display, and a touch interface, all for under a buck. You can check out the video below.
The key to this build was the CH32V003 CPU. It’s a RISC-V microcontroller that runs at a healthy 48 MHz, and it costs just 10 cents in reasonable quantities. A PCB etched to mate with a USB C cable eliminates the need for a connector.
[CNLohr] then gave the board a three-digit 7-segment LCD display from Aliexpress, which can be had for around 21 cents if you buy 100 or more. He then figured out how to drive the LCDs with a nifty trick that let the microcontroller use the display as a crude touch sensor. All in all, the total bill of materials for one of these things comes out somewhere under a dollar in quantity.
It’s mostly a random assemblage of tech glued together for a demo, but it’s a fun project. It’s worth checking out even if it’s just to learn how to create an integral USB C port on your own PCBs. The way it’s achieved with the etched contacts and milled-out tabs is pure elegance. Files are on Github for the curious.
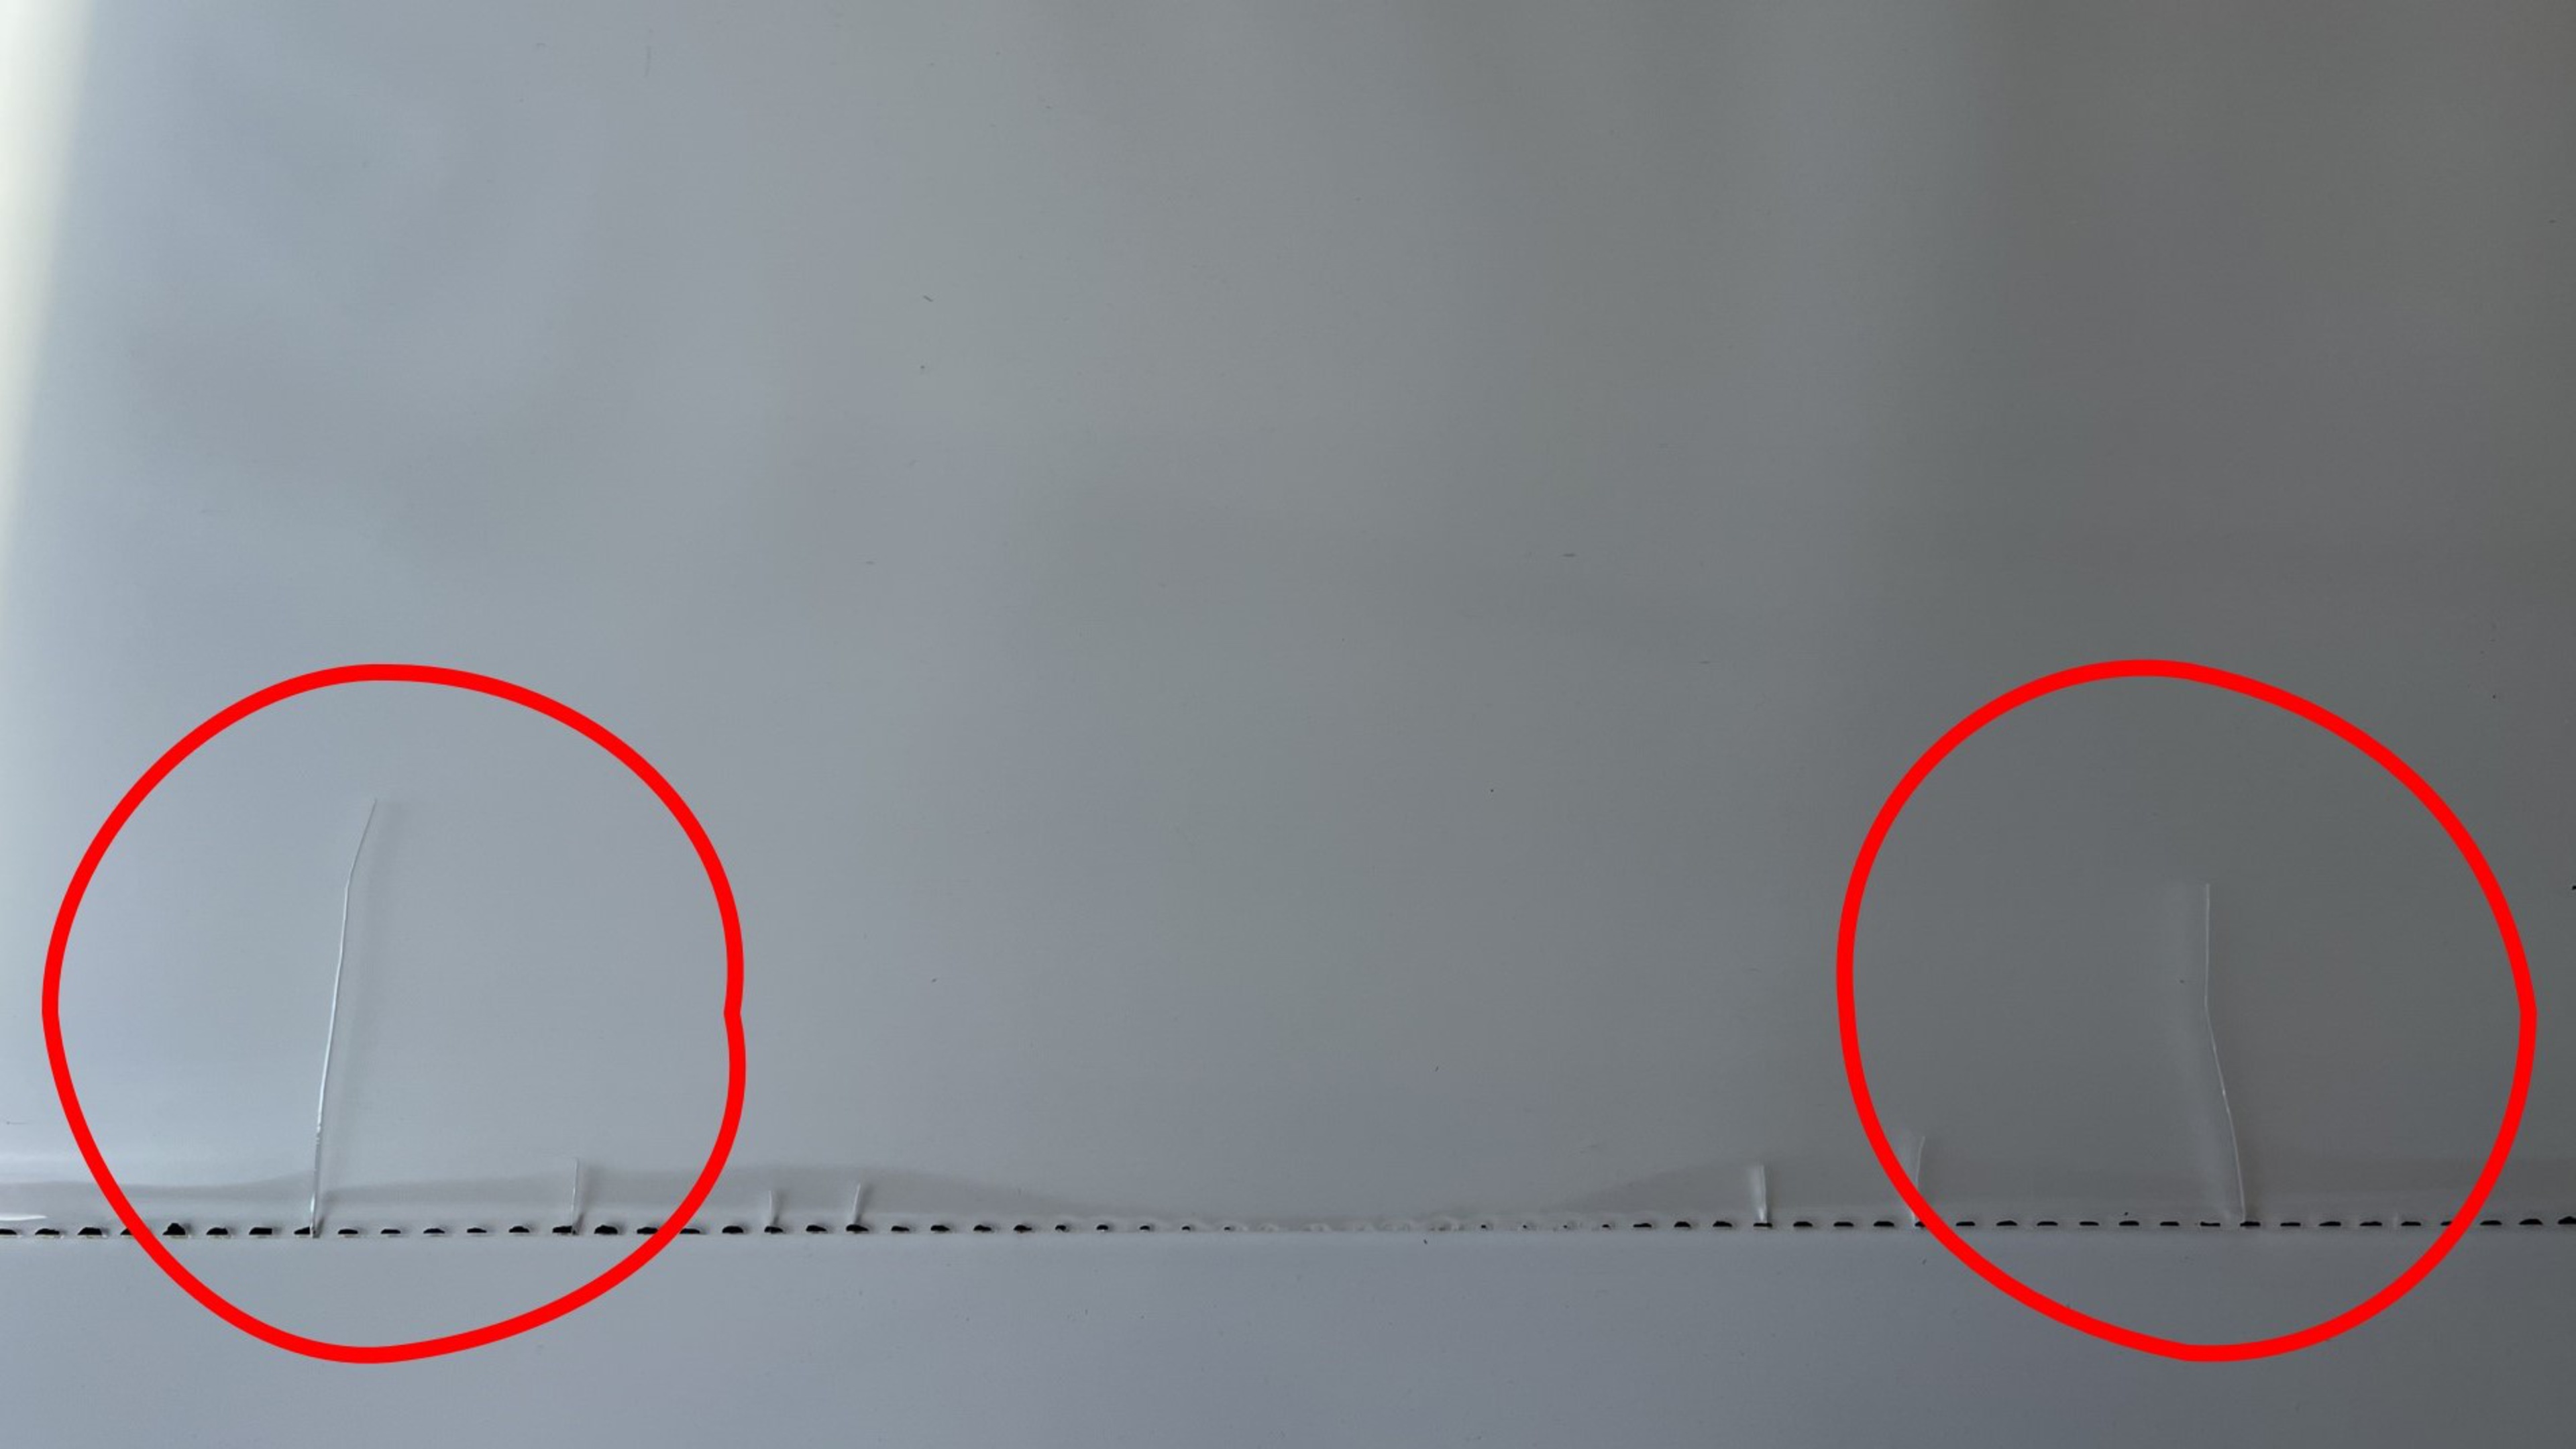
Canadian consumer goods testing site RTINGS has been subjecting 100 TVs to an accelerated TV longevity test, subjecting them so far to over 10,000 hours of on-time, equaling about six years of regular use in a US household. This test has shown a range of interesting issues and defects already, including for the OLED-based TVs. But the most recent issue which they covered is that of uniformity issues with edge-lit TVs. This translates to uneven backlighting including striping and very bright spots, which teardowns revealed to be due to warped reflector sheets, cracked light guides, and burned-out LEDs.
Excluding the 18 OLED TVs, which are now badly burnt in, over a quarter of the remaining TVs in the test suffer from uniformity issues. But things get interesting when contrasting between full-array local dimming (FALD), direct-lit (DL) and edge-lit (EL) LCD TVs. Of the EL types, 7 out of 11 (64%) have uniformity issues, with one having outright failed and others in the process of doing so. Among the FALD and DL types the issue rate here is 14 out of 71 (20%), which is still not ideal after a simulated 6 years of use but far less dramatic.
Cracks in the Samsung AU8000’s Light Guide Plate (Credit: RTINGS)
As part of the RTINGS longevity test, failures and issues are investigated and a teardown for analysis, and fixing, is performed when necessary. For these uniformity issues, the EL LCD teardowns revealed burned-out LEDs in the EL LED strips, with cracks in the light-guide plate (LGP) that distributes the light, as well as warped reflector sheets. The LGPs are offset slightly with plastic standoffs to not touch the very hot LEDs, but these standoffs can melt, followed by the LGP touching the hot LEDs. With the damaged LGP, obviously the LCD backlighting will be horribly uneven.
In the LG QNED80 (2022) TV, its edge lighting LEDs were measured with a thermocouple to be running at a searing 123 °C at the maximum brightness setting. As especially HDR (high-dynamic range) content requires high brightness levels, this would thus be a more common scenario in EL TVs than one might think. As for why EL LCDs still exist since they seem to require extreme heatsinking to keep the LEDs from melting straight through the LCD? RTINGS figures it’s because EL allows for LCD TVs to be thinner, allowing them to compete with OLEDs while selling at a premium compared to even FALD LCDs.