Spice Up The Humble 16×2 LCD With Big Digits

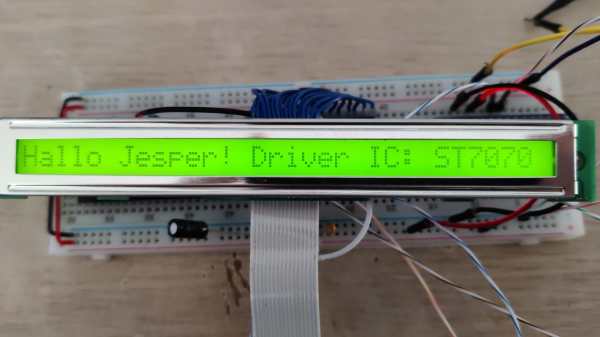
The 16×2 LCD display is a classic in the microcontroller world, and for good reason. Add a couple of wires, download a library, mash out a few lines of code, and your project has a user interface. A utilitarian and somewhat boring UI, though, and one that can be hard to read at a distance. So why not spice it up with these large-type custom fonts?

As [upir] explains, the trick to getting large fonts on a display that’s normally limited to two rows of 16 characters each lies in the eight custom characters the display allows to be added to its preprogrammed character set. These can store carefully crafted patterns that can then be assembled to make reasonable facsimiles of the ten numerals. Each custom pattern forms one-quarter of the finished numeral, which spans what would normally be a two-by-two character matrix on the display. Yes, there’s a one-pixel wide blank space running horizontally and vertically through each big character, but it’s not that distracting.

Composing the custom patterns, and making sure they’re usable across multiple characters, is the real hack here, and [upir] put a lot of work into that. He started out in Illustrator, but quickly switched to a spreadsheet because it allowed him to easily generate the correct binary numbers to pass to the display for each pattern. It seems to have really let his creative juices flow, too — he came up with 24 different fonts! Our favorite is the one he calls “Tron,” which looks a bit like the magnetic character recognition font on the bottom of bank checks. Everyone remembers checks, right?

Hats off to [upir] for a creative and fun way to spice up the humble 16×2 display. We’d love to see someone pick this up and try a complete alphanumeric character set, although that might be a tall order with only eight custom characters to work with. Then again, if Bad Apple on a 16×2 is possible…

Continue reading “Spice Up The Humble 16×2 LCD With Big Digits”

A solar-powered device with a small LCD screen

Low Power Challenge: LCD Solar Creatures Live On Sunlight, Sleep At Night

With all those e-paper based projects doing the rounds these days, including in our Low Power Challenge, you’d almost forget that monochrome LCDs were the original ultra-low-power display. Without them, we wouldn’t have had watches, calculators and handheld games operating off button cell batteries or tiny solar panels back in the ’80s and ’90s. [Gabor] decided to build a set of gadgets with a 1990s LCD aesthetic, called LCD Solar Creatures. These cute little beasts live on nothing but solar power and provide some amusing animations on a classic seven-segment LCD screen.

The Creatures’ activity depends entirely on the amount of power that’s available to them. If their supercapacitors dip below 3.3 V, their micros enter a deep sleep state and do nothing except briefly flash an LED every now and then as a sign of life. When light hits the solar panel, the supercaps are charged up and the Creatures come to life and display a few basic stats. Once the caps hit 4.1 V, they really start their day and run a few programs, including a Game of Life-style simulation and an animation of Euclidean rhythms. Continue reading “Low Power Challenge: LCD Solar Creatures Live On Sunlight, Sleep At Night”

Continuous Printing On LCD Resin Printer: No More Wasted Time On Peeling? Is It Possible?

Anyone who has done any amount of 3D printing with SLA printers is probably well aware of the peeling step with each layer. This involves the newly printed layer being pulled away from the FEP film that is attached to the bottom of the resin vat. Due to the forces involved, the retraction speed of the build plate on the Z-axis has to be carefully tuned to not have something terrible happen, like the object being pulled off the build plate. Ultimately this is what limits SLA print speed, yet [Jan Mrázek] postulates that replacing the FEP with an oxygen-rich layer can help here.

The principle is relatively simple: the presence of oxygen inhibits the curing of resin, which is why for fast curing of resin parts you want to do so in a low oxygen environment, such as when submerged in water. Commercial printers by Carbon use a patented method called “continuous liquid interface production” (CLIP), with resin printers by other companies using a variety of other (also patented) methods that reduce or remove the need for peeling. Theoretically by using an oxygen-permeating layer instead of the FEP film, even a consumer grade SLA printer can skip the peeling step.

The initial attempt by [Jan] to create an oxygen-permeating silicone film to replace the FEP film worked great for about 10 layers, until it seems the oxygen available to the resin ran out and the peeling force became too much. Next attempts involved trying to create an oxygen replenishment mechanism, but unfortunately without much success so far.

Regardless of these setbacks, it’s an interesting research direction that could make cheap consumer-level SLA printers that much more efficient.

(Thumbnail image: the silicone sheet prior to attaching. Heading image: the silicone sheet attached to a resin vat. Both images by [Jan Mrázek])

Reverse Engineering Saves Weller With A Wonky LCD From The Trash Pile

There’s nothing more satisfying than finding a broken piece of gear in the trash and bringing it back to life. Satisfying, but also potentially more time-consuming — someone tossed it for a reason, after all. Figuring out what that reason is and finding a way to back it better is where the fun — and the peril — are.

Luckily, some pieces of equipment have a relatively short list of well-known failure modes, a fact that [Lauri Pirttiaho] relied on for this fix of an old Weller WD1 soldering station. The unit, sporting the familiar light blue Weller livery and more than a few scratches and dings, had an LCD that was DOA. Typically it’s the driver that’s the problem here, but [Lauri]’s diagnosis revealed it was the LCD module itself that was bad.

With OEM replacements being basically unobtainium at this point, the fix was to intercept the data heading from the driver to the old LCD and send it to a new, easily sourced 16×2 character LCD display. This began with an inspection of the display controller’s datasheet, and a bit of probing of the old display to find out which segments and backplanes map to which pins. A little bit of case modding allowed the new display to fit, the old controller chip was removed, and a PIC16 went into its place, in a tidy nest of Kapton tape and bodge wires. The PIC does the job of translating the original display, which had a fair number of custom icons and symbols, into sensible text-based equivalents and sending them to the 16×2 via I2C. The video below shows the hack in action; it honestly looks like it could have come from the factory like that.

The nice thing here is that [Lauri]’s fix applies to a whole range of Weller stations, so if you find one in the trash, you might be able to resuscitate it. Failing that, you could always roll your own Weller from (more-or-less) scratch.

Continue reading “Reverse Engineering Saves Weller With A Wonky LCD From The Trash Pile”

DrLCD Is Here To Give Your MSLA Printer A Checkup

Over the last couple years, we’ve seen an absolute explosion of masked stereolithography (MSLA) 3D printers that use an LCD screen to selectively block UV light coming from a powerful LED array. Combined with a stepper motor that gradually lifts the build plate away from the screen, this arrangement can be used to produce high-resolution 3D prints out of photosensitive resins. The machines are cheap, relatively simple, and the end results can be phenomenal.

But they aren’t foolproof. As [Jan Mrázek] explains, these printers are only as good as their optical setup — if they don’t have a consistent UV light source, or the masking LCD isn’t working properly, the final printed part will suffer. In an effort to better understand how these factors impact print quality, he designed the DrLCD: a TSL2561 luminosity sensor mounted to a robotic arm with associated software to map out the printer’s light source.

The individual LED assemblies are clearly visible.

The results when running DrLCD against a few different types of printers is fascinating. [Jan] was clearly able to make out the type of lenses used, and in one case, was even able to detect that a darker spot in the scan was due to a bit of resin having leaked into the light source and clouded up the optics.

But DrLCD can do more than just tell you where you’ve got a dark spot. Using the data collected from the scan, it’s possible to create a “compensation map” that can be combined with the sliced model you wish to print. As the slicer assumes an idealistic light source, this map can help by adding additional masking where bright spots in the display have been detected.

[Jan] goes on to compare the dimensional accuracy of printed parts before and after the compensation map has been applied to the model, and was able to identify a small but distinctive improvement. Not everyone is going to be concerned about the 157 µm deviation observed without the backlight compensation, but we certainly aren’t going to complain about 3D printers getting even more dimensionally accurate.

A couple years back we covered a similar technique that used a DSLR to capture high-resolution images of the bed. While arguably much easier to pull off, we can’t help but fall in love with the glorious overengineering that went into the DrLCD system, and we can’t wait until it starts making house calls.

LCD Monitor Plays The Hits

In the old days, it wasn’t uncommon to put an AM radio near a computer or a monitor and deliberately cause interference to have a crude form of sound generation. Did you miss out on that? No! Thanks to [luambfb] you can now do the same trick with a common LCD monitor. You’ll need the horizontal refresh rate of the monitor in question.

Of course, doing it is somewhat less interesting than learning how it works. The effect relies on the fact that the LCDs emit signals as it refreshes a row. A black row emits relatively low energy while a white row emits more. Grayscale… well, you get the idea. Continue reading “LCD Monitor Plays The Hits”

LCD Screen Windows Are This Summer’s Hottest Case Mod

Case modding took off in the late 90s, and taught us all that computers could (and should!) look awesome. Much of the aesthetic went mainstream, and now tons of computer cases come with lights and windows and all the rest. [WysWyg_Protogen] realized those simple case windows could be way cooler with a neat LCD hack, and set to work.

The concept is simple. Take an old LCD monitor, remove the backlight and extraneous hardware, and then install it to the window in a computer case. When lit from behind via LEDs in the case, the screen creates a ghostly display through which the computer’s internals can still partially be seen. It’s a really compelling effect, and in theory, quite easy to achieve. All one need do is mount the stripped-down screen to the case and pipe it video from the graphics card.

In practice, it’s a little tricky. Disassembling the screen and removing things like the anti-glare coating can be tough to do without damaging the delicate panel inside. The windows typically used on computer cases can dull the effect, too. However, [WysWyg_Protogen] is continuing to tinker with the project and the results are getting increasingly impressive with each iteration. It doesn’t photograph too well, but it looks truly amazing in motion.

We often forget LCDs are transparent in their basic form, as we generally only use them with backlights or reflective backers. They really do look great when used in this transmissive way, though. Video after the break.

Continue reading “LCD Screen Windows Are This Summer’s Hottest Case Mod”