Color Dot Puzzle Will Wrinkle Your Brain

2022 is a good year for puzzles, and if you’re getting tired of Wordle, you might be after a new challenge. This color puzzle from [Sebastian Coddington] could be just what you’re looking for. 

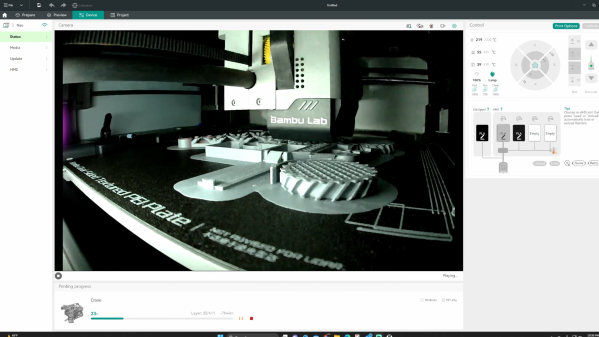
[Sebastian] describes the 4×4 Color Dot Puzzle as a sort of combination of the ideas behind the Rubik’s Cube and the 15 puzzle. The aim is to arrange the 16 colored tiles on the board to form four single-colored 2×2 squares in the overall 4×4 board. The puzzle is 3D printed, using 6 colors of filament – black for the body of the puzzle, white for the control sticks, and yellow, green, red, and blue for the individual tiles.

We haven’t seen any mathematical proofs of how to beat the game, but we’re sure [Sebastian] has gotten good at beating the puzzle having designed it himself. According to tipster [Michael Gardi], who knows a thing or two about 3D printing games himself, the puzzle makes for a fun little mind teaser.

If you’re more of a jigsaw person, consider this advanced illuminated build.

Tutorial Teaches You To Use Neopixels With Micropython

Addressable LEDs are wonderful things, with products like Neopixels making it easy to create all kinds of vibrant, blinking glowables. However, for those without a lot of electronics experience, using these devices can seem a bit daunting. [Bhavesh Kakwani] is here to help, with his tutorial on getting started with Neopixels using the MicroPython environment. 

The tutorial flows on from [Bhavesh’s] Blink example for MicroPython, and is aimed at beginners who are learning for the first time. It explains the theory behind RGB color mixing that allows one to generate all manner of colors with WS2812B-based LED strings, and how to code for the Raspberry Pi Pico to make these LEDs do one’s bidding.

The guide even covers the use of the Wokwi simulation tool. This is a great way for beginners to test their projects before having to play with actual hardware. This is useful for beginners, because it’s a great way to catch mistakes – is there a software problem, or did they push the soldering iron through the microcontroller? It’s also a technique that pays dividends when working on more complicated projects.

Whether you’re entirely new to the embedded world, or just want to learn the intricacies of talking to addressable LEDs and make sense of color mixing theory, this tutorial will serve you well. Before you know it, you’ll be building glowing projects with the best of them!


Simple Dev Board Module Socket

When you’re building a quick prototype or a one-off project it’s nice to be able to securely mount the various modules and development boards. Sometimes these boards have mounting holes, but often they don’t. As an example from the latter category, digital music instrument maker and performer [DIYDSP] shows us how to build a simple socket to mount an STM32 Nucleo-32 module.

The socket is built on a standard pad-per-hole piece of vector board cut to the desired size. Pairs of female pin header strips are soldered down to the board. The inner pair of headers is for the module, the outer pair is for your interconnections. The headers are connected up with short solder bridges, and [DIYDSP] recommends you extend the outer pair several pins longer than necessary. These extras can be used for additional power or ground points, or on some boards they could connect to the debug header pins. He prefers to use female sockets because that lessens the odds that an accidentally bent pin will short something out.

Final step is to drill your mounting holes in the desired location, and no more development boards free-floating and held up only by wires. Do you have any tips for mounting these kinds of modules, either individually as shown here or onto PCBs? Let us know in the comments.

Continue reading “Simple Dev Board Module Socket”

Homemade Probe For 3D Printer: $3

You have a few choices if you want to use a probe to level your 3D printer bed. Rarely, you’ll see optical or capacitive probes. More commonly, though, your probe will sense a metal print or uses a physical probe to touch the print bed. [Design Prototype Test] has long used a BLTouch which uses the latter method. However, putting it in a heated build chamber prevented it from working so he set out to make his own simple design using an Allen key.

We’ve seen Allen key sensors before, but usually, they use a microswitch. We’ve also seen microswitches used to directly probe the bed. But, in this case, a 3D printed fan shroud uses an optical sensor to note when the Allen key hits the bed.

Continue reading “Homemade Probe For 3D Printer: $3”

Pyrotechnic Posters Are Fireworks Drawn On Paper

There’s a deep love many humans feel for fire; it’s often cited as one of the most important discoveries that led to the founding of civilization. The work of French artistic duo [Pinaffo-Pluvinage] definitely hits upon that, combining pyrotechnics with paper to make what are probably the most exciting posters you’ve ever seen, as reported by Heise Online.

The artworks are made with a variety of powders, including those for blue and red flames and one with a special “scintillating” effect.

The posters aren’t huge, measuring 50 cm x 70 cm. However, what they lack in size, they make up for with literal flames. Yes, the posters are laced with a variety of pyrotechnic powders that combust in a variety of designs and patterns to create a dynamic burning artwork once ignited.

Each poster is thus a work of art in both the visual and combustible realms. Different parts of the artwork burn at differnt rates and with different colored flames, adding to the performance when the poster is burned. Impressively, the artworks are not destroyed in the process; the pyrotechnic material burns off with much flame and smoke without destroying the poster itself.

Putting together the posters wasn’t as simple as simply doodling some designs. The duo had to develop their own methods to apply the pyrotechnic material to the paper. Reportedly, the effort took hundreds of experiments to get right.

It’s unclear exactly how the effect is achieved without burning the whole poster down; one suspects some kind of protective layer may be used. It’s quite the opposite of flash paper, which consumes the paper itself in the combustion.

In any case, fireworks experts will likely have some good ideas of the chemicals used to achieve the flaming effects; sound off in the comments if you know what’s what!

The pieces could be interpreted as a commentary on the transience of all things, or the artist’s intention could have been something different entirely. Who can say? Video after the break.

Continue reading “Pyrotechnic Posters Are Fireworks Drawn On Paper”

Maybe The Simplest Cloud Chamber

Have you ever seen a Wilson cloud chamber — a science experiment that lets you visualize ionizing radiation? How hard would it be to build one? If you follow [stoppi’s] example, not hard at all (German, Google Translate link). A plastic bottle. some tape, a flashlight, some water, hot glue, and — the only exotic part — a bit of americium 241. You can see the design in the video below and the page also has some more sophisticated designs including one that uses a CPU cooler. Even if you don’t speak German, the video will be very helpful.

You need to temper your expectations if you build the simple version, but it appears to work. The plastic bottle is a must because you have to squeeze it to get a pressure change in the vessel.

Continue reading “Maybe The Simplest Cloud Chamber”