This Robot Picks Locks, If You’re Very Patient

We all know the Hollywood trope of picking a lock with a paperclip, and while it certainly is doable, most reputable locks require slightly more sophisticated tools to pick effectively. That’s not to say that wire is off the table for locksports, though, as this cool lock-picking robot demonstrates.

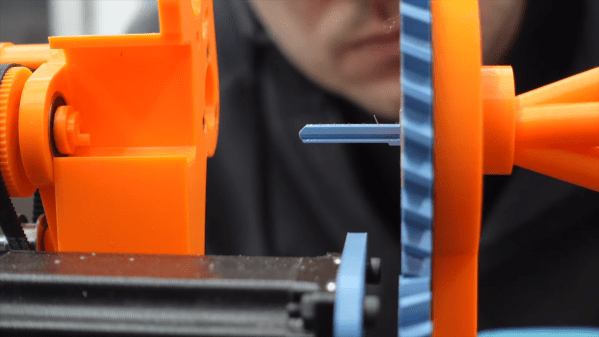
The basics behind [Sparks and Code]’s design are pretty simple. Locks are picked by pushing pins up inside the cylinder until they line up with the shear plane, allowing the cylinder to turn. Normally this is done a pin at a time with a specialized tool and with a slight bit of torque on the cylinder. Here, tough, thin, stiff wires passing through tiny holes in a blade shaped to fit the keyway are used to push all the pins up at once, eliminating the need to keep tension on the cylinder to hold pins in place.

Sounds simple, but in practice, this looks like it was a nightmare. Getting five wires to fit into the keyway and guiding them to each pin wasn’t easy, nor was powering the linear actuators that slide the wires in and out. Applying torque to the lock was a chore too; even though tension isn’t needed to retain picked pins, the cylinder still needs to rotate, which means moving the whole picking assembly. But the biggest problem by far seems to be the fragility of the blade that goes into the keyway. SLA might not be the best choice here; perhaps the blade could be made from two thin pieces of aluminum with channels milled on their faces and then assembled face-to-face.

The robot works, albeit very slowly. This isn’t [Sparks and Code]’s first foray into robot lock picking. His previous version attempted to mimic how a human would pick a lock, so this is really thinking outside the box.

Continue reading “This Robot Picks Locks, If You’re Very Patient”

Ham Radio Paddles Cost Virtually Nothing

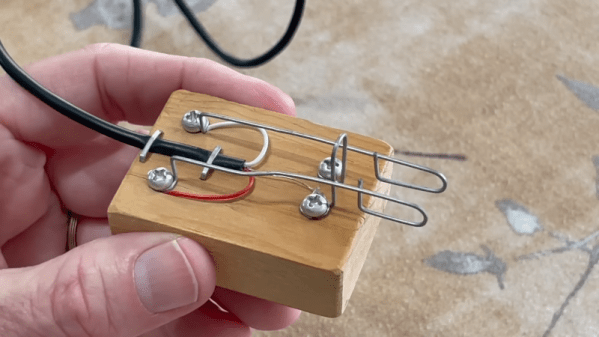
If you don’t know Morse code, you probably think of a radio operator using a “key” to send Morse code. These were — and still are — used. They are little more than a switch built to be comfortable in your hand and spring loaded so the switch makes when you push down and breaks when you let up. Many modern operators prefer using paddles along with an electronic keyer, but paddles can be expensive. [N1JI] didn’t pay much for his, though. He took paperclips, a block of wood, and some other scrap bits and made his own paddles. You can see the results in the video below.

When you use a key, you are responsible for making the correct length of dits and dahs. Fast operators eventually moved to a “bug,” which is a type of paddle that lets you push one way or another to make a dash (still with your own sense of timing). However, if you push the other way, a mechanical oscillator sends a series of uniform dots for as long as you hold the paddle down.

Modern paddles tend to work with electronic “iambic” keyers. Like a bug, you push one way to make dots and the other way to make dashes. However, the dashes are also perfectly timed, and you can squeeze the paddle to make alternating dots and dashes. It takes a little practice, but it results in a more uniform code, and most people can send it faster with a “sideswiper” than with a straight key.

Continue reading “Ham Radio Paddles Cost Virtually Nothing”

3D Printing In Custom PLA With A TPU Core

[Stefan] from CNC Kitchen explored an unusual approach to a multi-material print by making custom PLA filament with a TPU core to make it super-tough. TPU is a flexible filament whereas PLA is hard almost to the point of being brittle. The combo results in a filament with some unusual properties, inviting some thoughts about what else is possible.

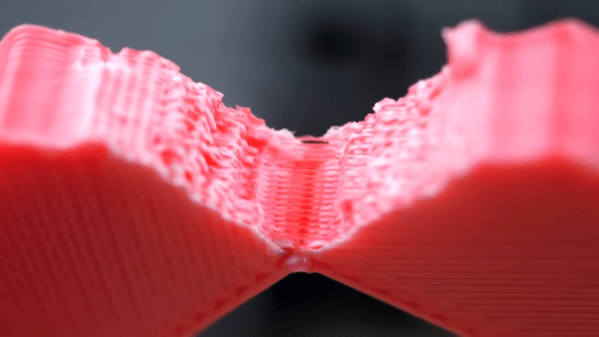
Cross-section of 3D print using white PLA with a red TPU core.

[Stefan]’s video covers a few different filament experiments, but if you’d like to see the TPU-PLA composite you can skip ahead to 18:15. He first creates the composite filament by printing an oversized version on a 3D printer, then re-forming it by running it through a Recreator to resize it down to 1.75 mm.

We have seen this technique of printing custom filaments before, which is useful to create DIY multi-color filaments in small quantities right on a 3D printer’s print bed with no special equipment required. This is an effective method but results in filament with a hexagonal profile, which works but isn’t really ideal. By printing his custom composite at 4 mm diameter then resizing the filament down to 1.75 mm, [Stefan] was able to improve overall printability.

That being said, TPU and PLA have very different characteristics and don’t like to adhere to one another so the process was pretty fiddly. TPU-cored PLA might be troublesome and uncooperative to make, but it can be done with some patience and fairly simple equipment.

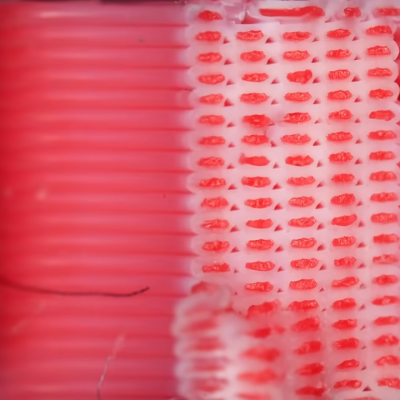
Despite the difficulties, test prints were pretty interesting. PLA toughness was roughly doubled and under magnification one can see a lattice of TPU strands throughout the prints which are unlike anything else. Check it out in the video, embedded below.

Continue reading “3D Printing In Custom PLA With A TPU Core”

Almost Making A Camera Sensor From Scratch

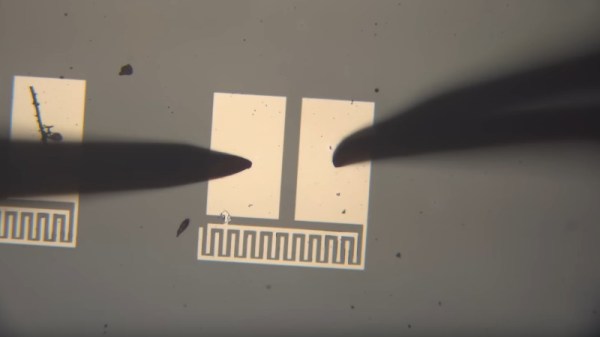
On our travels round the hardware world we’ve encountered more than one group pursuing the goal of making their own silicon integrated circuits, and indeed we’ve seen [Sam Zeloof] producing some of the first practical home-made devices. But silicon is simply one of many different semiconductor materials, and it’s possible to make working semiconductor devices in a less complex lab using some of the others. As an example, [Breaking Taps] has been working with copper (II) oxide, producing photodiodes, and coming within touching distance of a working matrix array.

The video below the break is a comprehensive primer on simple semiconductor production and the challenges of producing copper (II) oxide rather than the lower temperature copper (I) oxide. The devices made have a Schottky junction between the semiconductor and an aluminium conductor, and after some concerns about whether the silicon substrate is part of the circuit and even some spectacular destruction of devices, he has a working photodiode with a satisfying change on the curve tracer when light is applied. The finale is an array of the devices to form a rudimentary camera sensor, but sadly due to alignment issues it’s not quite there  yet. We look forward to seeing it when he solves those problems.

As we’ve seen before, copper oxide isn’t the only semiconductor material outside the silicon envelope.

Continue reading “Almost Making A Camera Sensor From Scratch”

Here’s How That Disney 360° Treadmill Works

One thing going slightly viral lately is footage of Disney’s “HoloTile” infinite floor, an experimental sort of 360° treadmill developed by [Lanny Smoot]. But how exactly does it work? Details about that are less common, but [Marques Brownlee] got first-hand experience with HoloTile and has a video all about the details.

HoloTile is a walking surface that looks like it’s made up of blueish bumps or knobs of some kind. When one walks upon the surface, it constantly works to move its occupant back to the center.

Whenever one moves, the surface works to move the user back to the center.

Each of these bumps is in fact a disk that has the ability spin one way or another, and pivot in different directions. Each disk therefore becomes a sort of tilted wheel whose edge is in contact with whatever is on its surface. By exerting fine control over each of these actuators, the control system is able to create a conveyor-belt like effect in any arbitrary direction. This can be leveraged in several different ways, including acting as a sort of infinite virtual floor.

[Marques] found the system highly responsive and capable of faster movement that many would find comfortable. When walking on it, there is a feeling of one’s body moving in an unexpected direction, but that was something he found himself getting used to. He also found that it wasn’t exactly quiet, but we suppose one can’t have everything.

How this device works has a rugged sort of elegant brute force vibe to it that we find appealing. It is also quite different in principle from other motorized approaches to simulate the feeling of walking while keeping the user in one place.

The whole video is embedded just below the page break, but if you’d like to jump directly to [Marques] explaining and showing exactly how the device works, you can skip to the 2:22 mark.

Continue reading “Here’s How That Disney 360° Treadmill Works”

Google Removes RISC-V Support From Android

Last year the introduction of  RISC-V support to the Android-specific, Linux-derived Android Common Kernel (ACK) made it seem that before long Android devices might be using SoCs based around the RISC-V ISA, but it would seem that these hopes are now dashed. As reported by Android Authority, with a series of recently accepted patches this RISC-V support was stripped again from the ACK. While this doesn’t mean that Android cannot be made to work on RISC-V, any company interested would have to do all of the heavy lifting themselves, which might include Qualcomm with their recently announced RISC-V-based smartwatch Snapdragon SoC.

No reason was provided by Google for this change, and the official statement from Google to Android Authority says that Google is not ready to provide a single supported Android Generic Kernel Image (GKI), but that ‘Android will continue to support RISC-V’. This change however, removes RISC-V kernel support from the ACK, and since Google only certifies Android builds which ship with a GKI featuring an ACK, this effectively means that RISC-V is not supported at this point, and likely won’t be for the foreseeable future.

As discussed on Hacker News, a potential reason might be the very fragmentary nature of the RISC-V ISA, which makes a standard RISC-V kernel very complicated if you want to support more than a (barebones) profile. This is also supported by a RISC-V mailing list thread, where ‘expensive maintenance’ is mentioned for why Google doesn’t want to support RISC-V.

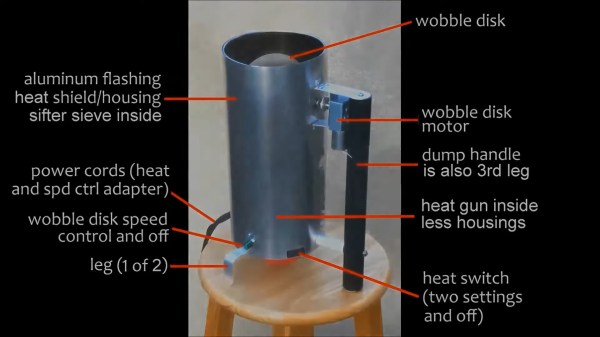
A DIY coffee roaster with part callouts.

Follow The Red Ball Wobble Disk Roaster To Coffee Excellence

If you’ve never considered roasting your own coffee at home, you may be surprised to learn that it can be done in a few minutes with a regular popcorn popper and not much else. After all, you only really need two things to roast coffee: heat, and constant agitation to distribute that heat evenly. While the popcorn popper provides both, it’s easy to end up with semi-uneven roasts, probably because the beans are mostly just spinning around and not being tossed as well as they could be. Eventually, one might want a more advanced machine, and that’s where something like [Larry Cotton]’s latest wobble disk roaster can step in.

For starters, this machine roasts more beans than the average popcorn popper in a single throw — the maximum is 350g, or just over three-quarters of a full pound, which is way more than the average popcorn machine will hold. It essentially consists of a heat gun pointed upwards at a sieve full of green coffee beans that are being constantly pushed around by a motorized wobbling disk. As the heat blows, the large metal disk does figure eights through the beans, keeping the heat nice and even. So where does the red ball come in? It’s at the bottom, keeping the flying bean skins (chaff) from entering the heat gun’s fan motor.

Toward the end of the short video after the break, you’ll see a diagram showing all the parts of this roaster. If that’s not enough for you, here’s a build guide for a previous wobble disk roaster (PDF) that should be quite helpful in building either version.

If you want to see some of Larry’s previous machines, we’ve got ’em. And then you can let Hackaday Editor-in-Chief [Elliot Williams] tell you all about roasting at home.

Continue reading “Follow The Red Ball Wobble Disk Roaster To Coffee Excellence”