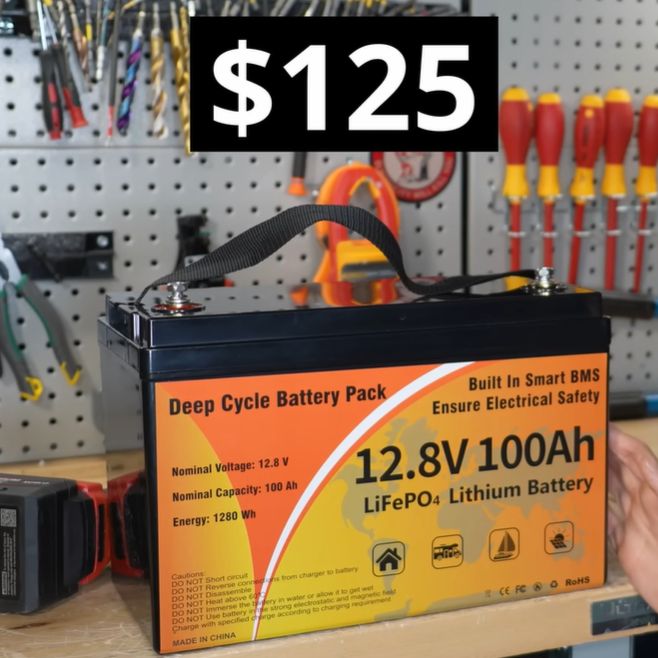
Experimenting With MicroPython On The Bus Pirate 5

I recently got one of the new RP2040-based Bus Pirate 5 (BP5), a multi-purpose interface debugging and testing tool. Scanning the various such tools in my toolbox already: an Analog Discovery 2, a new Glasgow Interface Explorer, and a couple of pyboards, I realized they all had a Python or MicroPython user interface. A few people on the BP5 forums had tossed around the idea of MicroPython, and it just so happened that I was experimenting with building beta versions of MicroPython for a RP2350 board at the time. Naturally, I started wondering, “just how hard can it be to get MicroPython running on the BP5?”

The Lazy Approach

Rather than duplicating the BP5 firmware functionality, I decided to ignore it completely and go with existing MicroPython capabilities. I planned to just make a simple set of board definition files — perhaps Board Support Package (BSP) is a better term? I’ve done this a dozen times before for development and custom boards. Then write a collection of MicroPython modules to conform to the unique aspects in the BP5 hardware. As user [torwag] over on the Bus Pirate forums said back in March:

Micropython comes already with some modules and enough functions to get some stuff out-of-the-box working. E.g. the infamous version of “hello world” for microcontrollers aka led-blinking.

Continue reading “Experimenting With MicroPython On The Bus Pirate 5”

Mapping A Fruit Fly’s Brain With Crowdsourced Research

Example of a graph representation of one identified network with connections coded by neurotransmitter types. (Credit: Amy Sterling, Murthy and Seung Labs, Princeton University)

Compared to the human brain, a fruit fly (Drosophila melanogaster) brain is positively miniscule, not only in sheer volume, but also with a mere 140,000 or so neurons and 50 million synapses. Despite this relative simplicity, figuring out how the brain of such a tiny fly works is still an ongoing process. Recently a big leap forward was made thanks to crowdsourced research, resulting in the FlyWire connectome map. Starting with high-resolution electron microscope data, the connections between the individual neurons (the connectome) was painstakingly pieced together, also using computer algorithms, but with validation by a large group of human volunteers using a game-like platform called EyeWire to perform said validation.

This work also includes identifying cell types, with over 8,000 different cell types identified. Within the full connectome subcircuits were identified, as part of an effort to create an ‘effectome’, i.e. a functional model of the physical circuits. With the finished adult female fruit fly connectome in hand, groups of researchers can now use it to make predictions and put these circuits alongside experimental contexts to connect activity in specific parts of the connectome to specific behavior of these flies.

Perhaps most interesting is how creating a game-like environment made the tedious work of reverse-engineering the brain wiring into something that the average person could help with, drastically cutting back the time required to create this connectome. Perhaps that crowdsourced research can also help with the ongoing process to map the human brain, even if that ups the scale of the dataset by many factors. Until we learn more, at this point even comprehending a fruit fly’s brain may conceivably give us many hints which could speed up understanding the human brain.

Featured image: “Drosophila Melanogaster Proboscis” by [Sanjay Acharya]

Breaking News: 2024 Supercon SAO Contest Deadline Extended

More than a couple folks have written us saying that their entries into the Supercon Add-On Contest got caught up in the Chinese fall holidays. Add to that our tendency to wait until the last minute, and there still more projects out there that we’d like to see. So we’re extending the deadline one more week, until October 22nd.

AND!XOR Doom SAO from years past.

If you’re just tuning in now, well, you’ve got some catching up to do. Supercon Add-Ons are another step forward in the tradition of renaming the original SAO. One of our favorite resources on the subject comes from prolific SAO designer [Twinkle Twinkie], and you can even download PCB footprints over there on Hackaday.io.

Don’t know why you want to make an SAO?  Even if you’re not coming to Supercon this year? Well, our own [Tom Nardi] describes it as a low barrier to entry, full-stack hardware design and production tutorial. Plus, you’ll have something to trade with like-minded hardware nerds at the next con you attend.

We’ve already seen some killer artistic entries, but we want to see yours! We know the time’s tight, but you can still get in a last minute board run if you get started today. And those of you who are sitting at home waiting for boards to arrive, wipe that sweat from your brow. We’ll catch up with you next Tuesday!

ANTIRTOS: No RTOS Needed

Embedded programming is a tricky task that looks straightforward to the uninitiated, but those with a few decades of experience know differently. Getting what you want to work predictably or even fit into the target can be challenging. When you get to a certain level of complexity, breaking code down into multiple tasks can become necessary, and then most of us will reach for a real-time operating system (RTOS), and the real fun begins. [Aleksei Tertychnyi] clearly understands such issues but instead came up with an alternative they call ANTIRTOS.

The idea behind the project is not to use an RTOS at all but to manage tasks deterministically by utilizing multiple queues of function pointers. The work results in an ultra-lightweight task management library targeting embedded platforms, whether Arduino-based or otherwise. It’s pure C++, so it generally doesn’t matter. The emphasis is on rapid interrupt response, which is, we know, critical to a good embedded design. Implemented as a single header file that is less than 350 lines long, it is not hard to understand (provided you know C++ templates!) and easy to extend to add needed features as they arise. A small code base also makes debugging easier. A vital point of the project is the management of delay routines. Instead of a plain delay(), you write a custom version that executes your short execution task queue, so no time is wasted. Of course, you have to plan how the tasks are grouped and scheduled and all the data flow issues, but that’s all the stuff you’d be doing anyway.

The GitHub project page has some clear examples and is the place to grab that header file to try it yourself. When you really need an RTOS, you have a lot of choices, mostly costing money, but here’s our guide to two popular open source projects: FreeRTOS and ChibiOS. Sometimes, an RTOS isn’t enough, so we design our own full OS from scratch — sort of.

Modular Magnetic LED Matrix

[bitluni] seems rather fond of soldering lots of LEDs, and fortunately for us the result is always interesting eye candy. The latest iteration of this venture features 8 mm WS2812D-F8 addressable LEDs, offering a significant simplification in electronics and the potential for much brighter displays.

The previous version used off-the-shelf 8×8 LED panels but had to be multiplexed, limiting brightness, and required a more complex driver circuit. To control the panel, [bitluni] used the ATtiny running the MegaTinyCore Arduino core. Off-the-shelf four-pin magnetic connectors allow the panels to snap together. They work well but are comically difficult to solder since they keep grabbing the soldering iron. [bitluni] also created a simple battery module and 3D printed neat enclosures for everything.

Having faced the arduous task of fixing individual LEDs on massive LED walls in the past, [bitluni] experimented with staggered holes that allow through-hole LEDs to be plugged in without soldering. Unfortunately, with long leads protruding from the back of the PCB, shorting became an immediate issue. While he ultimately resorted to soldering them for reliability, we’re intrigued by the potential of refining this pluggable design.

The final product snapped together satisfyingly, and [bitluni] programmed a simple animation scheme that automatically updates as panels are added or removed. What would you use these for? Let us know in the comments below. Continue reading “Modular Magnetic LED Matrix”

What Actually Causes Warping In 3D Prints?

The 3D printing process is cool, but it’s also really annoying at times. Specifically, when you want to get a part printed, and no matter how you orientate things, what adhesion aids you use or what slicer settings you tweak, it just won’t print right. [David Malawey] has been thinking a little about the problem of the edges of wide prints tending to curl upwards, and we believe they may be on to something.

Obviously, we’re talking about the lowest common denominator of 3D printing, FDM, here. Other 3D printing technologies have their gotchas. Anyway, when printing a wide object, edge curling or warping is a known annoyance. Many people will just try it and hope for the best. When a print’s extreme ends start peeling away from the heat bed, causing the print to collide with the head, they often get ripped off the bed and unceremoniously ejected onto the carpet. Our first thought will be, “Oh, bed adhesion again”, followed by checking the usual suspects: bed temperature, cleanliness and surface preparation. Next, we might add a brim or some sacrificial ‘bunny ears’ to keep those pesky edges nailed down. Sometimes this works, but sometimes not. It can be frustrating. [David] explains in the YouTube short how the contraction of each layer of materials is compounded by its length, and these stresses accumulate as the print layers build. A simple demonstration shows how a stack of stressed sections will want to curl at the ends and roll up inwards.

This mechanism would certainly go some way to explain the way these long prints behave and why our mitigation attempts are sometimes in vain. The long and short of it is to fix the issue at the design stage, to minimize those contraction forces, and reduce the likelihood of edge curling.

Does this sound familiar? We thought we remembered this, too, from years ago. Anyway, the demonstration was good and highlighted the issue well.

Continue reading “What Actually Causes Warping In 3D Prints?”

A RISC-V LISP Compiler…Written In Lisp

Ah, Lisp, the archaic language that just keeps on giving. You either love or hate it, but you’ll never stop it. [David Johnson-Davies] is clearly in the love it camp and, to that end, has produced a fair number of tools wedging this language into all kinds of nooks and crannies. The particular nook in question is the RISC-V ISA, with their Lisp-to-RISC-V compiler. This project leads on from their RISC-V assembler by allowing a Lisp function to be compiled directly to assembly and then deployed as callable, provided you stick to the supported language subset, that is!

The fun thing is—you guessed it—it’s written in Lisp. In fact, both projects are pure Lisp and can be run on the uLisp core and deployed onto your microcontroller of choice. Because who wouldn’t want to compile Lisp on a Lisp machine? To add to the fun, [David] created a previous project targeting ARM, so you’ve got even fewer excuses for not being able to access this. If you’ve managed to get your paws on the new Raspberry Pi Pico-2, then you can take your pick and run Lisp on either core type and still compile to native.

The Lisp-Risc-V project can be found in this GitHub repo, with the other tools easy enough to locate.

We see a fair few Lisp projects on these pages. Here’s another bare metal Lisp implementation using AVR. And how many lines of code does it take to implement Lisp anyway? The answer is 42 200 lines of C, to be exact.