Hacklet 118 – Infrared And Universal Remote Controls

The first remote control for a TV was the Zenith Space Command back in the 1950’s. Space Command used sounds at ultrasonic frequencies to control the set. It wasn’t until the 1980’s and the Viewstar cable box that infrared entered the picture. Remote controls spread like wildfire. It wasn’t long before every piece of consumer electronics had one. Coffee tables were littered with the devices. It didn’t take long for universal remotes to hit the scene. [Woz] himself worked on the CL9 Core device, back in 1987. Even in today’s world of smart TV’s and the internet of things, universal remotes are still a big item. Hackers, makers, and engineers are always trying to build a device that works better for them. This week’s Hacklet is about some of the best universal and IR remote projects on Hackaday.io!
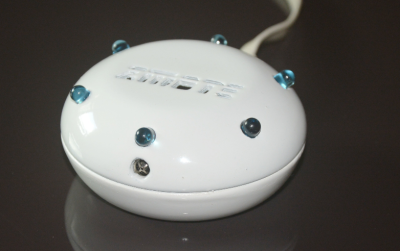
smoteWe start with [Harikrishna] and zmote. Zmote is an open source WiFi enabled, infrared,  360° remote control. That’s a mouthful. It might be easier to say it’s an ESP8266 and some IR LEDs. An ESP-01 module connects the device to WiFi and provides the 32-bit processor which runs the show. Learning functionality comes courtesy of a TSOP1738 modulated infrared receiver. The beauty of the Zmote is in the software. REST and MQTT connectivity are available. Everything is MIT licensed, and all the code is available on Github.


easton

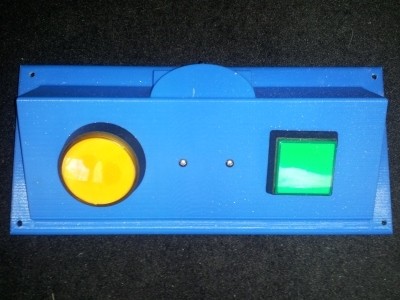
Next up is [Benjamin Kenobi] with TV Remote Control, Limited. Not everyone can operate the tiny buttons on a modern remote. [Benjamin] built this device for Easton, a special kid with a disability that impairs his motor skills. The 3D printed case holds two buttons – one for power, and one to change the channel. An Arduino Nano running [Ken Shirriff’s] IR library is the brains of the operation. The IR signal timing is hard coded for simplicity. One problem [Ben] ran into was the Nano’s high current draw, even in sleep mode. Batteries wouldn’t last a week. A simple diode circuit with a reed relay keeps the Nano shut down until Easton presses a button.
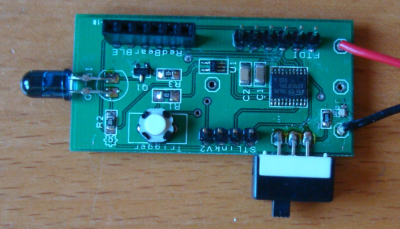
 

openirNext we have [Nevyn] with OpenIR – Infrared Remote Control. A dead DSLR remote shutter release was all the motivation [Nevyn] needed to start work on his own universal remote control. OpenIR can be connected to (and controlled by) just about anything with a UART – a PC via an FTDI cable, a Bluetooth module, even an ESP8266. The module can be programmed by entering pulse length data through a custom Windows application. The Windows app even allows the user to view the pulses graphically, like a scope. The data is stored on an EEPROM on OpenIR’s PCB. Once programmed, the OpenIR board is ready to control the world.
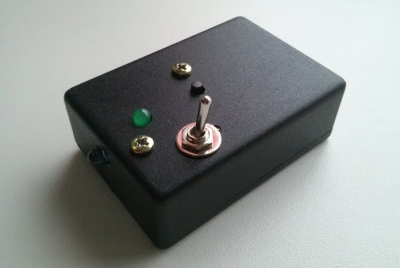
onebuttonFinally, we have [facelessloser] with One button TV remote. This project may be the simplest open source remote control this side of TV-B-GONE. He wanted to build a simple remote control for his young daughter to scan between the various kids channels. A simple toggle switch turns the device on, and one button performs the rest of the magic. [Facelessloser] wanted to “move up” from an Arduino to an ATtiny85. This project became part of his ATtiny education. A custom PCB from OSH Park ties things together. A simple black project box keeps the electronics safe from tiny fingers – at least until she’s old enough to use a screwdriver.

If you want to see more IR and universal remote��projects, check out our new infrared and universal remote projects list. See a project I might have missed? Don’t be shy, just drop me a message on Hackaday.io. That’s it for this week’s Hacklet, As always, see you next week. Same hack time, same hack channel, bringing you the best of Hackaday.io!

Make Your Own Infrared Camera On The Cheap!

This is a super fun hack that’s been around for ages — but now with cheap full 1080P HD camera availability, it’s probably a good time to make your own infrared camera!

It’s actually a very easy modification to perform. All cameras are capable of “seeing” infrared light, but for standard photography and video, you don’t want to see the infrared light. So most sensors just have an infrared filter in front of the sensor, to block out any excess infrared light. If you remove it … you have a converted infrared camera.

The following video shows exactly how to modify a camera to do this. It is a bit misleading though as it labels it as a thermal camera; and while it is seeing “infrared”, it’s not actually full thermal infrared, like a FLIR or Seek Thermal can see — it’s a mixture of visible and near infrared light. You will be able to see some hot things glowing through the camera, but not to the same degree as a real thermal imaging device. Continue reading “Make Your Own Infrared Camera On The Cheap!”

Infrared Detector Selects Over A Wide Range

You can classify infrared light into three broad ranges: short wave, medium wave, and long wave. Traditionally, sensors concentrate on one or two bands, and each band has its own purpose. Short wave IR, for example, produces images similar to visible light images. Long wave is good for thermal imaging.

Researchers have announced a new detector that, by adjusting a bias, can detect all three bands using a simple approach that stacks different absorption layers over a semiconductor substrate. The device only requires two terminals and is very efficient, although the efficiency varies based on the band.

We’ve covered infrared sensing before. We’ve even seen DSLRs hacked into IR sensors. This new research might be a bit much to duplicate in your garage. After all, it requires tellurium doped gallium antimonide substrates and sophisticated processing equipment. However, this research will probably lead to practical devices that will find their way into projects before too long.

The Infrared Theremin

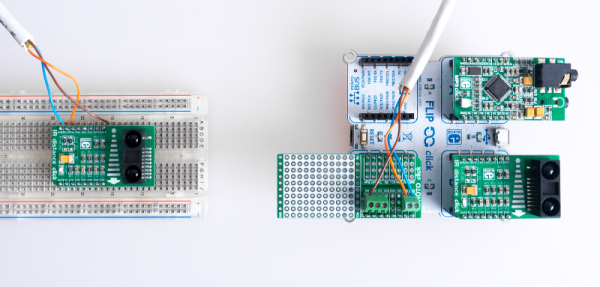
The traditional theremin is more or less an audio oscillator with two metal rods. Using proximity sensing, one rod controls the pitch of the oscillator and the other controls the volume. [Teodor Costachiou] apparently asked himself the excellent question: Why does the proximity sensor have to use capacitance? The result is an Arduino-based theremin that uses IR sensors to determine hand position.

[Teodor] used a particular type of Arduino–the Flip and Click–because he wanted to use Click boards for the IR sensors and also to generate sound via an MP3 board based around a VS1053. The trick is that the VS1053 has a realtime MIDI mode, and that’s how this Theremin makes it tones.

Continue reading “The Infrared Theremin”

Remote Tester

A Simple Circuit For Testing Infrared Remote Controls

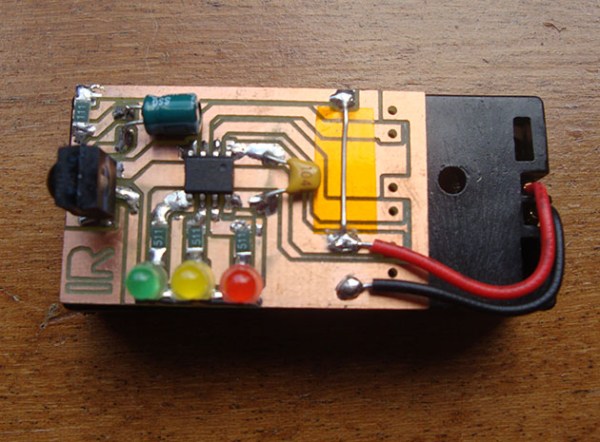
Every now and then a remote control acts up. Maybe you are trying to change the channel on your television and it’s just not working. A quick way to determine if the remote control is still working is by using a cell phone camera to try to see if the IR LED is still lighting up. That can work sometimes but not always. [Rui] had this problem and he decided to build his own circuit to make it easier to tell if a remote control was having problems.

The circuit uses a Vishay V34836 infrared receiver to pick up the invisible signals that are sent from a remote control. A Microchip 12F683 processes the data and has two main output modes. If the remote control is receiving data continuously, then a green LED lights up to indicate that the remote is functioning properly. If some data is received but not in a continuous stream, then a yellow LED lights up instead. This indicates that the batteries on the remote need to be replaced.

The circuit also includes a red LED as a power indicator as well as RS232 output of the actual received data. The PCB was cut using a milling machine. It’s glued to the top of a dual AAA battery holder, which provides plenty of current to run the circuit.

Infrared-controlled Light Switch

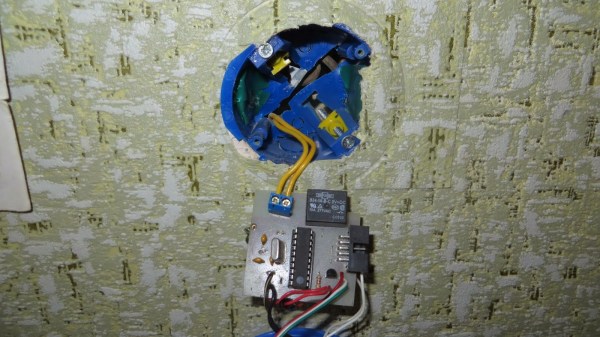
If you’re looking for your first electronics project, or a project to get someone else started in electronics, [Vadim] has you covered. Back when he was first starting out in electronics he built this infrared-controlled light switch that works with a standard TV remote control.

[Vadim]’s first few projects ended up as parts for other projects after they were built, so he wanted to build something useful that wouldn’t ultimately end up back in the parts drawer. The other requirements for the project were to use a microcontroller and to keep it simple. [Vadim] chose an ATtiny2313 to handle the RC-5 IR protocol and switch the light.

The circuit still has a switch to manually control the lights, preserving the original functionality of the light switch. The rest of the design includes a header for programming the board and another header for tying into the high voltage lines. This is a great project for anyone who knows what they’re doing with mains power but is just getting started with microcontrollers. If properly designed and implemented you’ll never stumble across a room to turn the lights out again!

Perhaps mixing high and low voltages on the same circuit board doesn’t spark your fancy or you can’t modify the light switch in your place of residence? Check out this mechanically-switched light switch.


Infrared Controlled Remote Firework Igniter

Firework Igniter

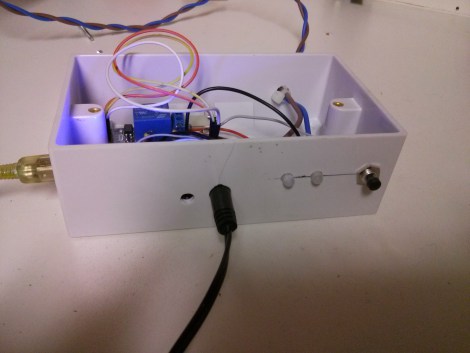
With Independence Day just around the corner, American hackers are likely to find themselves blowing things up in the name of Independence. It’s all great fun but it can also be dangerous. The standard ignition method of “use a lighter and run away really fast” is not exactly safe. Instead of lighting your fireworks the old-fashioned way, why not follow [Facelesstech’s] example and build your own infrared controlled remote igniter?

The first step was to decide how to actually ignite the firework fuse. [Facelesstech] had seen others use a car cigarette lighter for this purpose and he decided to follow in their footsteps. He started by removing the cigarette lighter from his own car and pulling it apart. Only one component was needed for this hack. The main heating element is a small disk with a “stem” on the end. If you apply 12V to the stem and attach the outer edge of the disk to ground, the igniter will quickly become hot.

[Facelesstech] originally thought he could just solder some wires to the device. However, the heating element gets so hot that the solder just melts every time it’s turned on. He then got creative and drilled a hole in a small block of wood that fits the heating element. The element is bolted into the wood and the bolt is used as a conductor for the electrical power.

The heating element is powered via a 12V relay. The relay is controlled by an Arduino Nano. The Nano allows two modes of operation. With the first mode, you simply press a button and the Nano will start a five second timer. The idea is to give you enough time to run to a safe distance before the firework is ignited. This isn’t much different from the old-fashioned method, but it does give you a slightly extended fuse. The second mode is where the project really shines. The Nano is also hooked up to an infrared receiver. This allows [Facelesstech] to press a button on an old television infrared remote control to active the igniter. This is a clever solution because it allows you to get to a safe distance without having to run a long wire. It’s also simple and inexpensive. Be sure to watch the video test of the system below. Continue reading “Infrared Controlled Remote Firework Igniter”