Convert That Cheap Laser Engraver To 100% Open-Source Toolchain

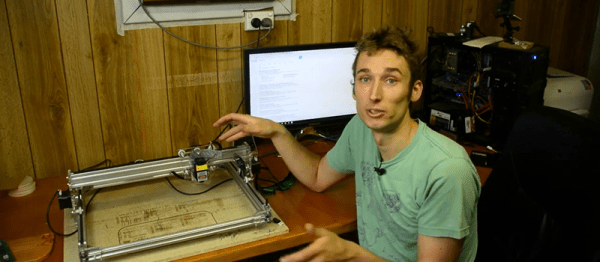
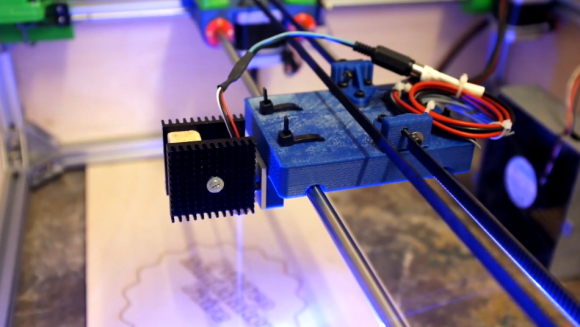
laserweb-on-cheap-laser-squareLaserWeb is open-source laser cutter and engraver software, and [JordsWoodShop] made a video tutorial (embedded below) on how to convert a cheap laser engraver to use it. The laser engraver used in the video is one of those economical acrylic-and-extruded-rail setups with a solid state laser emitter available from a variety of Chinese sellers (protective eyewear and any sort of ventilation or shielding conspicuously not included) but LaserWeb can work with just about any hardware, larger CO2 lasers included.

LaserWeb is important because most laser engravers and cutters have proprietary software. The smaller engravers like the one pictured above use a variety of things, and people experienced with larger CO2 laser cutters may be familiar with a piece of software called LaserCut — a combination CAD program and laser control that is serviceable, but closed (my copy even requires a USB security dongle, eww.)

LaserWeb allows laser engravers and cutters to be more like what most of us expect from our tools: a fully open-source toolchain. For example, to start using LaserWeb on one of those affordable 40 W blue-box Chinese laser cutters the only real hardware change needed is to replace the motion controller with an open source controller like a SmoothieBoard. The rest is just setting up the software and enjoying the added features.

Continue reading “Convert That Cheap Laser Engraver To 100% Open-Source Toolchain”

Paper Cutter Becomes A Laser Engraver

Small and powerful laser diodes are getting cheaper and cheaper, and there are a few commercial products that give anyone the ability to cut paper and vinyl with a computer-controlled cutting machine. What happens when you combine the two? The beginnings of a hacked together laser engraver.

For this build, [Peter] is using a Silhouette Portrait, a desktop CNC cutting machine that’s usually used for vinyl decals and intricately cut paper crafts. This machine isn’t limited to mere decorative crafts – it’s been used for cutting PCB stencils and other pseudo-industrial tasks.

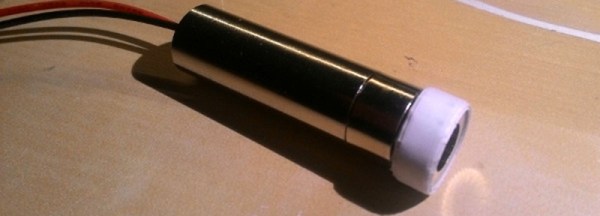
Because the Silhouette Portrait has an interface that allows just about any CAM software to control it, the only thing [Peter] needed to make for his experiments in laser engraving was a mount to hold the laser diode. Luckily, the laser had a similar form factor to the cutting blades for the machine, and a bit of tape held everything together.

Focusing the laser was done by unscrewing the lens, and with a bit of trial and error, [Peter] was able to make a few marks in the material of his choice. This isn’t a laser cutter, but with a little more work it will make a fantastic laser engraver.

Continue reading “Paper Cutter Becomes A Laser Engraver”

Delta Laser Engraver Uses Inkscape For G-Code

lazer

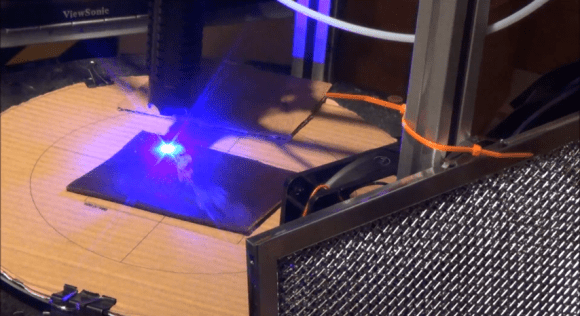
[Z LeHericy] has a SeeMe CNC Rostock Max 3D printer, and a 2W WickedLasers Spyder Artic blue laser. Naturally, he had to try strapping them together.

Most of our homemade laser engravers featured here use recycled DVD burner diodes, and while they certainly work, they leave a bit to be desired… Well, if you want more power, let us introduce the Class 4 Artic Spyder 2W blue laser from WickedLasers — a company that sells super high-powered lasers to anyone who can afford them — because that’s a great idea!

Safety concerns aside — wear your darn laser goggles! This pair can etch wood and leather quite well. He’s been using it to etch celtic knots onto pieces of leather. To do this he’s used Inkscape to convert a .BMP of the knot into a vector image, and then using the G-Code tools included with Inkscape he can create a tool path for the printer.

The finished leather looks awesome — Stick around after the break to see the laser in action!

Continue reading “Delta Laser Engraver Uses Inkscape For G-Code”

Raspi Mini Laser Engraver

If you’ve got a lot of spare parts lying around, you may be able to cobble together your own laser engraver without too much trouble. We’ve already seen small engraver builds that use an Arduino, but [Jeremy] tipped us off to [Xiang Zhai’s] version, which provides an in-depth guide to building one with a Raspberry Pi.

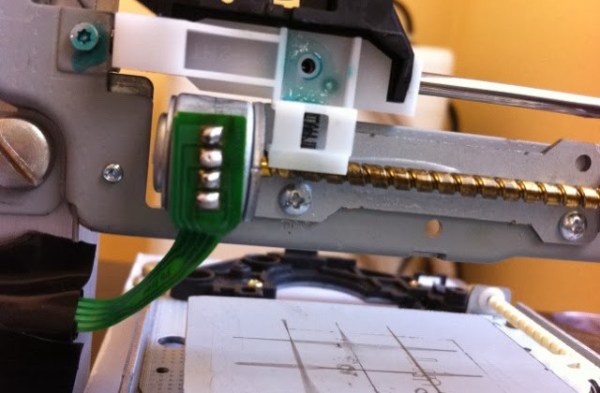
[Xiang] began by opening up two spare DVD writeable drives, salvaging not only their laser diodes but the stepper motors and their accompanying hardware, as well as a handful of small magnets near each diode. To assemble the laser, he sourced an inexpensive laser diode module from eBay and used a vise to push the diode into the head of the housing. With the laser snugly in place and the appropriate connecting wires soldered on, [Xiang] whipped up a laser driver circuit, which the Raspi will later control. [Xiang] worked out the stepper motors’ configuration by following [Groover’s] engraver build-(we featured it a few years back)-attaching the plate that holds the material to be engraved onto one axis and the laser assembly to the other.

Check out [Xiang’s] project blog for details explaining the h-bridge circuits as well as the Python code for the Raspi. As always, if you’re attempting any build involving a laser, please use all necessary precautions! And if you need more information on using DVD burners for their diodes, check out this hack from earlier in the summer

Extruded Rail And 3D Printed Connectors Form A Proper Laser Engraver

3d-printed-laser-engraver

Fast and accurate is a good description of this laser engraver built by [Ragnar] and [Gunnar]. The’re planning to show it off at the Trondheim Maker Faire after the new year but they took it out in the wild for the PSTEREO Mini Maker Faire (also in Trondheim) this past August. The video below gives an overview of the build process and the engraver at work. But we also enjoyed reading the post about a few missteps in the early prototyping process. We call this one a proper laser engraver because it was purpose built from the ground-up. We still like seeing the engravers hacked from optical drives, but this really is a horse of a different color in comparison.

From the start they’re using familiar parts when it comes to CNC builds. The outer frame is made of extruded aluminum rail, with precision rod for the gantry to slide upon. Movement is facilitated with stepper motors and toothed belts, with all of the connecting and mounting parts fabricated on a 3D printer. The mistake made with an early (and unfortunately mostly assembled) prototype was that the Y axis was only driven on one side when it really needed to be driven on both. But filament is relatively cheap so a few tweaks to the design were able to fix this and get the production back on track.

Continue reading “Extruded Rail And 3D Printed Connectors Form A Proper Laser Engraver”

Everything You Need To Know To Make A Laser Engraver From Scrap

make-a-laser-engraver-from-scrap

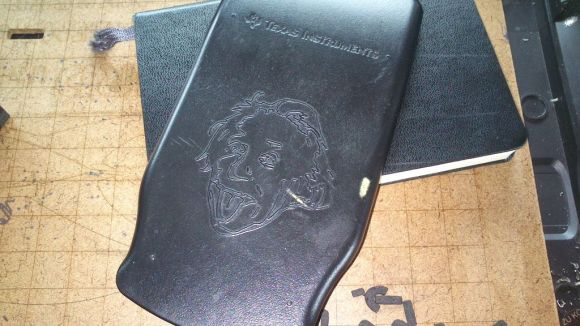
Check out the Einstein head which [Sebastian Müller] etched on the cover of his calculator using a laser engraver he made from scratch. We think he did a great job with the build, but we’re even more impressed with the work he put into sharing the techniques he used to salvage and repurpose all the components. It’s a perfect resource that should be pretty easy to adapt to different model/manufacturer source hardware.

He used an old scanner and an old printer for the bulk of the parts. These both originally included stepper-motor actuated gantries, which pull together to form the x and y axes in his Frankenstein Laser Engraver. As the parts came together he started in on the control electronics which include a couple of EasyDriver stepper motor boards and an Arduino.

At this point he took the machine for a test-run, attaching a marker to the carriage to use it as a pen plotter. After putting in a solid performance at this [Sebastian] moved on to adding in the laser diode. He covers how to drive the diode, as well as focal point alignment in great detail. It seems like his webpage post has the same content as the Instructable linked above but we wanted to leave the link just in case.

DVD Laser Diode Used To Build A Laser Engraver

[Johannes] has been reading Hackaday for years but this is the first project he’s tipped us off about. It’s a laser engraver built from a DVD burner diode (translated). It turned out so well we wonder what other projects he’s forgotten to tip us off about?

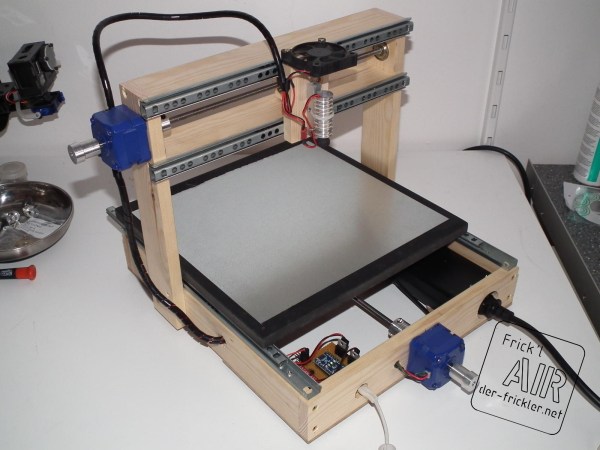
This is the second CNC machine he’s seen through from start to finish. It improves upon the knowledge he acquired when building his CNC mill. The frame is built from pine but also uses bits of plywood and MDF. It can move on the X and Y axes, using drawer sliders as bearings. The pair of blue stepper motors drive the threaded rods which move the platform and the laser mount. Just above the laser he included a small DC fan to keep it from burning up. The control circuitry is made up of an Arduino Nano and a stepper motor driver board. Catch a glimpse of the engraver cutting out some stencil material after the break.

There must be something about Spring that brings out the urge to work with laser diodes. We just saw a similar 1W cutter last week.

Continue reading “DVD Laser Diode Used To Build A Laser Engraver”