Bench-top Laser Engraver Does Some Cutting Too

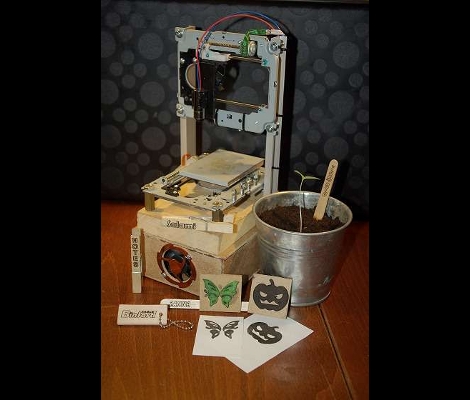
Grab that stack of old optical drives you have in the corner and get to work building this laser engraver. [Groover] is taking a no-nonsense approach to the build and we think it is just simple enough to be accessible to a very wide audience.

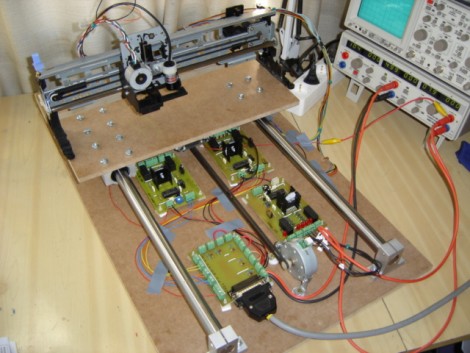
The physical assembly uses sleds from two optical drives. These are mounted some angle bracket. Since lasers cut at one specific focal length, there is not need for a Z axis (simplifying the build greatly). In fact, we think the hardest part of the assembly is retrieving the laser diode from a DVD-R drive and packaging it for use with this setup.

The electronics are a combination of a couple of consumer products. Two pre-fab motor drivers are used to command the stepper motors on the optical sleds. These receive their commands from an Arduino. A package called GRBL reads in G-code ([Groover] shows how to generate this from Inkscape) and in turn sends commands to the Arduino.

The results are quite remarkable. It can engrave wood with great resolution and contrast. The video after the break even shows it cutting out shapes from construction paper. Now we still want our own full-size laser cutter, but this project is much more fiscally possible for us.

Continue reading “Bench-top Laser Engraver Does Some Cutting Too”

1 Watt Laser Engraver

This laser engraver was built using printer parts, a CD-ROM carriage, and some homebrew electronic boards. The laser diode is a 1-Watt model similar to what we saw used as a weak laser cutter back in August. When the width of the material changes the focus of the laser is affected so the diode was mounted on a CD-ROM carriage (in the Z axis) for easy adjustment. The X and Y axes are made using parts from Epson Stylus 800 and Epson Stylus Color II printers. After the break we’ve embedded a video of the machine engraving some wood using EMC2 software on an Ubuntu box. It also boasts the ability to cut paper and some plastic but it can’t compare in power to a CO2-based unit.

Continue reading “1 Watt Laser Engraver”

Building A Bigger, Better Laser Engraver

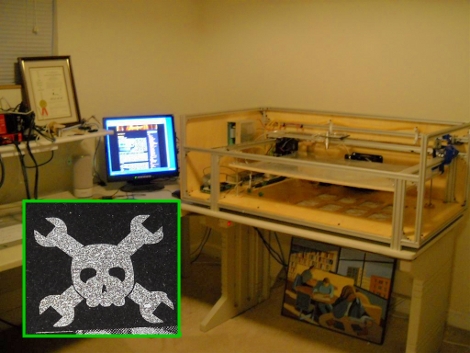
[Bart] built a giant laser etcher from scratch. One of his first test engravings included the Hackaday skull-and-wrenches on a polished granite floor tile (we love it when people do that). He used an XMOS controller and Mach3 CNC software to handle the device. With just two axes to worry about this seem like an easy project. The difficult bit is controlling, cooling, and focusing the laser.  Oh, and if you screw up, you could be blinded, burned or horribly maimed. But if you start from the beginning you’ll see that [Bart] knows what he’s doing.

No-Laser CNC Engraver Is Something New Under The Sun

Hooking up a laser to a CNC gantry isn’t exactly an Earth-shattering innovation, but it does make for a useful tool. Even a cheap diode laser mounted to an old 3D printer can do engraving, marking, or even light-duty cutting. But what about a laser engraver without the laser? Can that be of any use?

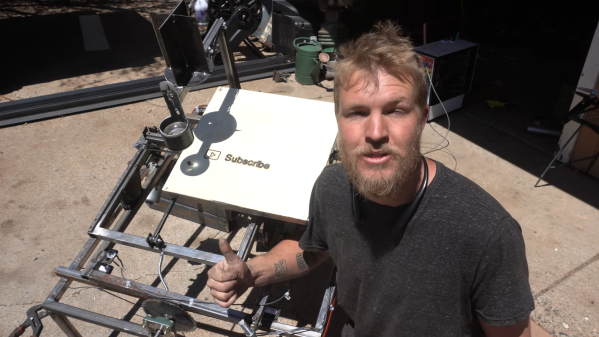
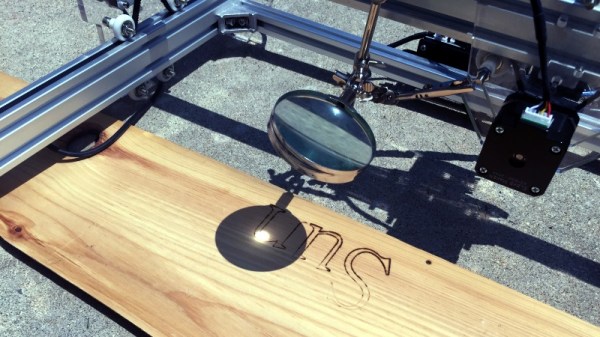
Apparently, the answer is yes, if you can harness the power of the sun. That’s what [Lucas] did with his solar-tracking CNC engraver, the build of which is shown in the video below. The idea is pretty simple — mount a decent-sized magnifying lens where the laser optics would normally go on a laser engraver, and point the thing at the sun. But as usual, the devil is in the details. The sun has a nasty habit of moving across the sky during the day, or at least appearing to, so [Lucas] has to add a couple of extra degrees of freedom to a regular X-Y CNC rig to track the sun. His tracking sensor is simplicity itself — four CdS photocells arranged with a pair of perpendicular shades, and an Arduino to drive the gimbals in the correct direction to keep all four sensors equally illuminated. He had some initial problems getting the jerkiness out of the control loop, but the tracker eventually kept the whole thing pointing right at the Sun.

So how does it work? Not bad, actually — [Lucas] managed to burn some pretty detailed designs into a piece of wood using just the sun. He mentions adding a shutter to douse the cutting beam to allow raster patterns, but even better might be a servo-controlled iris diaphragm to modulate beam intensity and control for varying sun conditions. He might also check out this solar engraver we covered previously for some more ideas, too.

Continue reading “No-Laser CNC Engraver Is Something New Under The Sun”

A Poor-Man’s Laser CNC Engraver

What do you get when you mix the disappointment that sometimes accompanies cheap Chinese electronics with the childhood fascination of torturing insects with a magnifying glass on a sunny day? You get a solar-powered CNC etcher, that’s what.

We all remember the days of focussing the sun on a hapless insect, or perhaps less sadistically on a green plastic army man or just a hunk of dry wood. The wonder that accompanied that intense white spot instantly charring the wood and releasing wisps of smoke stayed with you forever, as seemingly did the green spots in your vision. [drum303] remembered those days and used them to assuage his buyer’s remorse when the laser module on his brand new CNC engraver crapped out after the first 10 minutes. A cheap magnifying glass mounted to the laser holder and a sunny day, and he don’t need no stinkin’ lasers! The speed needs to be set to a super slow — 100mm per minute — and there’s the problem of tracking the sun, but the results are far finer than any of our childhood solar-artistic attempts ever were.

Do we have the makings of a possible performance art piece here? A large outdoor gantry with a big Fresnel lens that could etch a design onto a large piece of plywood would be a pretty boss beachside attraction. Of course, you’d need a simple solar tracker to keep things in focus.

Continue reading “A Poor-Man’s Laser CNC Engraver”

Hackaday Podcast Episode 285: Learning Laser Tricks, Rocket Science, And A Laptop That’s Not A Laptop

This week on the Podcast, we have something a little different for you. Elliot is on vacation, so Tom was in charge of running the show and he had Kristina in the hot seat.

First up in the news: the 2024 Tiny Games Challenge is still underway and has drawn an impressive 44 entries as of this writing. You have until 9AM PDT on September 10th to show us your best tiny game, whether that means tiny hardware, tiny code, or a tiny BOM.

Then it’s on to What’s That Sound, which Tom and Kristina came up with together, so there will be no pageantry about guessing. But can you get it? Can you figure it out? Can you guess what’s making that sound? If you can, and your number comes up, you get a special Hackaday Podcast t-shirt.

Now it’s on to the hacks, beginning with an open-source liquid-fueled rocket and a really cool retro trackball laptop. Then we’ll discuss screwdriver mange, the Wow! signal, and whether you’re using you’re calipers incorrectly. Finally, we look at a laptop that that isn’t really a laptop, and one simple trick to keep things aligned on your laser engraver.

Check out the links below if you want to follow along, and as always, tell us what you think about this episode in the comments!

Download in DRM-free MP3 and savor at your leisure.

Continue reading “Hackaday Podcast Episode 285: Learning Laser Tricks, Rocket Science, And A Laptop That’s Not A Laptop”

Laser Art Inspired By The Ford Motor Company

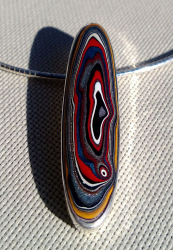
Have you ever heard of Fordite? It was a man-made agate-like stone that originated from the Ford auto factories in the 1920s. Multiple layers of paint would build up as cars were painted different colors, and when it was thick enough, workers would cut it, polish it, and use it in jewelry. [SheltonMaker] uses a similar technique to create artwork using a laser engraver and shares how it works by showing off a replica of [Van Gogh’s] “Starry Night.”

A piece of Fordite on a pendant

The technique does have some random variation, so the result isn’t a perfect copy but, hey, it is art, after all. While true Fordite has random color layers, this technique uses specific colors layered from the lightest to the darkest. Each layer of paint is applied to a canvas. Only after all the layers are in place does the canvas go under the laser.

The first few layers of paint are white and serve as a backer. Each subsequent layer is darker until the final black layer. The idea is that the laser will cut at different depths depending on the desired lightness. A program called ImagR prepared the image as a negative image. Adjustments to the brightness, contrast, and gamma will impact the final result.

Of course, getting the exact power settings is tricky. The best result was to start at a relatively low power and then make more passes at an even lower power until things looked right. In between, compressed air cleared the print, although you have to be careful not to move the piece, of course.

There are pictures of each pass, and the final product looks great. If art’s not your thing, you can also do chip logos. While the laser used in this project is a 40-watt unit, we’ve noted before that wattage isn’t everything. You could do this—probably slower—with a lower-powered engraver.

Fordite image By [Rhonda]  CC BY-SA 2.0.