Too much of a good thing is generally a bad thing, but a surfeit of asteroid material is probably a valid exception to that rule. Such was NASA’s plight as it started to unpack the sample return capsule recently dropped off by the OSIRIS-REx spacecraft as it flew by Earth, only to discover it was packed to overflowing with samples of asteroid Bennu. The spacecraft, which arrived at Bennu in 2018 and spent a good long time mapping the near-Earth asteroid, apparently approached its carefully selected landing site a bit too energetically and really packed the sample container full of BennuBits™ — so much so that they could actually see sample shedding off into space before stowing it for the long trip back to Earth. The container is now safely in the hands of the sample analysis team, who noted that everything in the TAGSAM (Touch and Go Sample Acquisition Module), even the avionics deck, is covered with black particles, each precious one of which needs to be collected and cataloged. The black stuff is especially interesting to planetary scientists, as it might be exactly what they were after when they selected Bennu, which may have broken off a much larger carbon-rich asteroid a billion or so years ago. It’ll be interesting to see if these interplanetary hitchhikers have anything to tell us about the origin of life in the solar system.
Auto Xylophone Uses Homemade Solenoids
Want to play the xylophone but don’t want to learn how? [Rachad]’s automatic xylophone might be just the ticket. It uses homemade solenoids to play tunes under computer control. Think of it as a player piano but with electromagnetic strikers instead of piano keys. You can hear the instrument in action in the video below.
Since the project required 24 solenoids, [Rachad] decided to build custom ones using coils of wire and nails. We were amused to see a common curling iron used as an alternate way to apply hot glue when building the coils. The other interesting part of the project was the software. He now uses a toolchain to convert MIDI files into a serial output read by the Arduino. Eventually, he wants to train an AI to read sheet music, but that’s down the road, apparently.
Honestly, we were a bit surprised that it sounded pretty good because we understand that the material used to strike the xylophone and the exact position of the strike makes a difference. We doubt any orchestra will be building one of these, but it doesn’t sound bad to us.
The last one of these we saw did have more conventional strikers if you want to compare. Honestly, we might have just bought the solenoids off the shelf but, then again, we don’t make our own relays either.
Virtual Mini Pinball Cabinet Scores Big
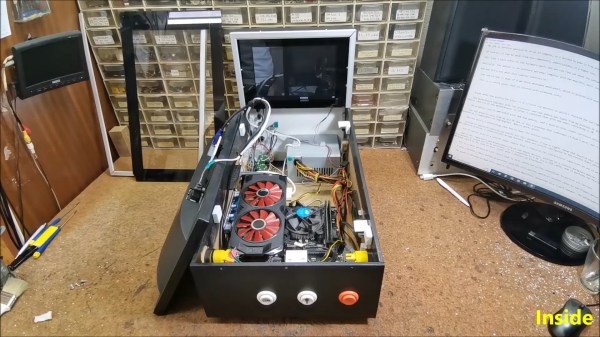
Do you love pinball, but can’t justify owning a full-size cabinet? Yeah, us either, and that’s why we’re so interested in [mircemk]’s great-looking DIY mini virtual pinball cabinet. Since [mircemk] is a IT service specialist, they are lucky enough to have access to lots used and broken equipment, and that’s what this build is made of.
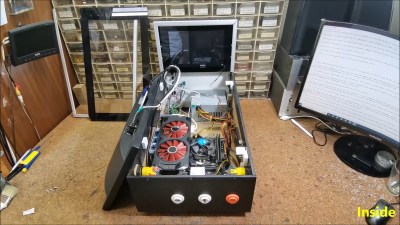 Essentially two computers working together, the playfield is a old 17-inch monitor that needed its LED lighting replaced before gracing the MDF cabinet The backglass is an ancient 10-inch tablet that was perfect for this application.
Even the motherboard, RAM, and SSD came from one of [mircemk]’s previous PCs. The SSD needed some attention first as well — it didn’t work sometimes, and didn’t show up in the BIOS at all, so [mircemk] threw it in the oven for 10 minutes at 250°, and now all is well.
One thing we really like about this build is that instead of designing a control board for the buttons, [mircemk] used a cheap USB joystick and wired them up to the pads.
So how does the tablet figure into all of this? It’s connected to a PC via USB and does its job thanks to a piece of software called Wired XDisplay. There is even a tilt switch in this bad boy. Because what’s a pinball cabinet without a tilt switch? A cheater’s cabinet, that’s what. Check out the build/demo video after the break.
Don’t even have the space for a mini cabinet? We hear you. Here’s one that fits in the palm of your hand.
Blaupunkt Tube Radio Is The Sultan Of Radios
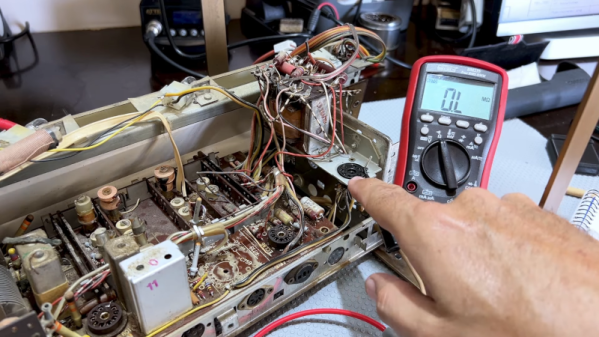
According to [M Caldeira], the Blaupunkt Sultan 24300 was one of the last tube radios made in the 1960s. He’s got one but it needed some tender loving care, and you can see how he approaches a restoration like this in the video below.
The radio was actually in better shape physically than most of the old radios we see. It wasn’t perfect, but it looked good on the outside. Electrically, though, it did need some work, and the dial had problems, too. The first obstacle was identifying exactly the model of the radio since there were a number of Sultan radios produced.
Continue reading “Blaupunkt Tube Radio Is The Sultan Of Radios”
Marionette 3D Printer Replaces Linear Rails With String
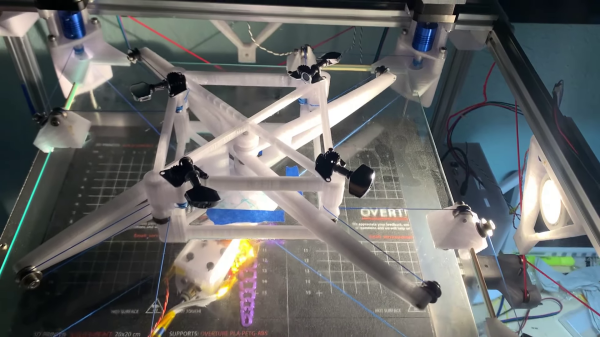
In the early days of FDM 3D printing, the RepRap project spawned all sorts of weird and and wonderful designs. In the video after the break [dizekat] gives us a throwback to those times with the Marionette 3D printer, completely forgoing linear rails in favor of strings.
The closest thing to a linear guide found on the Marionette is a pane of glass against which the top surface of the print head slides. A pair of stepper motors drive the printhead in the XY-plane, similar in concept to the Maslow CNC router, but in this case two more strings are required to keep the mechanism in tension. To correctly adjust the length of the string across the full range of motion, [dizekat] uses a complex articulating pulley mechanism that we haven’t seen before. The strings are also angled slightly downward from the spool to the print head, holding it in place against the glass.
The bed print bed is also suspended and constrained using string, with no rigid mechanical member attaching it to the frame of the printer. Six strings connected to the sides and bottom of the bed frame constrain it in 6-DOF, and pass through another pulley arrangement to three more strings and finally to a single stepper driven belt.
We can’t see any particular advantage to forgoing the linear rails, especially when the mechanisms have to be this complex, but it certainly make for an interesting engineering challenge. Whatever the reason, the end result is fascinating to watch move, and the print quality even looks decent.
Continue reading “Marionette 3D Printer Replaces Linear Rails With String”
Polish Up Your Product With Graphic Overlays
[Kevin Hunckler] recently did some in-house manufacturing for a product and shared his experiences in adding high-quality custom graphic overlays or acrylic panels to give the finished units a professional look. The results look great and were easy to apply, making his product more attractive without needing much assembly work.
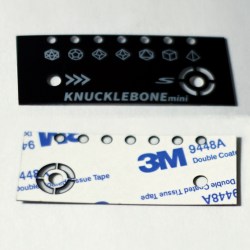
Sadly, when doing initial research he was disappointed to find very little information on the whole process. While in the end it isn’t terribly complex, it still involved a lot of trial and error before he zeroed in on what the suppliers in the industry expect. Fortunately, everything can be done with tools most hackers probably already have access to.
The process seems to us somewhat reminiscent of having PCBs manufactured. One defines the product housing, outlines the overlay, creates the artwork, defines an adhesive layer, and makes a design document explaining each layer and important feature. [Kevin] provides examples of his work, one of which fits an off-the-shelf Hammond enclosure.
Professionally-made acrylic panels or graphic overlays is something worth keeping in mind for hobbyists and those who might engage in desktop manufacturing, as long as the costs are acceptable. Rather like PCBs, costs go down as quantities go up. [Kevin]’s 50 mm x 50 mm overlay cost about 1 USD each in quantity 200, but only 0.50 USD each when buying 500.
These may be great for low or middling quantities, but that doesn’t mean one is out of options for prototypes or micro quantities. We have seen fantastic results adding full-color images to 3D prints, and even using a 3D printer to draw labels directly onto prints.
Designing A Macintosh-to-VGA Adapter With An LM1881
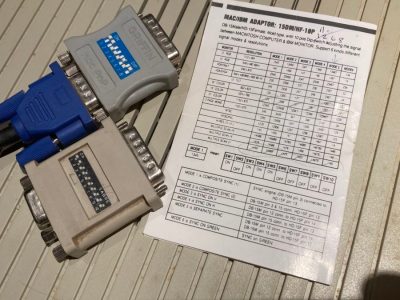
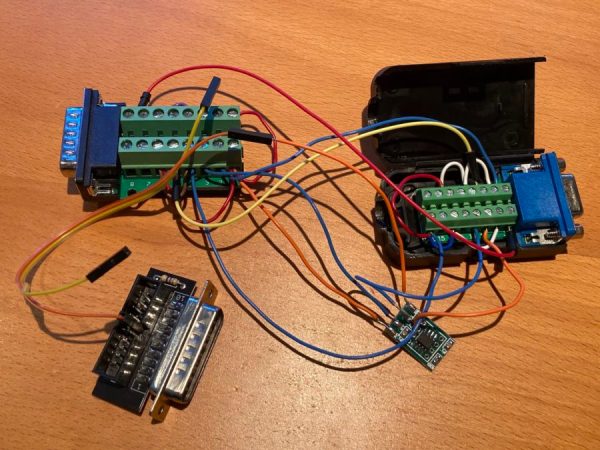
If you’re the happy owner of a vintage Apple system like a 1989 Macintosh IIci you may know the pain of keeping working monitors around. Unless it’s a genuine Apple-approved CRT with the proprietary DA-15-based video connector, you are going to need at least an adapter studded with DIP switches to connect it to other monitors. Yet as [Steve] recently found out, the Macintosh’s rather selective use of video synchronization signals causes quite a headache when you try to hook up a range of VGA-equipped LCD monitors. A possible solution? Extracting the sync signal using a Texas Instruments LM1881 video sync separator chip.
Much of this trouble comes from the way that these old Apple systems output the analog video signal, which goes far beyond the physical differences of the DA-15 versus the standard DE-15 D-subminiature connectors. Whereas the VGA standard defines the RGB signals along with a VSYNC and HSYNC signal, the Apple version can generate HSYNC, VSYC, but also CSYNC (composite sync). Which sync signal is generated depends on what value the system reads on the three sense pins on the DA-15 connector, as a kind of crude monitor ID.
Theoretically this should be easy to adapt to, you might think, but the curveball Apple throws here is that for the monitor ID that outputs both VSYNC and HSYNC you are limited to a fixed resolution of 640 x 870, which is not the desired 640 x 480. The obvious solution is then to target the one monitor configuration with this output resolution, and extract the CSYNC (and sync-on-green) signal which it outputs, so that it can be fudged into a more VGA-like sync signal. Incidentally, it seems that [Steve]’s older Dell 2001FP LCD monitor does support sync-on-green and CSYNC, whereas newer LCD monitors no longer list this as a feature, which is why now more than a passive adapter is needed.
Although still a work-in-progress, so far [Steve] has managed to get an image on a number of these newer LCDs by using the LM1881 to extract CSYNC and obtain a VSYNC signal this way, while using the CSYNC as a sloppy HSYNC alternative. Other ICs also can generate an HSYNC signal from CSYNC, but those cost a bit more than the ~USD$3 LM1881.


