CNC Your Own PCB With This Tutorial

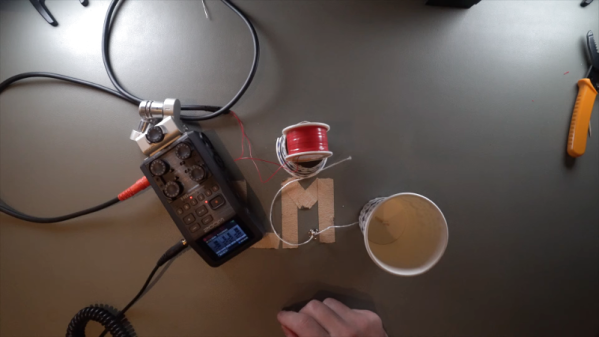
It is getting so easy to order a finished printed circuit board that it is tough to justify building your own. But sometimes you really need a board right now. Or maybe you need a lot of fast iterations so you can’t wait for the postal service. [Thomas Sanladerer] shows how he makes PCBs with a CNC machine and has a lot of good advice in the video below.

He starts with Eagle, although, you could use any creation package. He shows what parameters he changes to make sure the traces don’t get eaten away and how to do the CAM job to get the files required to make the boards. If you don’t use Eagle, you’ll need to infer how to do similar changes and get the same kind of output.

We’ve only heard a few people pronounce Gerber (as in Gerber file) with a soft G sound, but we still knew what he meant. We have the same problem with GIF files. However, once you have Gebers, you can join the video’s workflow about 5 minutes in.

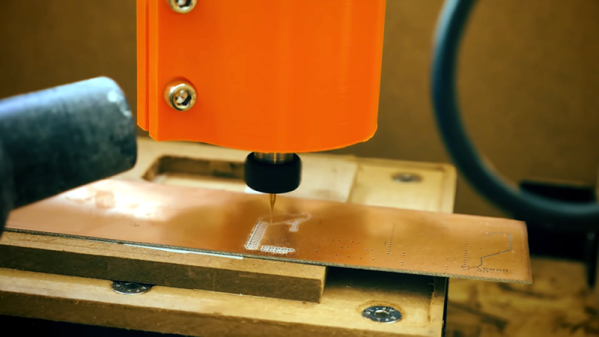
At that point, he uses FlatCAM to convert the Gerbers to a single G-code file that integrates the paths and drill files. There were a few tricks he used to make sure all the tracks are picked up. Other tricks include leveling a spoil board by just milling it down and mounting different size bits. He also has ideas on aligning the Z axis.

Continue reading “CNC Your Own PCB With This Tutorial”

Designing Custom LCDs To Repair Retrocomputers

China, we’re told, can make anything. If you need some PCBs in a few weeks, there are a few factories in China that will do it. If you need a nuclear reactor, yep, there’s probably a factory in China that’ll do it because nuclear reactors are listed as one of the items facing new tariffs when imported into the United States. No, I am not kidding. What about LCDs? What about old-school character LCDs? Is it possible to find a factory in China that will make you the LCD you want? That’s what [Robert Baruch] will find out, because he’s repairing an old computer with new parts.

The object of this repair and restomod is a TRS-80 Pocket Computer (PC-1), otherwise known as the Sharp PC-1211. It looks like a calculator, but no, it’s a legitimate computer you can program in BASIC. [Robert] bought this computer for a bit more than $5 on eBay ‘for repair’, which means the zinc-air battery was dead, and unfortunately, the LCD was shot. The LCD technically works, but it just doesn’t look good. Sometime in the last thirty years, moisture got in between the layers of glass, polarizing film, and liquid crystal. This is not unique to [Robert]’s unit — a lot of these PC-1s have the same problem, many of these broken seals rendering the computers themselves useless.

This is an ancient computer, and replacements for this LCD are impossible to find, but because the Sharp PC-1211 is well documented, it is possible to find the datasheet for the original display. With that, it’s just a question of finding an LCD manufacturer that will do it. So far, the costs look good — $800 USD ($300 for tooling and 10 samples, $500 for another 200 LCDs) is what it’ll take to get a few units. [Robert] already has a few people interested in repairing their own Pocket Computers. You can follow the eevblog thread here, or check out the video below.

Continue reading “Designing Custom LCDs To Repair Retrocomputers”

Be Vewy Vewy Quiet, We’re Hunting Baofengs

In the world of ham radio, a “Fox Hunt” is a game where participants are tasked with finding a hidden transmitter through direction finding. Naturally, the game is more challenging when you’re on the hunt for something small and obscure, so the ideal candidate is a small automated beacon that can be tucked away someplace inconspicuous. Of course, cheap is also preferable so you don’t go broke trying to put a game together.

As you might expect, there’s no shortage of kits and turn-key transmitters that you can buy, but [WhiskeyTangoHotel] wanted to come up with something that could be put together cheaply and easily from hardware the average ham or hacker might already have laying around. The end result is a very capable “fox” that can be built in just a few minutes at a surprisingly low cost. He cautions that you’ll need a ham license to legally use this gadget, but we imagine most people familiar with this particular pastime will already have the necessary credentials.

The heart of this build is one of the fairly capable, but perhaps more importantly, incredibly cheap Baofeng handheld radios. These little gadgets are likely familiar to the average Hackaday reader, as we discussed their dubious legal status not so long ago. At the moment they are still readily available though, so if you need a second (or third…), you might want to pull the trigger sooner rather than later.

Continue reading “Be Vewy Vewy Quiet, We’re Hunting Baofengs”

Digital Protractor Makes Angular Measurements A Snap

Old school vernier calipers served engineers and machinists well for a long time — and did a perfectly good job. Digital models then came along and were easier to read. They now rule the roost, despite their thirst for batteries. Humans are naturally wired to make the least effort possible at all times. That’s why you always drive to the store that’s only a few blocks from your doorstep. In this vein, you may find a digital protractor preferable to the classic printed type.

[Nirav Jadav]’s project is a simple one but serves as a good learning experience for those getting to grips with microcontrollers. An Arduino Pro Mini serves as the brains, reading signals from an MPU6050 gyroscope. Measured angles are displayed on a small OLED screen.

To use the protractor, first the reference button must be pressed, then the device may be rotated to measure the angle. Relying on a gyroscope means that it’s likely less accurate than a printed device, particularly if it isn’t recalibrated every few measurements to account for drift.

However, like many projects to grace these pages, its value lies not in its usability, but in the journey of creation. To build such a device requires programming ability, an understanding of interfacing with external peripheral devices, as well as how to drive a graphical display. These skills are highly useful in a wide variety of projects, and they’ll serve [Nirav] well in projects to come.

Once you’ve built your digital protractor, why not have a stab at building a digital measuring tape?

[Thanks to Baldpower for the tip!]

Paper Cup Mic Is Fun And Functional

Any studio operator worth their Protools subscription will have a wide array of microphones to cover any conceivable situation. SM57s to cover guitar cabs, fancy gilded ribbon mics for vocal takes, and a variety of condensers to round out the selection. That’s all well and good for high-fidelity recording, but what if you want to go the other way? [LeoMakes] has just the thing, with his sub-$10 paper cup mic.

The basic concept is that of a dynamic microphone. A paper cup is attached to a taut string, upon which a magnet is affixed. Sound waves hitting the paper cup cause the string, and thus the magnet, to vibrate. The magnet is located within a coil, created from thin insulated wire wrapped around an old solder spool. This induces a current, creating the audio signal.

Results are as lo-fi as you’d expect, with the exact character of the sound changing depending on the tension of the string and the exact materials used. It’s a fun project that can be tackled with cheap materials, and there’s scope to create all manner of wacky mics by varying the parameters of the build. If you’re doing this more than once, however, you might want some help winding the coils — let this project be an inspiration. Video after the break.

Continue reading “Paper Cup Mic Is Fun And Functional”

3D Printing Logic Gates

It may seem a paradox, but in the future tiny computers may dump electronics and return to their mechanical roots. At the macroscale, mechanical computers are fussy and slow, but when your area is down to a few molecules, electronics have trouble working but mechanical systems do just fine. In addition, these devices don’t use electricity directly, don’t generate electronic signatures, and may be less sensitive to things like radiation that damage electronics. A recent paper in Nature Communications discusses how to 3D print common logic gates using both macro-scale 3D printing techniques and a much smaller version with microstereolithography. You can see a video of gates in action below.

The gates use a bistable flexible mechanism. The larger gates use ABS plastic and measure about 250mm square. The smaller gate measures less than 25 mm square. They also use a special technique to make gates as small as 100 microns theoretically possible, although some of that is future work for the team.

Continue reading “3D Printing Logic Gates”

This Vintage Op-Amp Opens A Fascinating Window Into Semiconductor History

We have covered enough of the work of [Ken Shirriff] on these pages to know that when he publishes something, it will be a fascinating read and work of the highest quality. And so it is with his latest, a very unusual op-amp on which he performs his usual reverse engineering. Not only does it lead us directly to some of the seminal figures in the early years of the semiconductor industry, it turns out to have been a component manufactured to a NASA specification and of which there is an example on the Moon.

The metal can revealed a hybrid circuit when the lid was removed, one in which individual transistors were wired together with a single block containing a group of thin-film resistors. At the start of the 1960s the height of consumer electronics would have been your domestic TV which would have been an all-tube affair, so while it sounds archaic this would truly have been a space-age piece of technology. The designer is revealed as the legendary [Bob Pease], and the transistors take us back to the semiconductor physicist [Jean Hoerni], inventor of the planar transistor and one of the famous eight defectors from Shockley Semiconductor in the 1950s who kick-started the semiconductor boom.

The op-amp itself is a relatively simple design without the compensation capacitor you might expect in a modern device, but what makes it unusual for its time is the use of [Hoerni]’s planar JFETs at its input. [Ken]’s analysis is as usual extremely thorough, and the bit of Silicon Valley history it gives us is the icing on the cake.

If you have a thirst for ancient op-amps, you might like our look at the first commercially available fully-integrated design, the Fairchild μA702.