When working on classic vehicles, and especially when modifying them outside of their stock configurations, things can get expensive. It’s a basic principle in economics: the rarer something is the more money somebody can charge you for it. But if you’ve got the skills and the necessary equipment, you can occasionally save yourself money by custom-fabricating some parts yourself.
 After changing the gear ratio in his 1971 Ford F100, [smpstech] needed to adjust his speedometer to compensate. Unfortunately, a commercial speedometer reducer and the new cables to get it hooked up to his dash would have run into the hundreds of dollars, so he decided to try designing and 3D printing his own gearbox. The resulting development process and final product are a perfect example of how even a cheap desktop 3D printer, in the hands of a capable operator, can do a lot more than print out little toy boats.
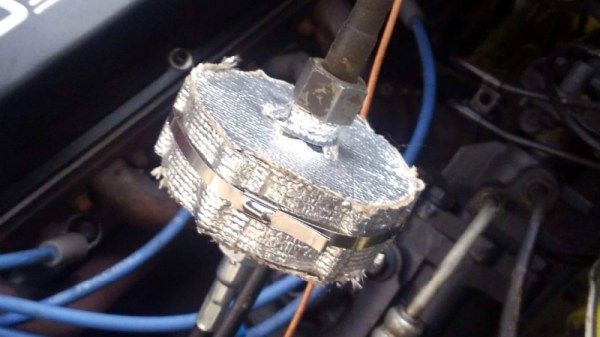
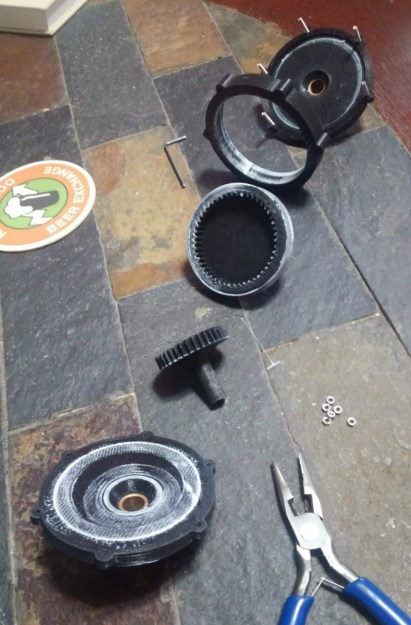
The gearbox contains a large ring gear driven by a smaller, offset, spur gear. This compact inline package drops the speed of the input shaft by 25.5%, which [smpstech] mentions is actually a bit slower than necessary, but it does give him some wiggle room if he decides to change his tire size.
Even if you’re not looking for a speedometer reducer for a nearly 50 year old truck, there are some lessons to be learned here in regards to 3D printed car parts. The first version of his gearbox, while functional initially, ended up looking like a deflated balloon after being exposed to the temperatures inside the F100’s engine bay. His cheapo PLA filament, which is probably fine for the aforementioned toy boats, simply wasn’t the right material for the job.
[smpstech] then reprinted the gadget in HTPLA, which needs to be annealed after printing to reach full strength. Usually this would involve a low-temperature bake in the oven, but he found that simmering the parts in a pot of water on the stove gave him better control over the temperature. Not only did the HTPLA version handle the under-hood conditions better, it was also strong enough that he was able to use a standard die on the connections for the speedometer cables to create the threads instead of having to model and print them. Definitely a material to keep an eye on if regular PLA isn’t cutting it for you.
This isn’t the first time we’ve seen 3D printed parts used to get a vintage vehicle back on the road. Building these custom parts would have been possible without a 3D printer, of course, but it’s a good example of how the technology can make these types of repairs faster and easier.
[via /r/functionalprint]