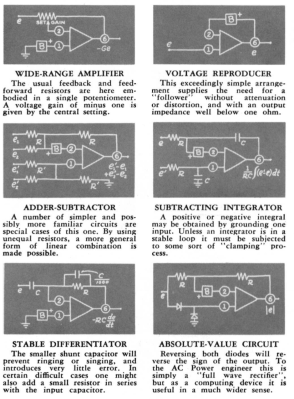
Op amps. Often the first thing that many learn about when beginning the journey into analog electronics, they’re used in countless ways in an overwhelmingly large array of circuits. When we think about op amps, images of DIPs and SOICs spring to mind, with an incredibly tiny price tag to boot. We take their abundance and convenience for granted nowadays, but they weren’t always so easy to come by.
[Mr Carlson] serves up another vintage offering, this time in the form of a tube op amp. The K2-W model he acquired enjoyed popularity when it was released as one of the first modular general purpose amplifiers, due to its ‘compact form’ and ‘low price’. It also came with large application manuals which helped it to gain users.
In order to power up the op amp and check its functionality, +300V and -300V supplies are needed. [Mr Carlson] is able to cobble something together, since it’s very apparent that he has an enviable stash of gear lying around. A 600V rail to rail supply is not something to be taken lightly, though it does give this particular model the ability to output 100V pk-pk without any distortion.
The op amp is set up as an inverting amplifier, and once powered on proves to work flawlessly. As always, the video is an entertaining watch, stuffed full of retro electronics trivia. We’re big fans of [Mr Carlson]’s work, and have previously written about his adventures with a colossal walk-in AM radio transmitter, as well as his restoration of a 1930s oscilloscope and subsequent transformer de-potting.
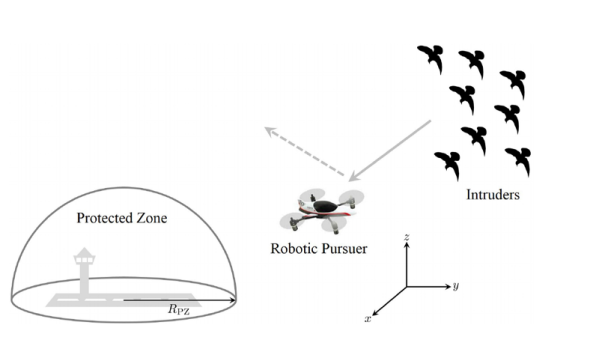
If you pay attention to airplane news — or you watched the film Sully — you know planes have problems with birds. Sully was about US Airways flight 1549 which struck a flock of geese and ditched in the Hudson river. Engineers at Caltech say that was the inspiration for them to develop a control algorithm that enables a single drone scarecrow to herd flocks of birds away from airports.
Airports have tried a lot of things to discourage birds ranging from trained falcons to manually-piloted drones. Apparently, herding birds is harder than you would think. If you fly the drone too far from a flock, it will ignore the threat. If you get too close, the flock will scatter making it both threaten a larger area and harder to control.
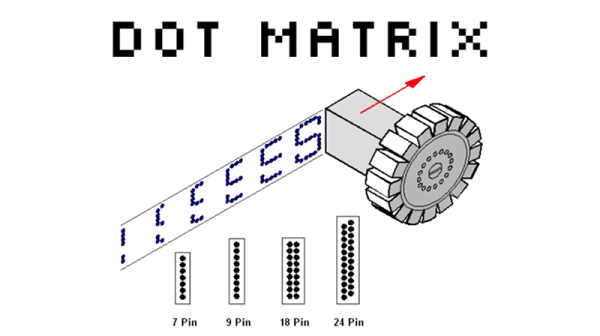
These days a printer — especially one at home — is likely to spray ink out of nozzles. It is getting harder to find home laser printers, and earlier printer technologies such as dot matrix are almost gone from people’s homes even if you’ll still see a few printing multipart forms in some offices.
[Thomas Winningham] bought an old Commodore dot matrix printer in a fast food parking lot for $20. How hard could it be to get it working? How hard, indeed. Check out the video below to see the whole adventure. The principle behind the printer is simple enough. The head has one or two rows of pins each controlled by a solenoid. The head moves across the paper and your job — should you decide to accept it — is to make the pins push out at the right spot. An ink ribbon like a typewriter uses — oh yeah, more vanishing tech — leaves ink on the paper where it gets punched by the pin.
To the delight of everyone, this year’s official DEF CON badge is an electronic badge chock full of entertainment. Of course there is blinky, the board is artistic, and everyone hopefully maybe gets one (it’s rumored 27,000+ were manufactured) if they don’t run out. But the badge contest at DEF CON is legendary — solve all the puzzles you are awarded the coveted black badge.
The creators of this badge are no strangers to the Hackaday community. Displayed proudly on the board and in the firmware, we discover that The Toymakers are the ones who have put it all on this line this year. Kudos to the dynamic hardware collective from Minnesota. There is no larger pressure cooker in the world of badges than this, and they pulled it off marvelously. Let’s take a look at all the goodies inside.
Our Hackaday Prize Challenges are evaluated by a panel of judges who examine every entry to see how they fare against judging criteria. With prize money at stake, it makes sense we want to make sure it is done right. But we also have our Hackaday Prize achievements, with less at stake leading to a more free-wheeling way to recognize projects that catch our eye. Most of the achievements center around fun topics that aren’t related to any particular challenge, but it’s a little different for the Infinite Improbability achievement. This achievement was unlocked by any project that impressed with their quest for power, leading to some overlap with the just-concluded Power Harvesting Challenge. In fact, when the twenty Power Harvesting winners were announced, we saw that fourteen of them had already unlocked the achievement.
Each of the Power Harvesting winners will get their own spotlight story. And since many of them have unlocked this achievement, now is the perfect time to take a quick tour through a few of the other entries that have also unlocked the Infinite Improbability achievement.
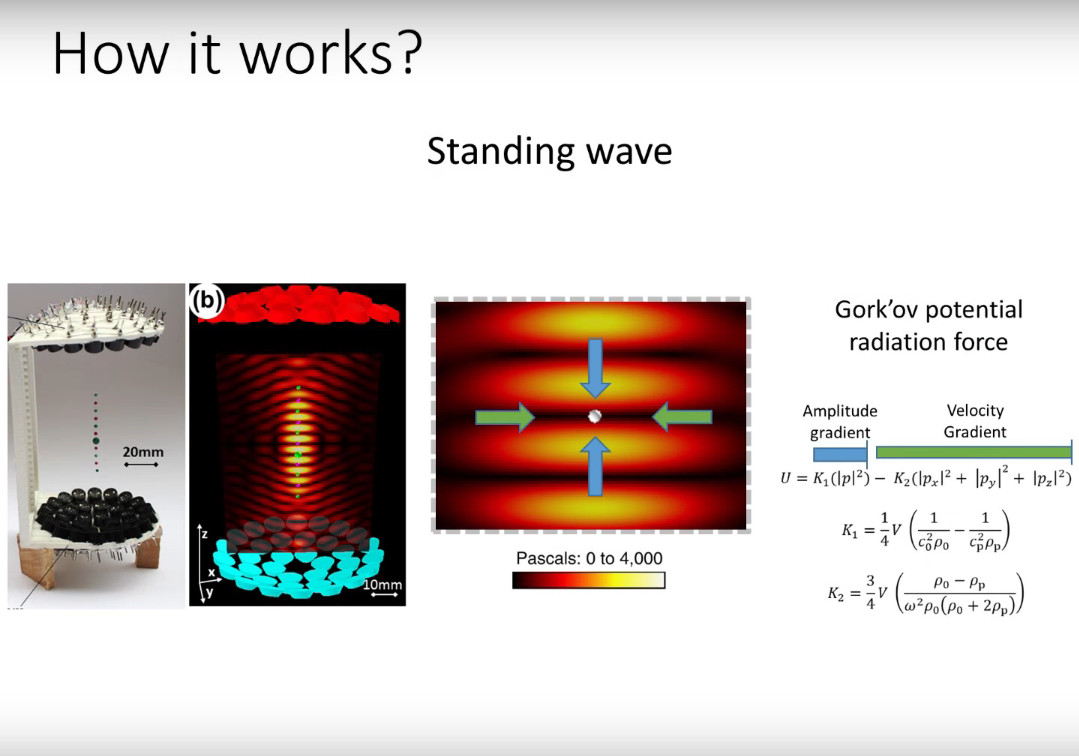
We’ve all seen acoustic levitation, it’s one of the scientific novelties of our age and a regular on the circuit of really impressive physical demonstrations of science to the public. The sight of arrays of ultrasonic speakers causing small objects and beads of liquid to float in mid-air without any suspension is magical, captivating people of all ages. Thus a lecture at Hackaday Belgrade on the subject from Asier Marzo, a research scientist with a speciality in the field of ultrasonics at the UK’s University of Bristol, was a particularly fascinating and informative one.
He started by explaining acoustic levitation as a concept, and its mechanism. As an idea it’s one with a long history, he tells us that hundreds of years ago people tried mass ranks of the loudest musical instruments at their disposal to move rocks, all to no avail. The array of musicians of yore lacked the ability to control their individual phase, and of course their combined output would have balked at a pea-sized piece of gravel, let alone a boulder.
Explaining the standing wave produced by an ultrasonic array.
The Power of Standing Waves
Given that we can now create standing waves between phased arrays of ultrasonic speakers, he explained the mechanism that allows the levitation. The standing wave creates patterns of high intensity and “quiet” low intensity sound, and the object nestles in one of these quiet areas. There is thus a size limit dictated by the wavelength of the sound in question, which for the ultrasound he’s using is in the order of a few millimetres.
Having explained how it all works, we were then taken into the fields in which it finds an application. This was particularly interesting, because it’s the side we never see in the for-the-kids demos where it’s all about “Look, we can make the water droplet float!”. The number of fields that can find a use for it was a surprise, and formed the next phase of the talk.
Real World Uses for Acoustic Levitation
The first example given was in the field of spectroscopy, when reflecting light from a droplet of liquid on a substrate a certain amount of the reflected light comes from the substrate. If the sample is levitated, all the reflection comes from it and nothing else. Microgravity experiments are another interesting application, where it is possible to replicate some of the work that has previously required the environment of a space craft such as the International Space Station. This was a particularly unexpected twist.
Manipulating a solid particle with a wearable array.
The technique can be used for tiny particles in a liquid medium with a much higher frequency — a demonstration involves moving a single blood cell in a pattern. But Asier has more tricks up his sleeve. This technique can be used in human interactions with computers and with the real world. We saw a display in which the pixels were small plastic balls suspended in a grid, they could even be flipped in colour by being rotated under an electric field. A successive display used the balls not in a grid but as a point cloud in a graph, proving that rasters are not the only means of conveying information. Finally we saw the arrays applied to wearable devices, a handheld tractor beam, and a set of standing wave tweezers. He gave the example of picking up an SMD component, something that we can see would be invaluable.
Levitation is Within Our Grasp
The good news for us is that this is a piece of cutting-edge science that is accessible to us at our level too. He’s made a selection of designs available online through the Acoustic Levitator site. There is an ultrasonic array, an acoustic levitator, and an acoustic tractor beam, and the components are such run-of-the-mill parts as Arduinos and motor driver boards. Even schoolchildren building them from kits, with an experimenter using one for Schlieren photography of the acoustic field. Finally we’re shown Ultraino, an ambitious project providing software and driver hardware for large arrays in which every transducer is individually driven, before a tantalising look at future work in fluid ultrasonics and the promise of an ultrasonic audio speaker project.
Hackaday covers a huge array of projects and topics from all corners of our community. Each one is exciting in its own way, from a simple-looking Arduino project that encapsulates a cool hack to a multi-year labour of love. It’s not often though that we can say we’ve seen a genuinely cutting-edge piece of science, while simultaneously having it explained in terms we understand and being given an accessible version that we can experiment with ourselves. We are really looking forward to the projects that will come from this direction, as acoustic levitation becomes yet another known quantity in the hardware hacker’s armoury.
One of the most amazing technological advances found in this year’s Hackaday Prize is the careful application of copper traces turned into coils. We’ve seen this before for RFID tags and scanners, but we’ve never seen anything like what Carl is doing. He’s building brushless motors on PCBs.
All you need to build a brushless motor is a rotor loaded up with super powerful and very cheap magnets, and a few coils of wire. Now that PCBs are so cheap, the coils of wire are easily taken care of. A 3D printer and some eBay magnets finish off the rest. For this week’s Hack Chat, we’re talking with Carl about PCB motors.
Carl Bugeja is a 23-year old electronics engineer who is trying to design new robotics technology. His PCB Motor design won the Open Hardware Design Challenge and will be going to the Finals of the Hackaday Prize. This open-source PCB motor is a smaller, cheaper, and easier to assemble micro-brushless motor.
[Carl]’s main project, the PCB Motor is a stator that is printed on a 4-layer PCB board. The six stator poles are spiral traces wound in a star configuration. Although these coils produce less torque compared to an iron core stator, the motor is still suitable for high-speed applications. [Carl]’s been working on other PCB motor designs, like the Linear PCB motor which is a monorail on a PCB and the Flexible PCB actuator where the coils of wire are tucked inside Kapton.
During this Hack Chat, we’re going to be discussing:
The design and construction of brushless motors
How to drive these motors
PCB applications beyond standard circuitry
Building accessible robotics technology
You are, of course, encouraged to add your own questions to the discussion. You can do that by leaving a comment on the Hack Chat Event Page and we’ll put that in the queue for the Hack Chat discussion.