Fidget spinners are not only a fad, but pretty much useless. Sounds like a job for hacking to make the toys have some actual purpose. [D777k] took up the challenge and created a MIDI controller from a common spinner. You can see a video of the results, below.
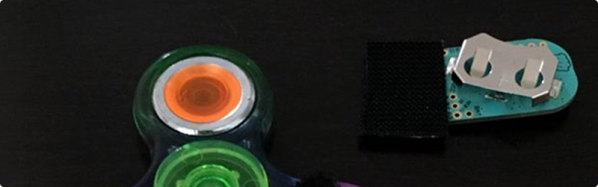
The device uses a LightBlue Bean controller and Garage Band as the MIDI software. Granted, it might not be super useful, but it is better than just a plain old spinner. [D777k] calls it a “whirling dervish of sound making!
The Arduino code that drives the thing is very simple. It reads three axes of acceleration and uses that to drive the MIDI software. When the acceleration exceeds a threshold, the software creates a new note based on the sums and differences of the accelerations.
The Lightblue Bean isn’t anything new, but it is well suited for this kind of service. Certainly, making a toy into a MIDI controller isn’t an original idea, either. But it sure is fun.
Continue reading “Fidget Spinner Gets Useful As MIDI Controller”