Reverse Engineering A Blu-ray Drive For Laser Graffiti

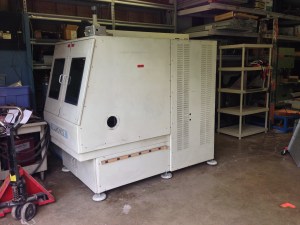
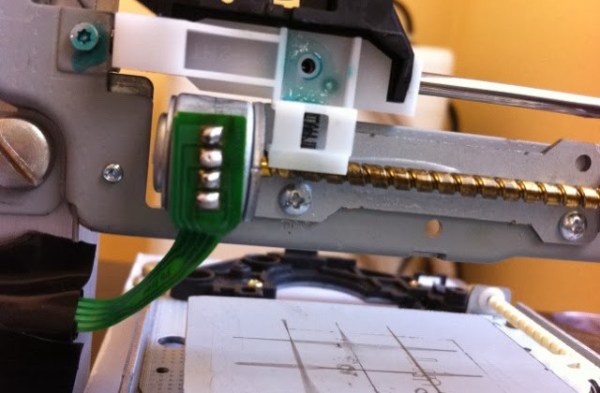
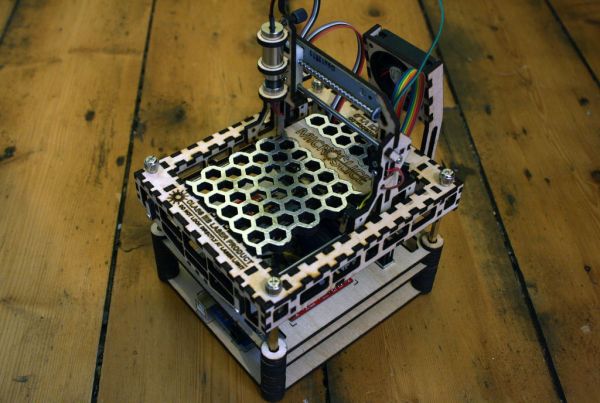
There’s a whole lot of interesting mechanics, optics, and electronics inside a Blu-ray drive, and [scanlime] a.k.a. [Micah Scott] thinks those bits can be reused for some interesting project. [Micah] is reverse engineering one of these drives, with the goal of turning it into a source of cheap, open source holograms and laser installations – something these devices were never meant to do. This means reverse engineering the 3 CPUs inside an external Blu-ray drive, making sense of the firmware, and making this drive do whatever [Micah] wants.

When the idea of reverse engineering a Blu-ray drive struck [Micah], she hopped on Amazon and found the most popular drive out there. It turns out, this is an excellent drive to reverse engineer – there are multiple firmware updates for this drive, an excellent source for the raw data that would be required to reverse engineer it.

[Micah]’s first effort to reverse engineer the drive seems a little bit odd; she turned the firmware image into a black and white graphic. Figuring out exactly what’s happening in the firmware with that is a fool’s errand, but by looking at the pure black and pure white parts of the graphic, [Micah] was able guess where the bootloader was, and how the firmware image is segmented. In other parts of the code, [Micah] saw thing vertical lines she recognized as ARM code. In another section, thin horizontal black bands revealed code for an 8051. These lines are only a product of how each architecture accesses code, and really only something [Micah] recognizes from doing this a few times before.

The current state of the project is a backdoor that is able to upload new firmware to the drive. It’s in no way a complete project; only the memory for the ARM processor is running new code, and [Micah] still has no idea what’s going on inside some of the other chips. Still, it’s a start, and the beginning of an open source firmware for a Blu-ray drive.

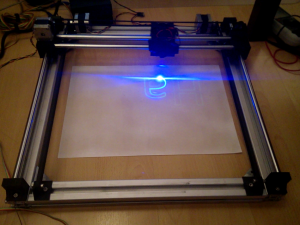
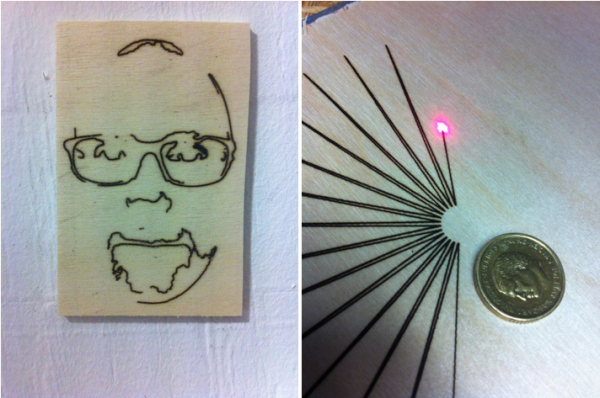
While [Micah] want’s to use these Blu-ray drives for laser graffiti, there are a number of other slightly more useful reasons for the build. With a DVD drive, you can hold a red blood cell in suspension, or use the laser inside to make graphene. Video below.

Continue reading “Reverse Engineering A Blu-ray Drive For Laser Graffiti”

Thumbnail that say The Hacklet

The Hacklet #6 – Lasers

Hacklet 6

This week’s Hacklet is all about lasers, which have been shining a monochromatic light for hackers since 1960. The first working laser was demonstrated by [Theodore Maiman], who was a hacker / maker himself, having learned circuits in his father’s home electronics lab. It’s no surprise that lasers have been hugely popular in the hacker community ever since.

laserwelder[Maiman’s] first laser was pumped with flash tubes, which is similar to the YAG laser in [macona’s] project to restore a laser welder. He’s gotten his hands on a 1985 model 400W Lumonics laser welder. This welder was originally bought by Tektronix to weld titanium CRT flanges. Time moved on, and the welder was sold to [macona’s] company, who used it until the Anorad control system died. There was an effort to bring it up to date with new servos and an OpenCNC control system, but the job was never finished. This laser sat for 12 years before [macona] bought it, and now he’s bringing it back to life with LinuxCNC. The project is off to a blazing start, as he already has the laser outputting about 200 Watts.

d0c96d91On the slightly lower power side of things we have [ThunderSqueak’s] 5mW visible red (650nm) laser. [ThunderSqueak] needed an alignment laser with decent focusing optics for her other projects. She mounted a module in a plastic case and added a switch. A quick build, but it’s paying dividends on some of her bigger projects – like her Low Cost CO2 Laser Build, which we featured on the blog back in May.


la-cutter

[phil] used buildlog 2.x as the inspiration for his Simple DIY laser cutter. The laser power comes from a low cost K40 laser tube and head. His frame is aluminum extrusion covered with Dibond, an aluminum composite material used in outdoor signs. Locomotion comes from NEMA 17 stepper motors. Many of [phil’s] parts are machined from HDPE plastic, though it looks like they could be 3D printed as well. We bet this one will be a real workhorse when it’s done.


la-cutter2[ebrithil] is working on a combo laser engraver/PCB etcher which will use a solid state laser module. His layout is the standard gantry system seen on many other mills and 3D printers. Dual steppers on the Y axis increase avoid the need for a central belt. His Z axis was donated by an old DVD drive. It has enough power to lift a pen, and should be plenty accurate for focusing duty. He’s already run a couple of great tests with a low power violet laser and glow in the dark material.

openexposer[Mario] is creating an incredibly versitile laser tool in his OpenExposer, which can do everything from stereolithography 3D printing to making music as a laser harp. The genius here is [Mario’s] reuse of laser printer parts. Every laser printer uses the same basic setup: a laser, a scanning mirror, and optics to stretch the beam out to a full page width. [Mario] is already getting some great prints from OpenExposer. This project is one to watch in The Hackaday Prize.

ramenspec[fl@C@] is digging into the physics side of things with his DIY 3D Printable RaspberryPi Raman Spectrometer. Raman Spectrometers are usually incredibly expensive pieces of requirement which can tell us which elements make up a given material sample. [fl@C@’s] laser is a 532nm 150mW laser, which bounces through a dizzying array of mirrors and lenses. The resulting data is crunched by a Raspberry Pi to give a full spectrographic analysis. [fl@C@’s] entered his project in The Hackaday Prize, and we featured his bio back in June.

That’s it for this week’s Hacklet, until next week, don’t just sit around wondering why aren’t lasers doing cool stuff. Make it happen, and post it up on Hackaday.io!


A 3-Axis Paper Cutting Mini Laser

LaserCutter

Laser are awesome, and so are projects that use lasers. A recent Instructable by [kokpat] gives an overview of how to create a fully functional laser paper cutter using CDROM stepper motors and an Arduino.

What is special about this build, is that it showcases how easy it can be to build a 3-axis mechanical system used for laser cutters, CNC machines, and 3D printers. Using a stepper stage that consist of a motor screw with a nut slider based carriage, the mechanical system can be put together quite easily and cost effectively. Luckily, from an electronics and software perspective, everything is quite standardized with the proliferation of the RepRap and similar machines. Simply pick any three stepper drivers, find the most pertinent firmware, and voilà! You’re done! Well, almost. Don’t forget a 100mW violet laser!

We have seen a ton of really cool laser cutters before, but this has to be one of the cheapest. See the laser cutter in action after the break.

Continue reading “A 3-Axis Paper Cutting Mini Laser”

Delta Laser Engraver Uses Inkscape For G-Code

lazer

[Z LeHericy] has a SeeMe CNC Rostock Max 3D printer, and a 2W WickedLasers Spyder Artic blue laser. Naturally, he had to try strapping them together.

Most of our homemade laser engravers featured here use recycled DVD burner diodes, and while they certainly work, they leave a bit to be desired… Well, if you want more power, let us introduce the Class 4 Artic Spyder 2W blue laser from WickedLasers — a company that sells super high-powered lasers to anyone who can afford them — because that’s a great idea!

Safety concerns aside — wear your darn laser goggles! This pair can etch wood and leather quite well. He’s been using it to etch celtic knots onto pieces of leather. To do this he’s used Inkscape to convert a .BMP of the knot into a vector image, and then using the G-Code tools included with Inkscape he can create a tool path for the printer.

The finished leather looks awesome — Stick around after the break to see the laser in action!

Continue reading “Delta Laser Engraver Uses Inkscape For G-Code”

DIY Laser Cutter

[Jens] decided he wanted to try building his own laser cutter to see just how much you can actually cut with a fairly low power 300mW laser diode.

He was inspired by a similar project from earlier this year, and chose to use the same LPC-826 laser diode, which you can find online for about $10-30. The cutter itself is has a wooden frame and uses drawer slides on both axes. Threaded M6 rods and NEMA17 stepper motors provide the actuation, and the whole thing is controlled by an Arduino Nano with Easy Driver stepper motor drivers.

So what can it cut? In his experiments he was able to cut through adhesive plastics (sticker paper), EVA foam, and black paper. He was also able to engrave wood and ABS plastic, although the plastic didn’t play too nicely with the laser. He also found it useful for laser cutting stencils, which he then used to create rusty art using hydrochloric acid and hydrogen peroxide.

Considering how cheap you could make one of these, it’s not a bad tool to have. Stick around after the break to see it laser cut a shark!

Continue reading “DIY Laser Cutter”

Raspi Mini Laser Engraver

If you’ve got a lot of spare parts lying around, you may be able to cobble together your own laser engraver without too much trouble. We’ve already seen small engraver builds that use an Arduino, but [Jeremy] tipped us off to [Xiang Zhai’s] version, which provides an in-depth guide to building one with a Raspberry Pi.

[Xiang] began by opening up two spare DVD writeable drives, salvaging not only their laser diodes but the stepper motors and their accompanying hardware, as well as a handful of small magnets near each diode. To assemble the laser, he sourced an inexpensive laser diode module from eBay and used a vise to push the diode into the head of the housing. With the laser snugly in place and the appropriate connecting wires soldered on, [Xiang] whipped up a laser driver circuit, which the Raspi will later control. [Xiang] worked out the stepper motors’ configuration by following [Groover’s] engraver build-(we featured it a few years back)-attaching the plate that holds the material to be engraved onto one axis and the laser assembly to the other.

Check out [Xiang’s] project blog for details explaining the h-bridge circuits as well as the Python code for the Raspi. As always, if you’re attempting any build involving a laser, please use all necessary precautions! And if you need more information on using DVD burners for their diodes, check out this hack from earlier in the summer

Microslice: The Tiny Arduino Laser Cutter

[SilverJimmy] already had a full-sized 50 watt laser cutter, but he decided to try his hand at putting together something smaller and microcontroller-driven. The result is this adorable little engraver: the MicroSlice.

To keep the design simple, [SilverJimmy] opted for a fixed cutting table, which meant moving the cutting head and the X-Axis as a unit along the Y-Axis. The solution was to take inspiration from gantry cranes. He snagged a couple of stepper motors with threaded shafts, designed the parts in Inkscape, then fired up his full-size cutter to carve out the pieces. An Arduino Uno and the relays for the laser and fans sit on the MicroSlice’s bottom platform, and two EasyDriver motor controllers sit above them on the next layer.

Swing by the Instructables for more details including the source code, and to see a video of the engraver below. [SilverJimmy] sourced his laser from eBay, but check out the engraver from earlier this year that used a DVD diode.

Continue reading “Microslice: The Tiny Arduino Laser Cutter”