Review: Battery Spot Welders, Why You Should Buy A Proper Spot Welder

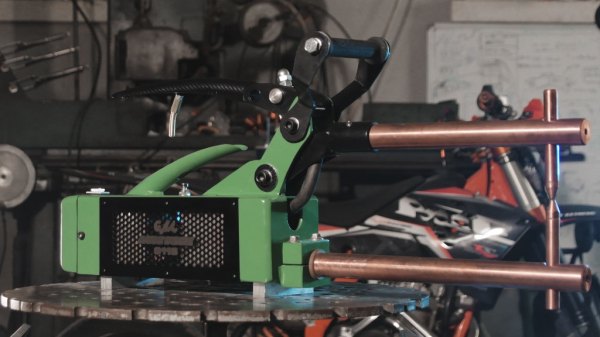
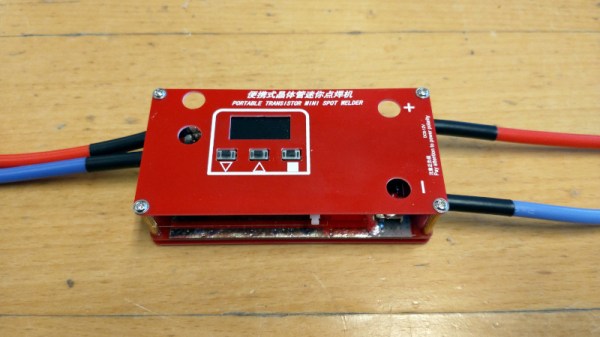
Making battery packs is a common pursuit in our community, involving spot-welding nickel strips to the terminals on individual cells. Many a pack has been made in this way, using reclaimed 18650 cells taken from discarded laptops. Commercial battery spot welders do a good job but have a huge inrush current and aren’t cheap, so it’s not uncommon to see improvised solutions such as rewound transformers taken out of microwave ovens. There’s another possibility though, in the form of cheap modules that promise the same results using a battery pack as a power supply.

With a love of putting the cheaper end of the global electronic marketplace through its paces for the entertainment of Hackaday readers I couldn’t resist, so I parted with £15 (about $20), for a “Mini Spot Welder”, and sat down to wait for the mailman to bring me the usual anonymous grey package.

Continue reading “Review: Battery Spot Welders, Why You Should Buy A Proper Spot Welder”

Ambitious Spot Welder Really Pushes The Amps

On the face of it, a spot welder is a simple device. If you dump enough current through two pieces of metal very quickly, they’ll heat up enough to melt and fuse together. But as with many things, the devil is in the details, and building a proper spot welder can be as much about addressing those details as seeing to the basics.

We haven’t featured anything from our friends over at [Make It Extreme], where they’re as much about building tools as they are about using them to build other things, if not more so. We expect, though, that this sturdy-looking spot welder will show up in a future video, because it really looks the business, and seems to work really well. The electronics are deceptively simple — just rewound microwave oven transformers and a simple timer switch to control the current pulse. What’s neat is that they used a pair of transformers to boost the current considerably — they reckon the current at 1,000 A, making the machine capable of welding stock up to 4 mm thick.

With the electrical end worked out, the rest of the build concentrated on the housing. A key to good-quality spot welds is solid physical pressure between the electrodes, which is provided by a leverage-compounding linkage as well as the long, solid-copper electrodes. We’ve got to say that the sweep of the locking handle looks very ergonomic, and we like the way closing down the handle activates the current pulse. Extra points for the carbon-fiber look on the finished version. The video below shows the build and a demo of what it can do.

Most of the spot welders we see are further down the food chain than this one, specialized as they are for welding battery packs and the like. We do recall one other very professional-looking spot welder, though.

Continue reading “Ambitious Spot Welder Really Pushes The Amps”

Upgrading An Old MIG Welder Wire Feeder With Arduino

Older industrial equipment is often a great option if you’re on a budget, and you might even be able to add some premium features yourself. [Brett] from [Theoretically Practical] has done with his old MIG welder, adding premium control features with the help of an Arduino.

The main features [Brett] were after is pre-flow, post-flow, and a spot welding timer. Pre-flow starts the flow of shielding gas a moment before energizing the filler wire, while post-flow keeps the gas going after the weld is complete. This reduces the chances of oxygen contaminating the welds. A spot welding timer automatically limits welding time, enabling consistent and repeatable spot welds.

The Miller S-22A wire feeder can have these features, but it requires an expensive and difficult to find control unit. All it does is time the activation of the relays that control the gas flow, power, and wire feeder, so [Brett] decided to use an Arduino instead. The welders control circuit runs at 24V, so an optoisolator receives the trigger signal, and relays are used for outputs. Potentiometers were added to the original control panel, and all the wiring was neatly fitted behind it. The upgrade worked perfectly and allowed [Brett] to increase the quality of his welds. See the video after the break for the full details.

Inverter welders can be picked up for ridiculously cheap prices, if you’re willing to live with the trade-offs. We’ve also seen some other DIY welder upgrades, on small and large machines.

Enjoying Some Exothermic Welding, With Thermite!

There probably aren’t many people out there who aren’t aware of what thermite is and how it demonstrates the power of runaway exothermic reactions. Practical applications that don’t involve destroying something are maybe less known. This is where the use of thermite for creating welds is rather interesting, as shown in this video by [Finn] that is also embedded after the break.

In the video, one can see how [Finn] uses thermite charges to weld massive copper conductors together in a matter of seconds inside a graphite mold. Straight joints, T-joints, and others are a matter of putting the conductors into the mold, pushing a button and watching the fireworks. After a bit of cleaning the slag off, a solid, durable weld is left behind.

The official name for this process is ‘exothermic welding‘, and it has been in use since the 19th century. Back then it was used primarily for rail welding. These days it sees a lot of use in high-voltage wiring and other applications, as in the linked video. The obvious advantage of exothermic welding is that the resulting joint is strong and durable, on account of the two surfaces having been permanently joined.

Continue reading “Enjoying Some Exothermic Welding, With Thermite!”

Printed Jig Is A Welding Rig

[NixieGuy] was scheming to build robots with cable-driven joints when the pandemic hit. Now that component sourcing is scarce, he’s had to get creative when it comes to continuous cables. These cables need to be as seamless as possible to avoid getting caught on the pulleys, so [Nixie] came up with a way to weld together something he already has on hand — lengths of .45mm steel cable.

The 3D printed jig is designed to be used under a digital microscope, and even clamps to the pillar with screws. Another set of screws holds the two wires in place while they are butt welded between two pieces of copper.

[Nixie] adds a spot of solder paste for good measure, and then joins the wires by attaching his bench power supply set to 20V @ 3.5A to the copper electrodes. We love that [Nixie] took the time to streamline the jig design, because it looks great.

This just goes to show you that great things can happen with limited resources and a little bit of imagination. [Nixie] not only solved his own supply chain problem, he perfected a skill at the same time. If you don’t have a bench supply, you might be able to get away with a battery-powered spot welder, depending on your application.

Defocused Laser Welding Fabric Proves There’s Many Ways To Slice It

Laser cutters are certainly a Hackerspace staple for cutting fabrics in some circles. But for the few fabrics derived from non-woven plastics, why not try fusing them together? That’s exactly what [Dries] did, and with some calibration, the result is a speedy means of seaming together two fabrics–no needles necessary!

The materials used here are non-woven goods often used in disposable PPE like face masks, disposable aprons, and shoe coverings. The common tool used to fuse non-woven fabrics at the seams is an ultrasonic welder. This is not as common in the hackerspace tool room, but laser cutters may be a suitable stand-in.

Getting the machine into a production mode of simply cranking out clothes took some work. Through numerous sample runs, [Dries] found that defocusing the laser to a spot size of 1.5mm at low power settings makes for a perfect threadless seam. The resulting test pockets are quite capable of taking a bit of hand abuse before tearing. Best of all, the fused fabrics can simply be cut out with another pass of the laser cutter. For fixtures, [Dries] started with small tests by stretching the two fabrics tightly over each other but suggests fixtures that can be pressed for larger patterns.

It’s great to see laser-cutters doubled-up as both the “glue” and “scissors” in a textile project. Once we get a handle on lasering our own set of scrubs, why not add some inflatables into the mix?

Fuel From Water Using Only An Arc Welder

Water, high currents, blinding balls of plasma, and a highly flammable gas that’s toxic enough to kill you in three minutes if you breathe enough of it. What’s not to love about this plasma-powered water gas generator?

In all seriousness, [NightHawkInLight] is playing with some dangerous stuff here, and he’s quite adamant about this one being firmly in the “Don’t try this at home” category. But it’s also fascinating stuff, since it uses nothing but a tank of water and an electric arc to produce useful amounts of fuel very quickly. It’s easy to jump to the conclusion that he’s talking about the electrolytic splitting of water into the hydrogen-oxygen mix HHO, but this is something else entirely.

Using a carbon electrode torch connected to his arc welder, a setup that’s similar to the one he used to make synthetic rubies, [NightHawkInLight] is able to strike an underwater arc inside a vessel that looks for all the world like a double-barreled bong. The plasma creates a mixture of carbon monoxide and hydrogen which accumulates very rapidly in the gasometer he built to collect the flammable products produced by a wood gasifier.

The water gas burns remarkably cleanly, but probably has limited practical uses. Unless you live somewhere where electricity costs practically nothing, it’ll be hard to break even on this. Still, it’s an interesting look at what’s possible when plasma and water mix.

Continue reading “Fuel From Water Using Only An Arc Welder”