The Meshpoint project originated in Croatia during the 2015 Syrian refugee crisis, when [Valent Turkovic] and other volunteers noticed that first responders, including NGOs like Greenpeace and the Red Cross, often struggled to set up communications in the field. They came to the conclusion that they couldn’t rely on the normal communications infrastructure because it was either damaged or overloaded.
The solution is a net of open source, autonomous WiFi mesh routers, scalable from a single team to serving thousands of people. Responders who won’t have time for a difficult login process, should find setup as easy as signing in to a social media site.
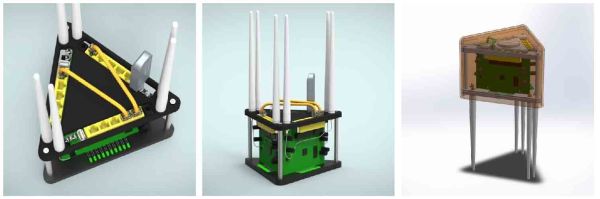
The physical nodes would consist of a router robust for up to 150 connections, all run by an ESP8266 and protected by a weatherproof enclosure. They would feature 6-8 hour battery lives with recharging via solar/wind, AC from wall current or generators, or simply DC car batteries.
You can learn more about the project or download their code from GitHub.