Wii Meets Its End In Breadcrumb Jail

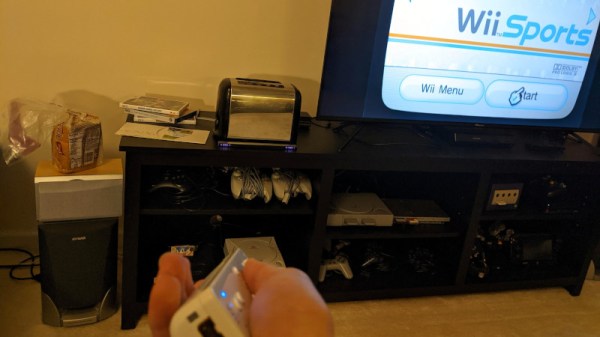
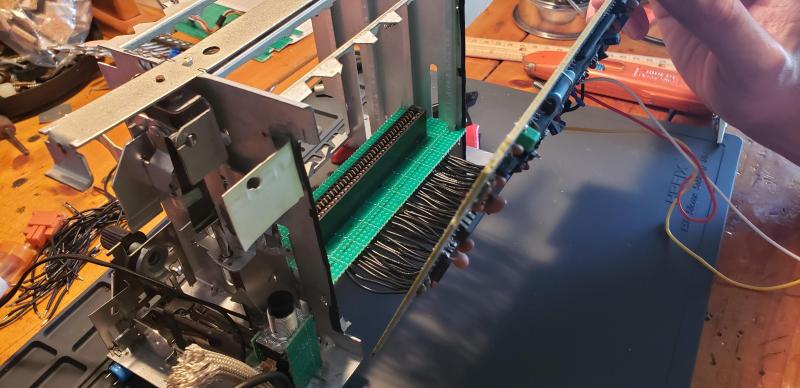
One of often encountered traits of a hacker is an ability to build devices into places where they don’t belong. Perhaps, [sonictimm]’s self-descriptive WiiinToaster was somewhat of an inevitability. Inspired by the legendary Nintoaster project which used a NES, this is a modern take on the concept, putting a Wii inside what used to be an ordinary bread-making kitchen appliance. [Sonictimm] has taken care to make it as functional while reusing the user interface options commonly found in a toaster, with some of the Wii’s connections routed to the original buttons and the lever. It’s compatible with everything that the Wii supports in its standard, non-toaster form – the only function that had to be sacrificed was the “making toast” part of it, but some would argue it’d be a bit counterproductive to leave in.

[Sonictimm] says it took five years from building the WiiinToaster to documenting it, which sounds about right for an average project. If you, like many, have a Wii laying around that you haven’t been using for years, building it into a toaster (or any other place a Wii shouldn’t be) is a decent weekend project. Perhaps, a spacier chassis will also help with the overheating problems plaguing some earlier Wii models. One thing we would not recommend, however, is building a toaster into a Wii case – unless you like to see your creations self-immolate, in which case, make sure to film it and grace our Tips line with a YouTube link. There’s also a challenge for the achievement-minded hackers out there – making a rebuild so daring, it gets a DMCA notice from Nintendo.

It wouldn’t be the first time we feature a Nintendo console reborn in a toaster’s shell, with NES and SNES projects coming to mind. If you’re interested in other directions of Wii rebuilds, perhaps you could make an Altoids-sized FrankenWii, or an unholy hybrid of three consoles. And if you do build a Switchster, or a ToaDSter (perhaps, best suited for a waffle iron), we’d love to take a look!

Continue reading “Wii Meets Its End In Breadcrumb Jail”

Leggo My Nintoaster!

If you’re one of today’s lucky 10,000* who have never seen a Nintoaster case mod before, boy are we glad you get to see this one first. [Dizzle813] found a shiny old Sunbeam toaster that looks just like the one we grew up with. Although the original creator made a build video, there is room for improvement in the explanation, and some people prefer reading, anyway. This handy guide references and builds upon [VomitSaw]’s original Nintoaster video.

[Dizzle813] really makes the hard parts look easy, and a build like this seems to be mostly hard parts. Unless you find this exact vintage of Sunbeam, you would have to orchestrate the innards as needed to fit your toaster. The hardest part of all is probably wiring up the 72-pin connector to the NES motherboard, but [Dizzle813] managed to pull it off using 22 AWG solid-core wire and still get everything to flex and fit together. Even still, they broke off a pin trying to ease it into the perfboard, but cutting a hole in the connector and inserting a bodge wire replacement worked just fine.

We absolutely love the way this looks and operates, especially with the lever-activated power button and the six orange LEDs inside that are brightness-controlled through the toastiness knob. Be sure to check out the demo after the break.

Isn’t it great when things are built into other things? Case in point: there’s a laptop hiding inside this printer.

*relevant xkcd

Continue reading “Leggo My Nintoaster!”

The Red Dwarf Talkie Toaster Made Real

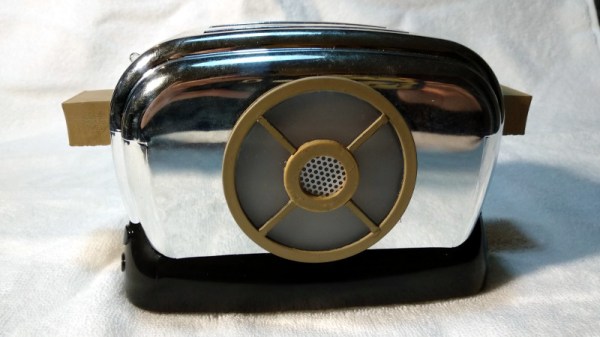
It’s cold outside, there’s no kind of atmosphere, you’re all alone, more or less. More or less meaning that you share the gigantic mining ship that is your home on the other side of the galaxy with an ineffectual android, a humanoid descended from your cat, a holographic representation of your dead colleague who’s a complete smeghead, and a really annoying sentient toaster that’s obsessed with bread products. If all this rings a bell, then maybe you’re familiar with the cult BBC TV series, Red Dwarf.  It’s a show that evidently [Bill Dudley] has spent too much time watching, because he’s created a really convincing replica of that talking toaster.

The base toaster is a toy appliance with a little clockwork ejector for toy toast, that comes with plenty of space inside and is easy to accessories for the classic Talkie Toaster look. Inside is an off-the-shelf MP3 player board and a home-made PCB which drives a set of LEDs behind the speaker grille in time with the audio. The result won’t make any toast, waffles, or even crumpets, but it will delight any Red Dwarf fans who might be passing, whether someone has smoked them a kipper or not.

Surprisingly this is not the first Talkie Toaster build we’ve seen. If they met, would they have a harmonious conversation about bagels?

The Surprising Tech Of A Cheap Toaster

How complicated can a toaster be? You can get a cheap one for way under $10 that is little more than a hot wire. However, there are a few little complications. First, consumer products need to be safe — lawsuits are expensive. Second, there has to be some mechanism to hold the toast down until it is done. If you can buy one for $10 you can bet it isn’t some super toast processor running Linux in there.

[Technology Connections] tore one down for you so you don’t have to. The circuitry is simple, and who knew there was a dedicated IC for toaster control? However, the real engineering is in the lowly little handle you pull down to start the toasting.

Continue reading “The Surprising Tech Of A Cheap Toaster”

Reflowduino: Put That Toaster Oven To Good Use

There are few scenes in life more moving than the moment the solder paste melts as the component slides smoothly into place. We’re willing to bet the only reason you don’t have a reflow oven is the cost. Why wouldn’t you want one? Fortunately, the vastly cheaper DIY route has become a whole lot easier since the birth of the Reflowduino – an open source controller for reflow ovens.

This Hackaday Prize entry by [Timothy Woo] provides a super quick way to create your own reflow setup, using any cheap means of heating you have lying around. [Tim] uses a toaster oven he paid $21 for, but anything with a suitable thermal mass will do. The hardware of the Reflowduino is all open source and has been very well documented – both on the main hackaday.io page and over on the project’s GitHub.

The board itself is built around the ATMega32u4 and sports an integrated MAX31855 thermocouple interface (for the all-important PID control), LiPo battery charging, a buzzer for alerting you when input is needed, and Bluetooth. Why Bluetooth? An Android app has been developed for easy control of the Reflowduino, and will even graph the temperature profile.

When it comes to controlling the toaster oven/miscellaneous heat source, a “sidekick” board is available, with a solid state relay hooked up to a mains plug. This makes it a breeze to setup any mains appliance for Arduino control.

We actually covered the Reflowduino last year, but since then [Tim] has also created the Reflowduino32 – a backpack for the DOIT ESP32 dev board. There’s also an Indiegogo campaign now, and some new software as well.

If a toaster oven still doesn’t feel hacky enough for you, we’ve got reflowing with hair straighteners, and even car headlights.

Nintoaster: The Next Generation

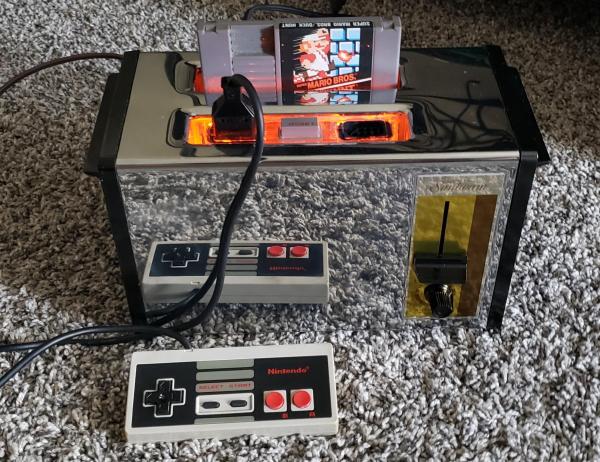
The original Nintendo Entertainment System is affectionately called “the toaster” due to the way the cartridge is inserted. [MrBananaHump] decided to take things a bit literally and installed a NES inside an actual toaster. This isn’t [MrBananaHump’s] design, the Nintoaster comes to us from [vomitsaw], who also built the SuperNintoaster. Since [vomitsaw] was kind enough to document his original build, [MrBananaHump] was able to build upon it.

The target toaster for this build was a plastic Sunbeam model found at a thrift store for $5. [MrBananaHump] gutted the toaster and cleaned out years of toast crumbs. The Nintendo mainboard would fit perfectly inside a toaster, except for two things – the RF Modulator and the expansion port. The expansion port was never used in the US version of the NES so it can be desoldered and removed. The RF also needs to be desoldered and relocated.

By far the biggest job in this casemod is hand-wiring each of the 72 pins for the cartridge port. It’s a tedious job, and it probably won’t look pretty. Keep your wires short, and things will probably work thanks to the relatively low clock speed of the NES.

The cartridge goes in one toast slot. [MrBananaHump] mounted his controller ports, power and reset buttons in the second slot. A bit of expanded metal grid completes the slot. Sure, it’s not exactly pretty inside, but with the case on, this becomes a rather nice looking build.

We’ve seen numerous Nintendo casemods over the years, just one other example is this N64 in an N64 controller.

DIY Talkie Toaster from Red Dwarf

Red Dwarf’s Talkie Toaster Tests Tolerance

In the Red Dwarf TV series, Talkie Toaster wants to know if you want toast, and if not toast, then maybe a muffin or waffle, and it will pester you incessantly until you smash it with a 14lb lump hammer and throw it in a waste disposal. Now [slider2732] has actually gone and made one of the infernal machines!

He’s hidden a PIR sensor in the toaster handle to tell an Arduino Pro Mini when someone is unfortunate enough to be passing by. The Arduino then reads sound files from an SD card reader and plays them through a 3 watt amplifier out to a speaker. For that he uses the TMRpcm library available on github.

[slider2732] cleverly mounted the speaker to the side of the toaster along with some appropriately shaped bits and pieces, and some LEDs to make it appear and work much like the circular panel that lights up on the real Talkie Toaster. We dare you to watch the video after the break, unless you really are looking for toast. As a consolation, the video also walks through making it.

Continue reading “Red Dwarf’s Talkie Toaster Tests Tolerance”