[Jason]’s at it again. This time the LEGO maestro is working on a LEGO BB-8 droid. As a first step he’s made a motorized monowheel that not only races along hallways and through living rooms at the peril of any passing people, but turns as well.
To drive it forward there’s an axle that runs across the center of the wheel and a motor that rotates that axle. He’s also included some weight bricks. Without the mass of those bricks for the rotation to work against, the motor and axle would just spin in place while the friction of the floor keeps the wheel from rotating. If you’ve seen the DIYer’s guide to making BB-8 drive systems, you’ll know that this is classified as an axle drive system.
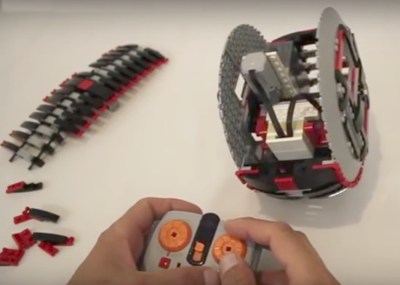
For steering the monowheel left or right he has another mass located just above the axle. Shifting the mass to the left causes the monowheel to lean and move in that direction. Shifting the mass to the right makes the wheel move to the right in the same fashion. Being ever efficient, [Jason] has the motor that shifts the mass doubling as the mass itself.
As with any proof-of-concept, there are still some issues to work out. When turning the wheel left or right it can tip onto its side. Ridges on both sides of the wheel’s circumference reduce the chances of that happening but don’t eliminate it altogether. Also, the steering mass/motor doesn’t yet have a self-centering mechanism; after a turn it’s up to the person holding the remote control to find center. If the mass isn’t correctly centered after a turn, there tends to be some wobble.
As always, we’re looking forward to seeing how [Jason] solves those issues but first he’ll have to put it back together since, as you can see from the video below, it didn’t quite pass the stair test.
Continue reading “LEGO Monowheel Corners Like It’s On Rails”