Last week we had a walk through of the Lunar Module’s source code with Don Eyles, who wrote the landing programs. Now you can take a rather thrilling ride to see Don’s code in action.
Below is an annotated video of the Apollo 12 landing, in real-time. It’s worth setting aside a quarter-hour to check it out. In an age where everyone is carrying around an HD (or way better) camera in their pocket, following along with radio broadcasts, still images, and small slivers of video might not sound that awesome. But it is!
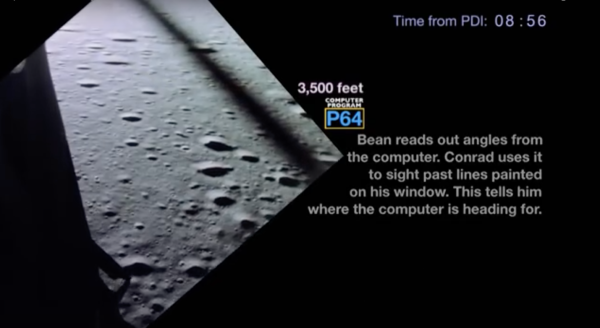
 The video takes us from Powered Descent Initiation through touchdown on the Moon with Pete Conrad and Alan Bean. As the audio plays out the video has annotations which explain what is going on and that translate the jargon used by the team. With the recently celebrated push to publish the source code you can even follow along as the video displays which program is running at that time. Just search for the program code and you’ll find it, like this screenshot of the P63 routine. The code comments are more than enough to get the gist of it all.
If you enjoy this, the description of the YouTube video below includes links to similar videos for Apollo 11, 14, 15, 16, and 17.
http://www.youtube.com/watch?v=8WEEFHJsZ0k
[Thanks to Paul Becker for sending along this video]


![DIY Research Vessel in use, while ROV is busy below. [Source: NYT]](https://hackaday.com/wp-content/uploads/2016/07/openrov-top-end2.jpg?w=250)