Pi Pico Powers Parts-Bin Audio Interface

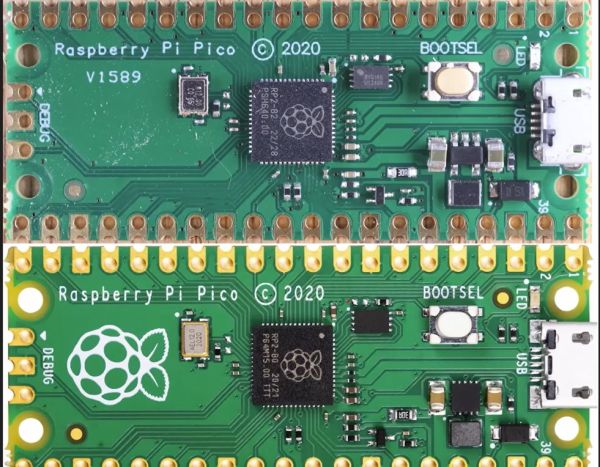
USB audio is great, but what if you needed to use it and had no budget? Well, depending on the contents of your parts bin, you might be able to use [Veyniac]’s Pico-Audio-Interface as a free (and libre! It’s GPL3.0) sound capture device.

In the project’s Reddit thread, [Veyniac] describes needing audio input for his homemade synth, but having no budget. Necessity being the mother of invention, rather than beg borrow or steal a device with a working sound card, he hacked together this lovely device. It shows up as a USB Audio Class 2.0 device so should work with just about anything, and offers 12-bit resolution and 4x oversampling to try and deal with USB noise with its 2-channel, 44.1 kHz sample rate.

Aside from the Pico, all you need is an LM324 op-amp IC and a handful of resistors and capacitors — [Veyniac] estimates about $10 to purchase the whole BOM. He claims that the captured audio sounds okay in his use, but can’t guarantee it will  be for anyone else, noise being the fickle beast that it is. We figure that sounding “Okay” has got to be pretty good, given that you usually get what you pay for — and again, [Veyniac] did build this in a cave with a box of scraps. Well, except for the cave part. Probably.

While the goal here was not to rival a commercial USB sound card, we have seen projects to do that. We’re quite grateful to [Omadeira] for the tip, because this really is a hack. If you, too, want a share of our undying gratitude (which is still worth its weight in gold, despite fluctuations in the spot price of precious metals), send in a tip of your own.

Spiral Connector Makes Fastener-Free Assemblies

[Anton Gaia]’s SPIRAL sculpture resembles an organizer or modern shelving unit, but what’s really interesting is how it goes together. It’s made entirely from assembling copies of a single component (two, if you count the short ‘end pieces’ as separate) without a fastener in sight. [Anton] made the 3D model available, so check it out for yourself!

The self-similar design of the joint, based on the golden spiral, makes a self-supporting joint that requires neither glue nor fasteners.

The ends of each part form a tight, spiral-shaped joint when assembled with its neighbors. Parts connect solely to themselves without any need of fasteners or adhesives.

The end result is secure, scalable, and with a harmonious structure that is very pleasing to look at. Small wonder [Anton] used it as the basis for artistic work. You can see more pictures here.

The design of the joint is based on the golden spiral (which it turns out is also a pretty useful chicken coop architecture.)

The parts lend themselves quite well to 3D printing, and we’d like to take a moment to appreciate that [Anton] shared the .step file instead of just an STL. STEP (or STP) files can be imported meaningfully into CAD programs, making it much easier to incorporate the design into one’s own work. STEP is also supported natively in many 3D printer slicers, so there’s no need to convert formats just to print them.

A brief video describing SPIRAL is embedded just below, with a closer look at how the pieces fit together.

Continue reading “Spiral Connector Makes Fastener-Free Assemblies”

Flopped Humane “AI Pin” Gets An Experimental SDK

The Humane AI Pin was ambitious, expensive, and failed to captivate people between its launch and shutdown shortly after. While the units do contain some interesting elements like the embedded projector, it’s all locked down tight, and the cloud services that tie it all together no longer exist. The devices technically still work, they just can’t do much of anything.

The Humane AI Pin had some bold ideas, like an embedded projector. (Image credit: Humane)

Since then, developers like [Adam Gastineau] have been hard at work turning the device into an experimental development platform: PenumbraOS, which provides a means to allow “untrusted” applications to perform privileged operations.

As announced earlier this month on social media, the experimental SDK lets developers treat the pin as a mostly normal Android device, with the addition of a modular, user-facing assistant app called MABL. [Adam] stresses that this is all highly experimental and has a way to go before it is useful in a user-facing sort of way, but there is absolutely a workable architecture.

When the Humane AI Pin launched, it aimed to compete with smartphones but failed to impress much of anyone. As a result, things folded in record time. Humane’s founders took jobs at HP and buyers were left with expensive paperweights due to the highly restrictive design.

Thankfully, a load of reverse engineering has laid the path to getting some new life out of these ambitious devices. The project could sure use help from anyone willing to pitch in, so if that’s up your alley be sure to join the project; you’ll be in good company.

A Prunt 3D printer control board is shown mounted in a 3D printer, just behind a power supply, in the center of the image.

Keeping Snap And Crackle Under Control With Prunt Printer Firmware

For quite some time now, Marlin has been the firmware of choice for any kind of custom 3D printer, with only Klipper offering some serious competition in the open-source world. [Liam Powell] aims to introduce some more variety with the development of Prunt, a 3D printer control board and firmware stack.

Smooth motion control is Prunt’s biggest advantage: Klipper and Marlin use trapezoidal (three-phase) motion profiles, which aim for acceleration changes with physically impossible rapidity, leading to vibrations and ringing on prints. By contrast, Prunt uses a more physically realistic 31-phase motion profile. This lets the user independently adjust velocity, acceleration, jerk, snap, and crackle (the increasingly higher-order derivatives of position with respect to time) to reduce vibration and create smoother prints. To avoid sharp accelerations, Prunt can also turn corners into 15-degree Bézier curves.

The focus on smooth motion isn’t just a software feature; the Prunt control board uses hardware timers to control step generation, rather than the CPU. This avoids the timing issues which Klipper sometimes faces, and avoids slowing other parts of the program down. The board also seems to have a particular focus on avoiding electrical damage. It can detect short circuits in the heaters, thermistors, fans, and endstops, and can cut power and give the user a warning when one occurs. If the board somehow experiences a serious electrical fault, the USB port is isolated to prevent damage to the host computer. The firmware’s source is available on GitHub.

If you’re more interested in well-established programs, we’ve given a quick introduction to Klipper in the past. We’ve also seen people develop their own firmware for the Bambu Lab X1.

Expanding rack structure

Expanding Racks In The Spirit Of The Hoberman Sphere

If you’re a mechanical engineering wonk, you might appreciate this latest video from [Henry Segerman] wherein he demonstrates his various expanding racks.

[Henry] explains how the basic “double-rack” unit can be combined to make more complex structures. These structures are similar in spirit to the Hoberman sphere, which is a compact structure that can be expanded to fill a large space.

Continue reading “Expanding Racks In The Spirit Of The Hoberman Sphere”

Dummy Plug Gets Smarter With Raspberry Pi

[Doug Brown] had a problem. He uses a dummy HDMI plug to fool a computer into thinking it has a monitor for when you want to run the computer headless. The dummy plug is a cheap device that fools the computer into thinking it has a monitor and, as such, has to send the Extended Display ID (EDID) to the computer. However, that means the plug pretends to be some kind of monitor. But what if you want it to pretend to be a different monitor?

The EDID is sent via I2C and, as you might expect, you can use the bus to reprogram the EEPROM on the dummy plug. [Doug] points out that you can easily get into trouble if you do this with, for example, a real monitor or if you pick the wrong I2C bus. So be careful.

Continue reading “Dummy Plug Gets Smarter With Raspberry Pi”