IBM Made A MIPS Laptop. Will It Make You WinCE?

We’re used to our laptop computers here in 2022 being ultra-portable, super-powerful, and with impressively long battery lives. It’s easy to forget then that there was a time when from those three features the laptop user could usually expect only one of them in their device. Powerful laptops were the size of paving slabs and had battery lives measured in minutes, while anything small usually had disappointing performance or yet again a minuscule power budget.

In the late 1990s manufacturers saw a way out of this in Microsoft’s Windows CE, which would run on modest hardware without drinking power. Several devices made it to market, among them one from IBM which [OldVCR] has taken a look at. It makes for an interesting trip down one of those dead-end side roads in computing history.

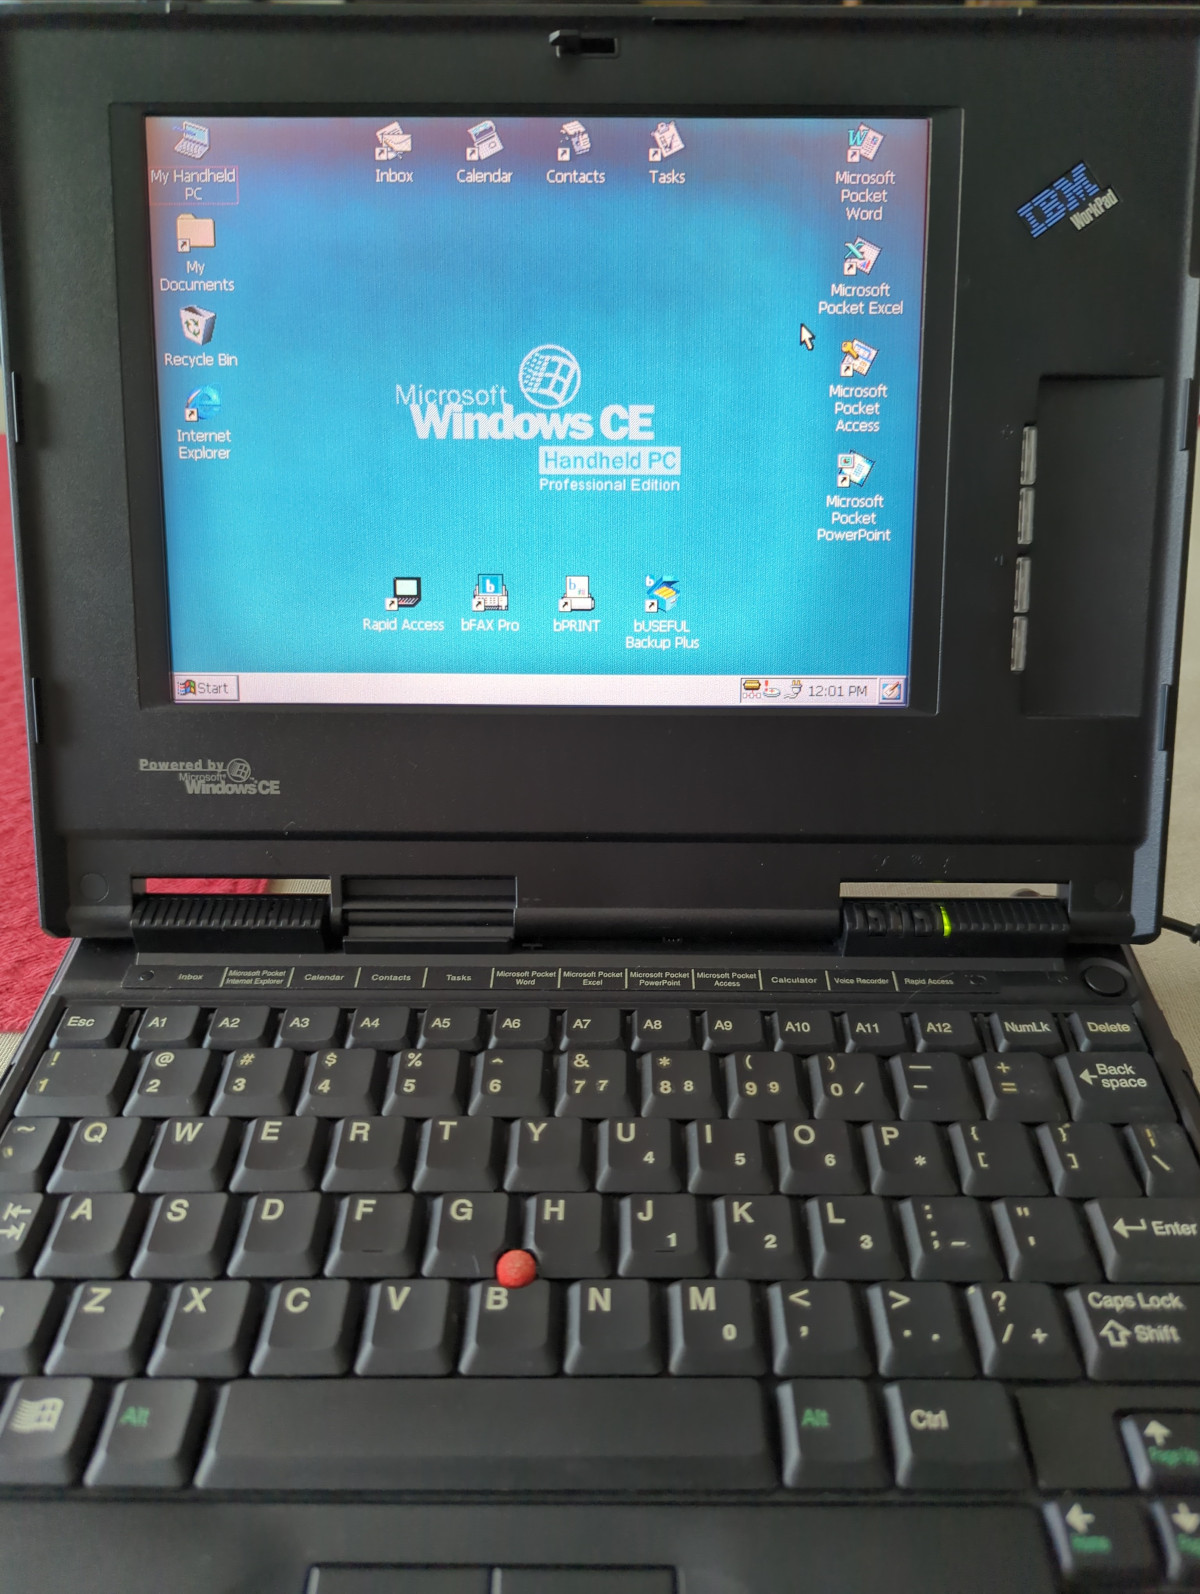
In the box bought through an online auction is a tiny laptop that screams IBM, we’d identify it as a ThinkPad immediately if it wasn’t for that brand being absent. This is an IBM WorkPad, a baby sibling of the ThinkPad line intended as a companion device. This one has a reduced spec screen and an NEC MIPS processor, with Windows CE on a ROM SODIMM accessible through a cover on the underside. For us in 2022 MIPS processors based on the open-sourced MIPS ISA are found in low-end webcams and routers, but back then it was a real contender. The article goes into some detail on the various families of chips from that time, which is worth a read in itself.

We remember these laptops, and while the IBM one was unaffordable there was a COMPAQ competitor which did seem tempting for on-the-road work. They failed to make an impact due to being marketed as a high-end executive’s toy rather than a mass-market computer, and they were seen off as “real” laptops became more affordable. A second-hand HP Omnibook 800 did the ultra-portable job on this bench instead.

The industry had various attempts at cracking this market, most notably with the netbooks which appeared a few years after the WorkPad was produced. It was left to Google to reinvent the ultra-portable non-Intel laptop as an internet appliance with their Chromebooks before they would become a mass-market device, but the WorkPad remains a tantalizing glimpse of what might have been.

Windows CE occasionally makes an appearance here, and yes, it runs DOOM.

Was There A Programmable PONG Chip?

Students of game console history will reach back into the 1970s for the primordial machines, tracing from the Magnavox Odyssey onwards, and thence via the Fairchild Channel F into the world of microprocessors and the chain of machines that lead us to those we enjoy today. In the early days there was a parallel evolution for a few years of dedicated video game consoles with no interchangeable cartridges or microprocessors, these took their inspiration from the legendary PONG arcade game and used dedicated non-programmable hardware in custom chips to create their video. But was there a programmable PONG chip lurking among all the others? [Old VCR] takes a look.

Many readers will be familiar with MOS Technology as the originator of the 6502 processor used in so many 8-bit home computers. But perhaps many of our attention spans will have passed over another of their products, the MOS 7600 and 7601. These were the chip company’s entry into the surprisingly congested mid-70s PONG-in-a-chip market, and the article investigates the question of whether they might in fact be mask-programmed microcontrollers masquerading as dedicated chips.

It’s a fascinating tour through the mid-70s in terms of games consoles, MOS, and through their eventual takeover, Commodore. The possibility of a mask-programmed PONG chip is explored in detail and discounted, though like [Old VCR], we’d love to see one decapped and reverse engineered. For us a stronger line of evidence comes in asking why MOS would stop at PONG if they had a mask-programmed microcontroller in their catalogue, and that our not having seen MOS microcontrollers appearing all over Commodore’s subsequent products suggests that it may be simply another dedicated PONG chip like all the others.

We’ve seen quite a few variants of this iconic game over the years, but few as impressive as one made from discrete components.

Dissecting A T1 Line

When it comes to internet connections, here in 2022 so many of us have it easy. Our ISP provides us with a fibre, cable, or DSL line, and we just plug in and go. It’s become ubiquitous to the extent that many customers no longer use the analogue phone line that’s so often part of the package. But before there was easy access to DSL there were leased lines, and it’s one of these that [Old VCR] is dissecting. The line in question is a T1 connection good for 1.536 Mbit/s and installed at great cost in the days before his cable provider offered reliable service, but over a decade later is now surplus to requirements. The ISP didn’t ask for their router back, so what else to do but give it the hacking treatment?

In a lengthy blog post, he takes us through the details of what a T1 line is and how it’s installed using two copper lines, before diving into the router itself. It’s an obsolete Samsung device, and as he examined the chips he found not the MIPS or ARM processors we’d expect from domestic gear of the period, but a PowerPC SoC from Freescale. Connecting to the serial port reveals it as running SNOS, or Samsung Network Operating System from an SD card, and some experimentation finds a default password reset procedure through the bootloader commands. The rest of the piece is dedicated to exploring this OS.

There was a time before the advent of the Raspberry Pi and similar cheap Linux-capable boards, that hacking a router was the way to get a cheap embedded Linux system, but now it’s much more done to liberate a router from the clutches of manufacturer and telco. Still, it’s very much still part of the common fare here at Hackaday.

Pulling Off A CRT Transplant Doesn’t Have To Be Tricky!

Whether it’s an engine swap in an old car or pulling a hard drive out of an old computer, we often find ourselves transplanting bits from one piece of hardware to another. [Emily Velasco] recently attempted this with a pair of CRTs, and came away with great success.

The donor was an old 1980s fishing sounder, which came complete with a rather fetching monochrome amber CRT display. [Emily]’s goal was to transplant this into the body of a early 2000s portable television. The displays were of a similar size and shape, though the Toshiba CRT from the 80s used a lot more glass in its construction.

The tube socket in the TV used to hook up the display matched the old CRT perfectly, so there were no hassles there. A bit of soldering was all that was needed to hook up the yoke, and [Emily] was ready to test. Amazingly, it powered up cleanly, displaying rolling amber static as you’d expect, given that analog television stations have been off the air for some time now.

After some perseverance, a VCR playing Mystic Pizza on VHS was able to deliver a video signal to the TV, proving that everything was working well. The next stage of the project is to get the television electronics to fit inside the 1980s fishing sounder housing, as it’s the more attractive of the two. Things were just built differently back in those days!

We’ve seen some other great vintage display swaps before, too. Video after the break.

Continue reading “Pulling Off A CRT Transplant Doesn’t Have To Be Tricky!”

Illuminating Origami Is Just Around The Corner

Pop-up greeting cards are about to get a whole lot more interesting. Researchers at Seoul National University in Korea have created glowing 3D objects with a series of prototypes that fold thin QLED (Quantum Dot LED) sheets like origami. They used a CO2 laser to etch “fold lines” in the QLED so the sheets could be formed into 3D shapes. The bends are actually rounded, but at 5μm they appear to be sharp corners and the panels continue to illuminate across the fold lines for at least 500 folds. Some glow in solid colors, while others use smaller addressable areas to create animated matrix displays of patterns and letterforms. See the short video after the break, read the Physics World article or to see all the prototypes and dig into details of the full research paper in Nature (freed from the paywall by SharedIt).

We’re not sure how soon this technique can be duplicated in our home labs, but we can’t wait to fold up our own 3D lights and matrices. Until then, check out some glowing origami you can make right now from [Charlyn Gonda] at Remoticon 2020 and earlier that year and this amazing origami lamp.

Continue reading “Illuminating Origami Is Just Around The Corner”

Threaded Wires Save Phone Numbers

If you thought programming your 1990s VCR was rough, wait until you see this Russian telephone autodialer that [Mike] took apart over on the mikeselectricalstuff YouTube channel (video below the break). [Mike] got this 1980s Soviet-era machine a few years ago, and finally got around to breaking into it to learning what makes it tick. The autodialer plugs into the phone line, much like an old-school answering machine. It provides the user with 40 pre-set telephone numbers, arranged in two banks of 20, and a speaker to monitor the connection process. It uses pulse dialing — no touch tones. What’s surprising is how you program the numbers. Given that this was build in the 1980s Soviet Union, he wasn’t expecting a microcontroller. But he wasn’t expecting transformer core “rope” memory, either.

The phone normally sits on a platform on the left side of the machine. Raising up the platform exposes a bank of toroidal cores, arranged in seven rows of four. Each row corresponds to a dialed digit, and the four cores used to encode a single digit. At the top and bottom of the programming board are two 40-pin connectors, each pin corresponding to one of the preset phone numbers. A bunch of patch wires would have been provided, and you program each number by threading a long wire through the appropriate cores, connecting it at the top and bottom connectors much like a modern solderless breadboard. It’s also interesting to see the components and construction technique of this circuit board. For example, the diodes have the strip on the Anode end, not the cathode as we’re normally used to today. The transistor cans are mounted upside down like dead spiders.

Continue reading “Threaded Wires Save Phone Numbers”

Using Arduinos To Drive Undocumented Displays

For those of us old enough to remember the VCR (and the difficulty of programming one), the ubiquitous vacuum fluorescent display, or VFD, is burned into our memories, mostly because of their brightness and contrast when compared to the superficially-similar LCD. These displays are incredibly common even apart from VCRs, though, and it’s easy to find them for next to no cost, but figuring out how to drive one if you just pulled it out of a 30-year-old VCR is going to take some effort. In this build, [mircemk] shows us how he drives unknown VFD displays using an Arduino in order to build his own weather forecasting station.

For this demonstration [mircemk] decided to turn a VFD into a weather forecasting station. First of all, though, he had to get the VFD up and running. For this unit, which came from a point-of-sale (POS) terminal, simply connecting power to the device turned on a demo mode for the display which let him know some information about it. From there, and with the knowledge that most POS terminals use RS232 to communicate, he was able to zero in on the Rx and Tx pins on the on-board microcontroller and interface them with an Arduino. From there it’s a short step to being able to output whatever he wanted to this display.

For this project, [mircemk] wanted the display to output information about weather, but rather than simply pull data from some weather API he is actually using a sensor suite connected to the Arduino to measure things like barometric pressure in order to make a 12-hour forecast. The design is inspired by old Zambretti weather forecasters which used analog wheels to input local weather data. It’s an interesting build not only for the VFD implementation but also for attempting to forecast the weather directly with just a tiny sensor set instead of downloading a forecast to display. To do any better with your own forecasts, you’d likely need your own weather station.

Continue reading “Using Arduinos To Drive Undocumented Displays”