Arduino IDE Creates Bootable X86 Floppy Disks

Arguably the biggest advantage of the Arduino ecosystem is how easy it is to get your code running. Type a few lines into the IDE, hit the button, and in a few seconds you’re seeing an LED blink or some text get echoed back over the serial port. But what if that same ease of use didn’t have to be limited to microcontrollers? What if you could use the Arduino IDE to create computer software?

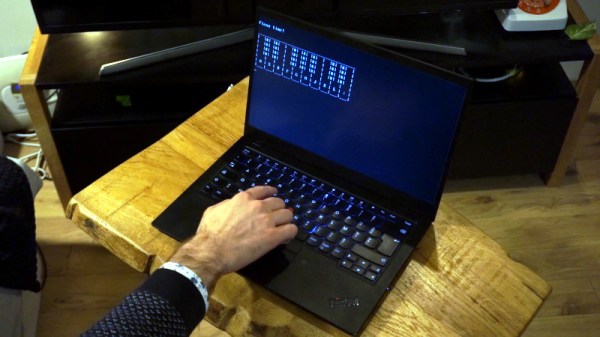
That’s exactly what boot2duino, a project developed by [Jean THOMAS] hopes to accomplish. As you might have guessed from the name, the code you write in the Arduino is turned into a bootable floppy disk image that you can stick into an old PC. After a few seconds of beeping and grinding your “Hello World” should pop up on the monitor, and you’ve got yourself the world’s biggest Arduino.

A minimal x86 Arduino sketch.

Now to be clear, this isn’t some kind of minimal Linux environment that boots up and runs a compiled C program. [Jean] has created an Arduino core that provides basic functionality on x86 hardware. Your code has full control over the computer, and there’s no operating system overhead to contend with. As demonstrated in a series of videos, programs written with boot2duino can display text, read from the keyboard, and play tones over the PC’s speaker.

The documentation for boot2duino says the project serves no practical purpose, but we’re not so sure. While the feature set is minimal, the low overhead means you could theoretically press truly ancient PCs into service. There’s certainly an appeal to being able to write your code on a modern OS and effortlessly deploy it on a retrocomputer, from somewhat modernized versions of early computer games to more practical applications. If any readers end up exploring this concept a bit further, be sure to let us know how it goes.

Continue reading “Arduino IDE Creates Bootable X86 Floppy Disks”

Illuminating Origami Is Just Around The Corner

Pop-up greeting cards are about to get a whole lot more interesting. Researchers at Seoul National University in Korea have created glowing 3D objects with a series of prototypes that fold thin QLED (Quantum Dot LED) sheets like origami. They used a CO2 laser to etch “fold lines” in the QLED so the sheets could be formed into 3D shapes. The bends are actually rounded, but at 5μm they appear to be sharp corners and the panels continue to illuminate across the fold lines for at least 500 folds. Some glow in solid colors, while others use smaller addressable areas to create animated matrix displays of patterns and letterforms. See the short video after the break, read the Physics World article or to see all the prototypes and dig into details of the full research paper in Nature (freed from the paywall by SharedIt).

We’re not sure how soon this technique can be duplicated in our home labs, but we can’t wait to fold up our own 3D lights and matrices. Until then, check out some glowing origami you can make right now from [Charlyn Gonda] at Remoticon 2020 and earlier that year and this amazing origami lamp.

Continue reading “Illuminating Origami Is Just Around The Corner”

Stout Peristaltic Pump Fabricated From Scratch

The peristaltic pump is perhaps most well known for its ability to pump fluids without the pump mechanism coming into contact with the working fluid. This is key for food-safe applications and other situations where a pump could contaminate the fluid. [Maciej Nowak] has built a great example of such a pump, crafted out of aluminium from scratch.

The build video covers the machining process in detail, showing how the aluminium body was fabricated on the lathe before installing bearings and a silicone hose. The pump shaft was then fabricated, along with a set of brass rollers to press along the tube, creating the pumping action. The rollers were also lubricated in order to reduce friction on the tubing. Powering the pump is a small DC motor, sending drive via a small toothed belt, giving the finished build quite an industrial look.

We’re used to seeing plenty of 3D-printed pumps about the place. This build, while it requires a fully-equipped machine shop, is much tougher than anything plastic, and you could easily use it to break a window in an emergency too, an obscure feature nevertheless requested by some discerning pump customers.

[Maciej] shows off the build by pumping some green liquid, noting the peristaltic design requires no priming which makes operation much easier. It’s also bidirectional, and can be run very slowly if required.

Overall, it’s a build that shows off the benefits of working in metal as well as the great features of the peristaltic pump design. Video after the break.

Continue reading “Stout Peristaltic Pump Fabricated From Scratch”

NTP server heated with Bitcoin mining dongles

Bitcoin Mining ASICs Repurposed To Keep NTP Server On Track

They say time is money, but if that’s true, money must also be time. It’s all figurative, of course, but in the case of this NTP server heater powered by Bitcoin mining dongles, money actually does become time.

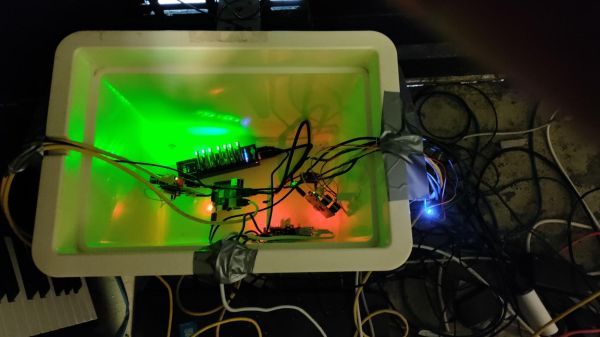
This is an example of the lengths to which Network Time Protocol aficionados will go in search of slightly better performance from their NTP servers. [Folkert van Heusden], having heard that thermal stability keeps NTP servers happy, used a picnic cooler as an environmental chamber for his  Pi- and GPS-based NTP rig. Heat is added to the chamber thanks to seven Block Erupter ASIC miner dongles, which are turned on by a Python script when a microcontroller sends an MQTT message that the temperature has dropped below the setpoint.

Each dongle produces about 2.5 Watts of heat when it’s working, making them pretty effective heaters. Alas, heat is all they produce at the moment — [Folkert] just has them working on the same hash over and over. He does say that he has plans to let the miners do useful work at some point, not so much for profit but to at least help out the network a bit.

This seems like a bit of a long way around to solve this problem, but since the mining dongles are basically obsolete now — we talked about them way back in 2013 — it has a nice hacky feeling to it that we appreciate.

Miniature Space Invaders game

Arduino And An OLED Make This Space Invaders Cabinet Tiny

For as simple as it appears now, Space Invaders was one machine from the Golden Age of video games that always seemed to have a long line waiting for a chance to lose a couple of quarters. And by way of celebrating the seminal game’s influence, [Nick Cranch] has executed what might just be the world’s smallest Space Invaders replica.

It appears that this started mainly as an exercise in what’s possible with what’s on hand, which included a couple of quite small OLED displays. For the build photos it looks like there’s an Arduino Nano running the show; [Nick] relates that the chosen hardware proved challenging, and that he had to hack the driver library to make it work. Once he got a working game, [Nick] didn’t rest on his laurels. Rather, he went the extra mile and built a miniature cabinet to house everything in.

The video quality below may be poor, but it’s more than enough to see how much work he put into detailing the cabinet. The graphics of the original US release of the game cabinet are accurately represented, right down to the art on the front glass. The cabinet itself is made from 1.5 mm plywood which he cut by hand. It even looks like he recreated the original scheme of cellophane overlays on the monochrome screen to add a little color to the game. Nice touch!

We really appreciate the attention to detail here, with our only quibble being no schematics or code being posted. Hopefully, we’ll see those later, but for now, this looks like a fun project and a nice trip down memory lane. But if you think it’s too small, no worries — we’ve got a much, much bigger version of the game too.

Continue reading “Arduino And An OLED Make This Space Invaders Cabinet Tiny”

It's a keyboard!

The Charachorder Keyboard Is Too Fast For Competition

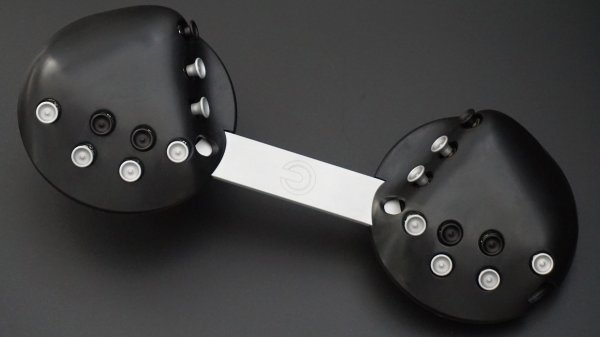
We interrupt the flow of Keebin’ with Kristina to bring you this special bulletin. When three different people alert you to a keyboard within 48 hours or so, it calls for more than just a paragraph in the roundup column. So here are several paragraphs, an animated GIF, and some extended commentary about the Charachorder, a new kind of input that came up through Kickstarter in 2021.

Driving this hype train are some short viral videos that show the founder hitting 500+ WPM on this crazy thing. FYI, that is fast enough to get you banned from typing competitions, including the monkeytype leaderboard. Those apes forbid chorded input altogether, and automatically throw out entries above 300 WPM. It acheives these insane speeds through clever mechanical design and, of course, firmware.

Continue reading “The Charachorder Keyboard Is Too Fast For Competition”

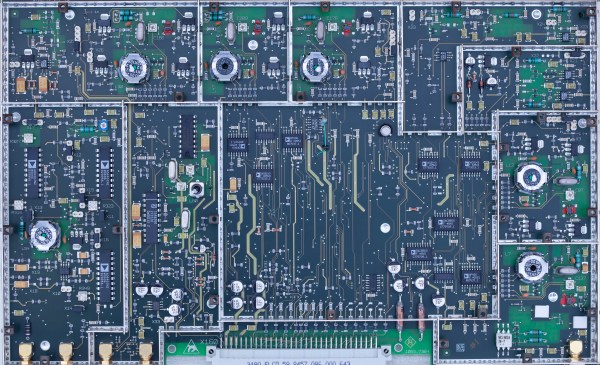
Rohde & Schwarz FSIQ 7 Logic Analyzer's RF module, back side. (Source: Roberto Barrios)

Rohde & Schwarz FSIQ Signal Analyzer IF-Filter Module Repair

Who can’t resist snapping up a piece of really expensive laboratory testing gear for next to nothing when browsing eBay or similar? Maybe it’s giving you mournful eyes when browsing through a yard sale. Often such gear is sold for cheap because it’s defective, but with a bit of attention, can be brought back to life. This is how [Roberto Barrios] ended up with a Rohde & Schwarz FSIQ 7 signal analyzer lounging around his place for a few months until he got it fixed.

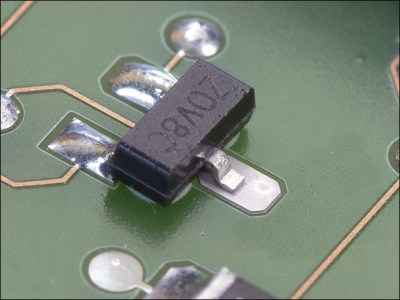
See anything wrong with this picture?

Part of the fix was replacing a busted RF converter module (A160 IF-Filter) with a used-but-working replacement, but this left the device with odd calibration failures. In the process of tracing down the cause, [Roberto] took many high-resolution images of both sides of the PCBs in order to reverse-engineer the circuit. To complicate matters, the calibration results indicated that the unit’s filters were fine on boot-up, but would deviate after a few minutes.

After extending the filter module to work outside the enclosure and experimental use of a hot air gun, ultimately the cause was tracked down to an unsoldered pad. Considering the extremely simple cause of the failure, it would seem that R&S QA had an off-day when that replacement module was produced. If there’s a lesson to be learned here it is probably that a simple visual inspection is sometimes all that is needed to fix a hardware issue.

What are your expensive gear repair stories? What did you learn that could save others hours of their time?